How to Display Office 365 Room Calendar View in SharePoint
Modified on:
Office 365 has room and equipment mailboxes that make it easy for users in an organization to reserve conference rooms, training rooms, meeting rooms, company transportation, and media equipment when needed through Outlook.
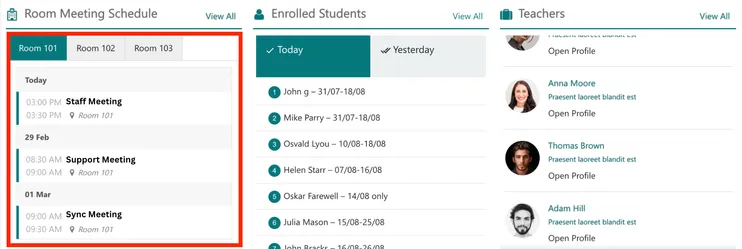
With ShortPoint Connect, you can showcase all reservations for rooms or equipment, providing real-time information about availability and reservations on your SharePoint page. This article will demonstrate how you can create a tabbed view of all your rooms with current reservations inside each tab.
Prerequisite
- You must have Tenancy Administrator permissions to create rooms and equipment emails.
- You have the latest version of ShortPoint installed on your SharePoint environment.
- You are a ShortPoint Designer with an active license.
Step-by-step Tutorial
The steps have been divided into four parts. Follow all four parts to learn how to display Office 365 Room Calendar view on your SharePoint page:
Note:
If you already have your Rooms & Equipment emails ready and have your calendars configured, you may proceed to part 3 of the tutorial.Part 1: Create Rooms and Equipment Emails
Follow the steps below to learn how to create rooms and equipment emails:
Step 1: Open the Rooms & Equipment page
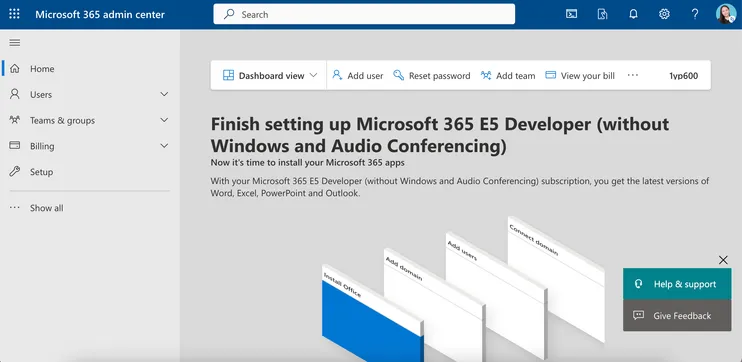
Go to the Microsoft 365 admin center:
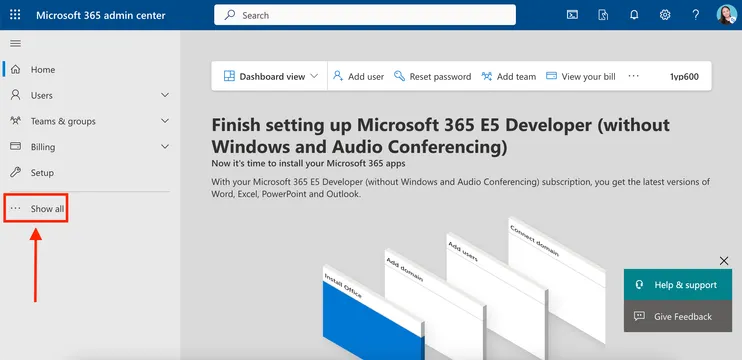
Select Show all:
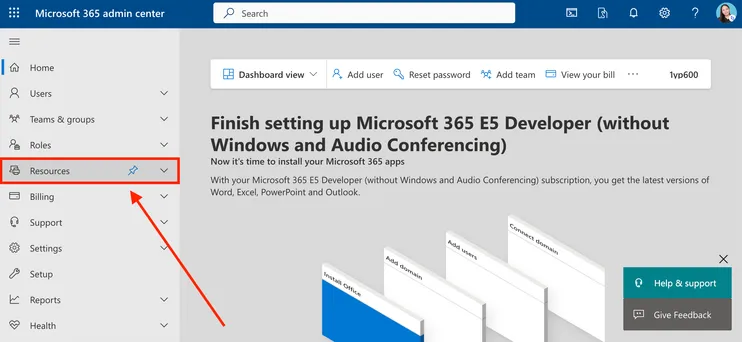
Click Resources:
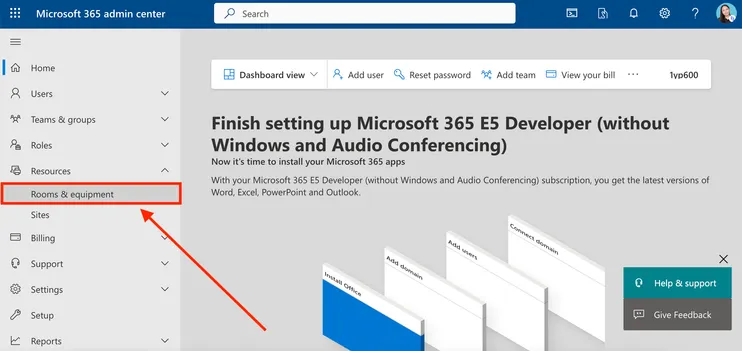
Select Rooms & equipment:
Step 2: Add Room / Equipment
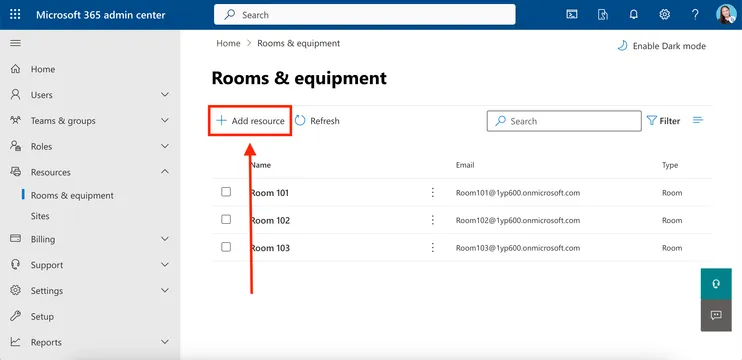
In the Rooms & Equipment page, you will see all the rooms/equipment you already have. To add a new one, click Add resource:
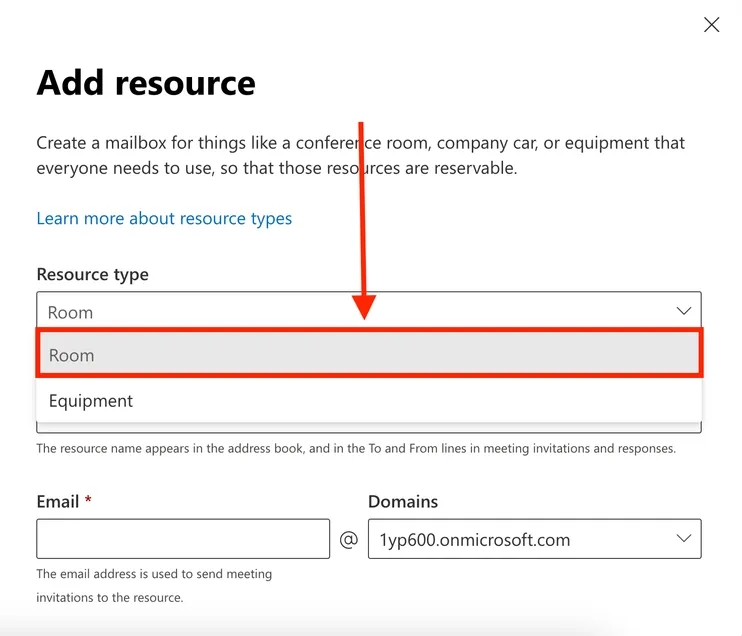
Select the Resource type you prefer. For this guide, we will add a Room:
Fill in the necessary details:
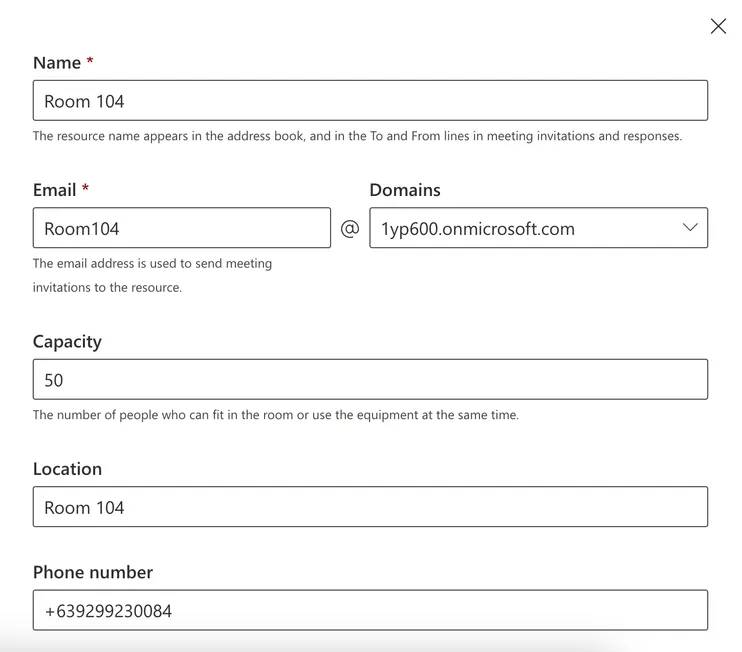
Click Save:
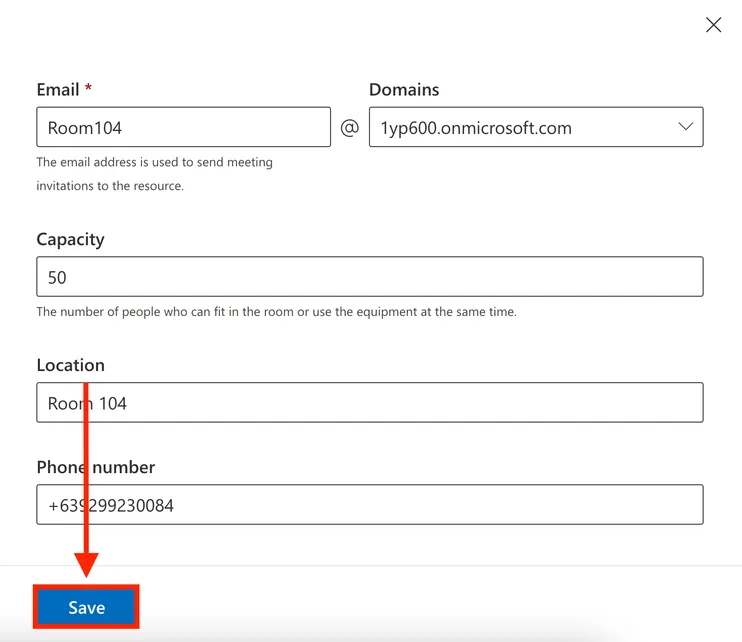
If you have any more rooms/ equipment to add, repeat the steps above.
Part 2: Use Room & Equipment email to create new events
Follow the steps below to learn how to use rooms & equipment email:
Step 1: Add New event
Go to your Outlook calendar:
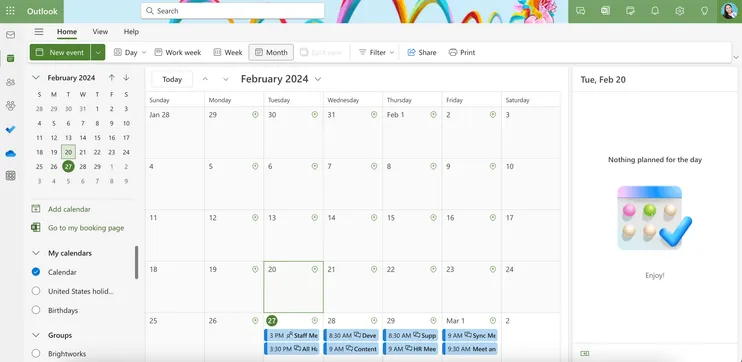
Select New event:
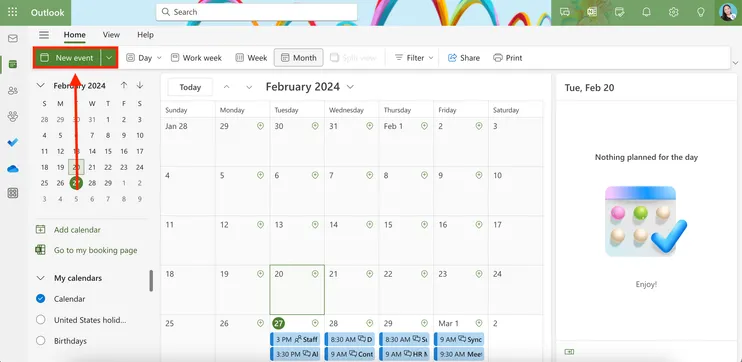
Step 2: Fill in the necessary details
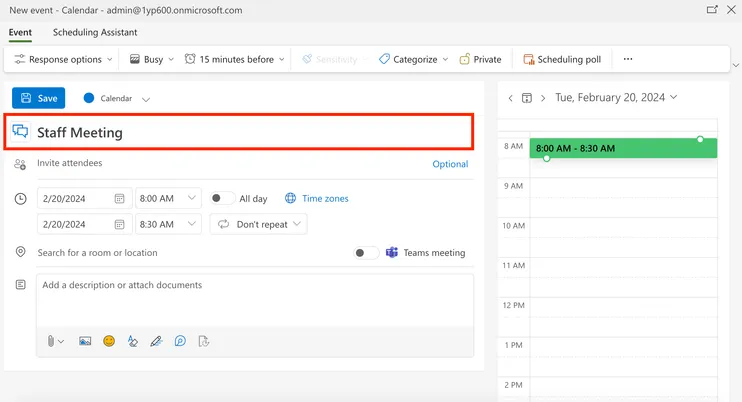
Add an Event Title:
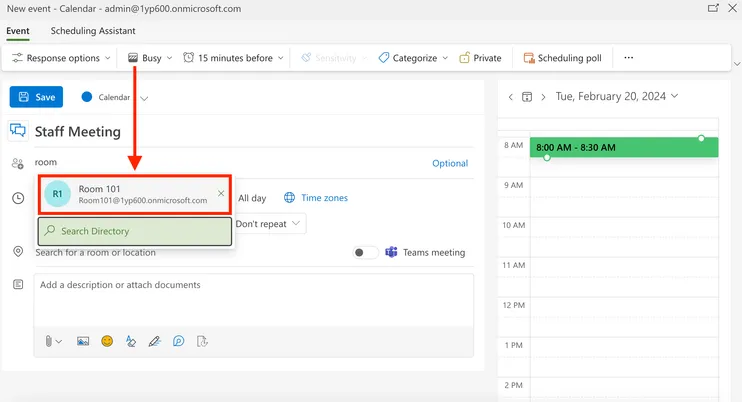
Write the email of the room where you want to schedule the event in the Invite attendees field:
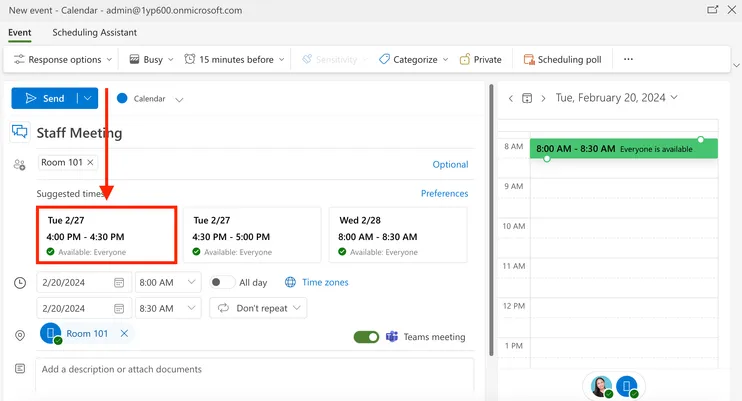
You will see the room's availability. Select the date and time slot you prefer:
Step 3: Finalize the event
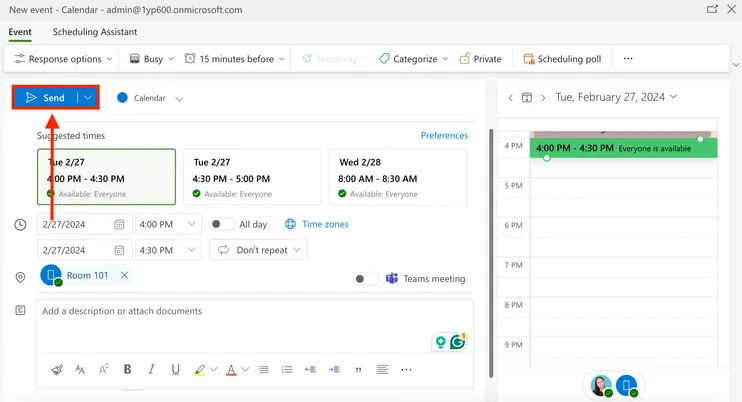
Click Send to finalize the new event:
If you have any more events to schedule for other rooms, repeat the steps above.
Part 3: Insert and Customize the Tabs Design Element
You need the Tabs Design Element to achieve the tabbed view of all rooms. Follow along to learn how to insert and customize it:
Step 1: Edit the ShortPoint web part
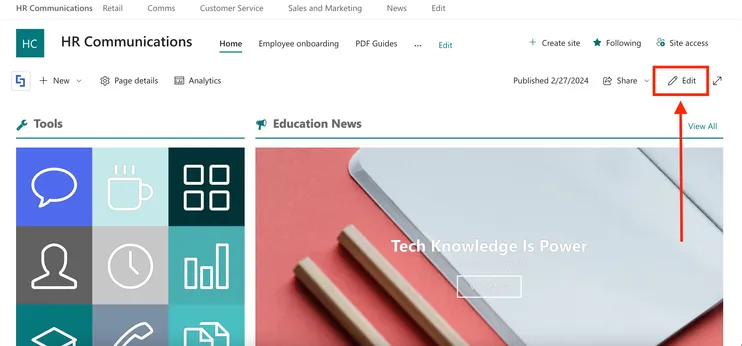
Go to the SharePoint page you want to use and click Edit:
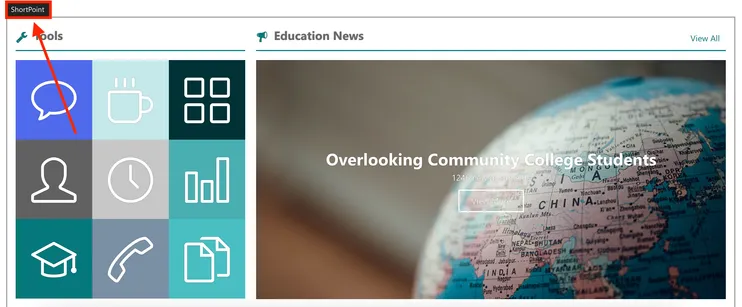
Click the ShortPoint tag:
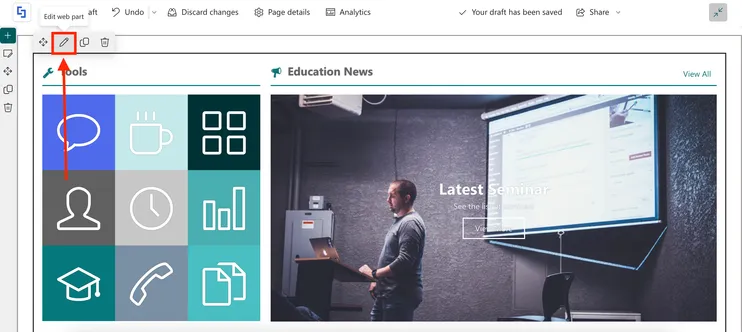
Select the pencil icon:
Step 2: Insert the Tabs Design Element
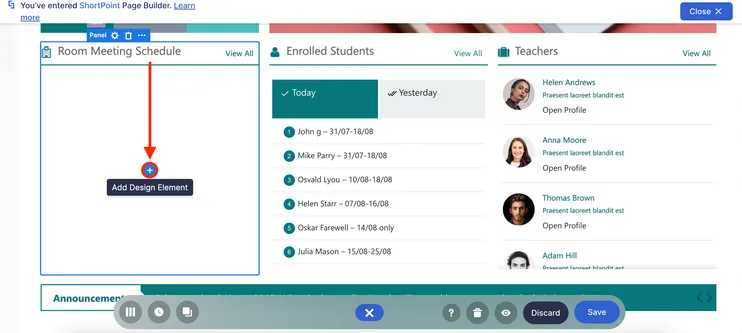
Click the plus icon:
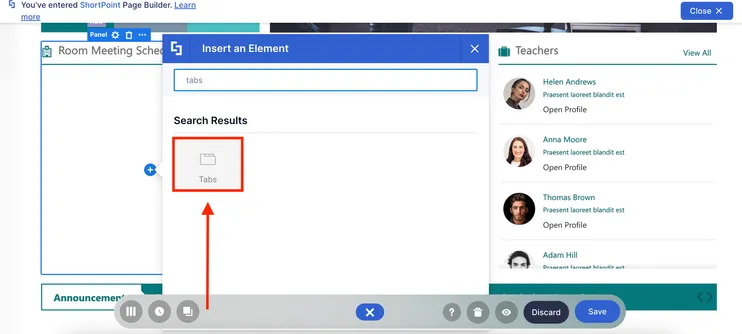
Use the search bar to look for the Tabs Design Element and click it:
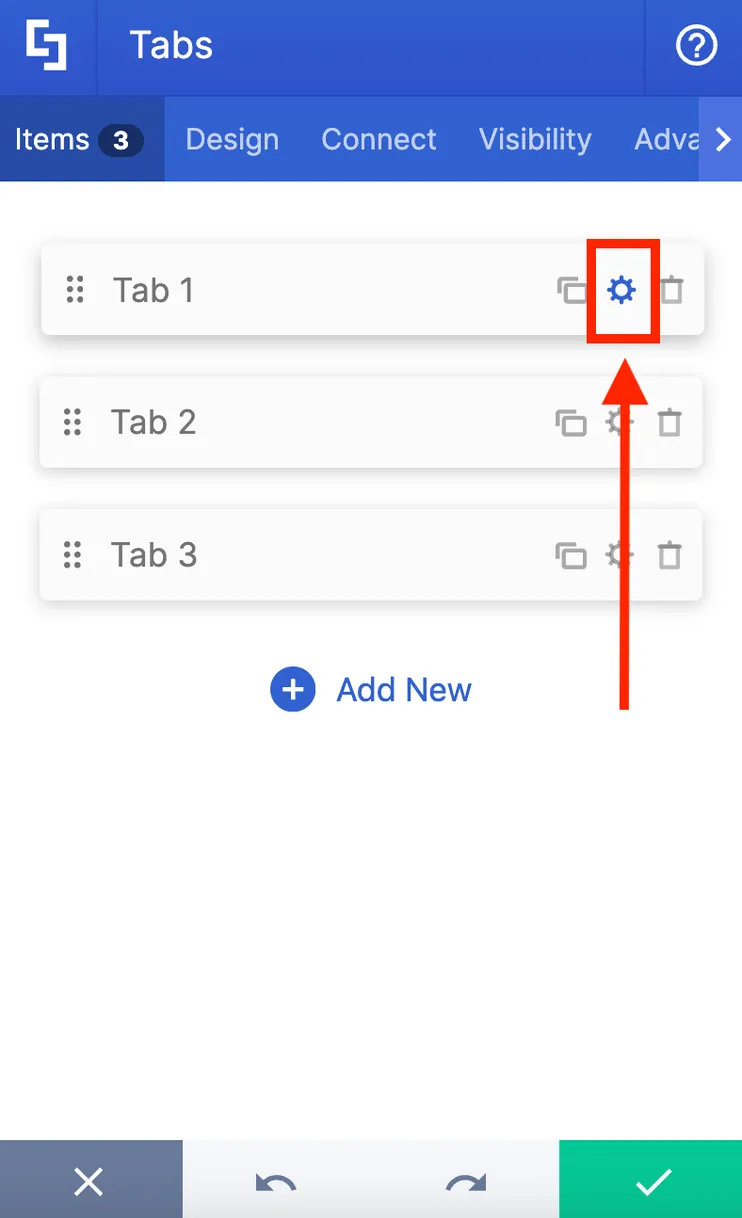
Step 3: Add all your rooms to the Tabs Design Element
Click the cogwheel icon to edit the content of a tab:
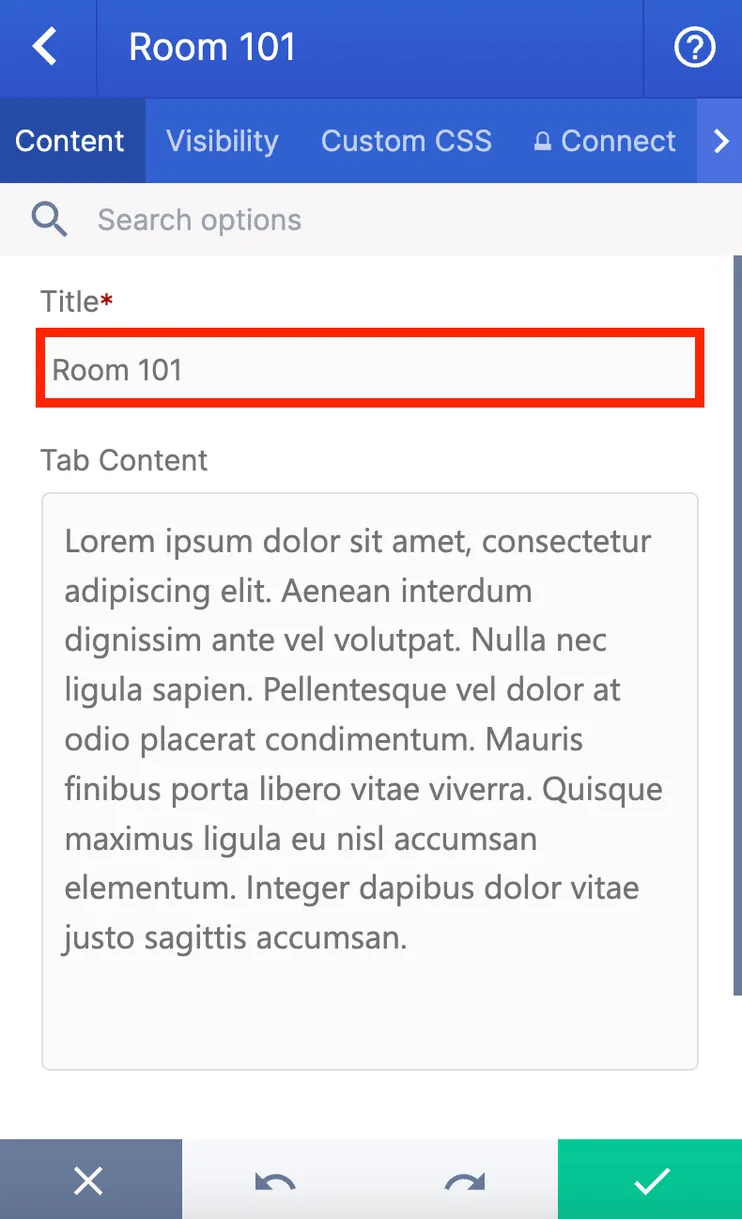
Write the name of the room as the Title:
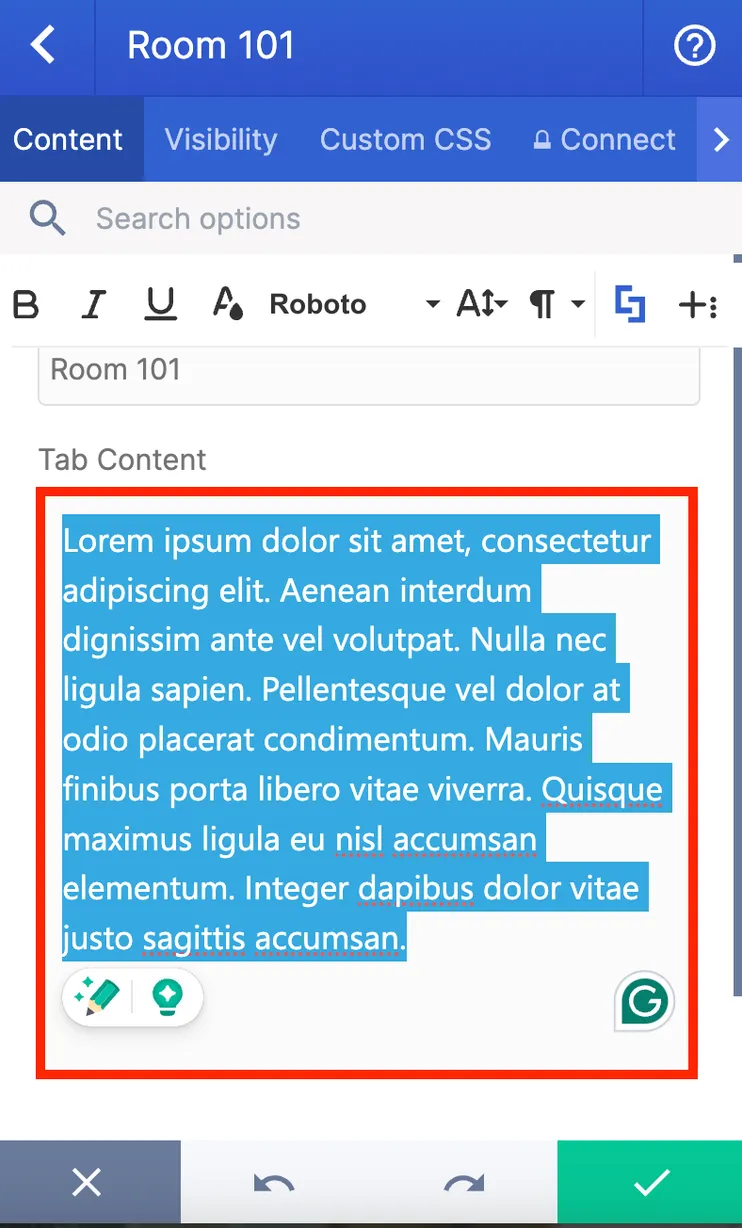
Delete default tab content:
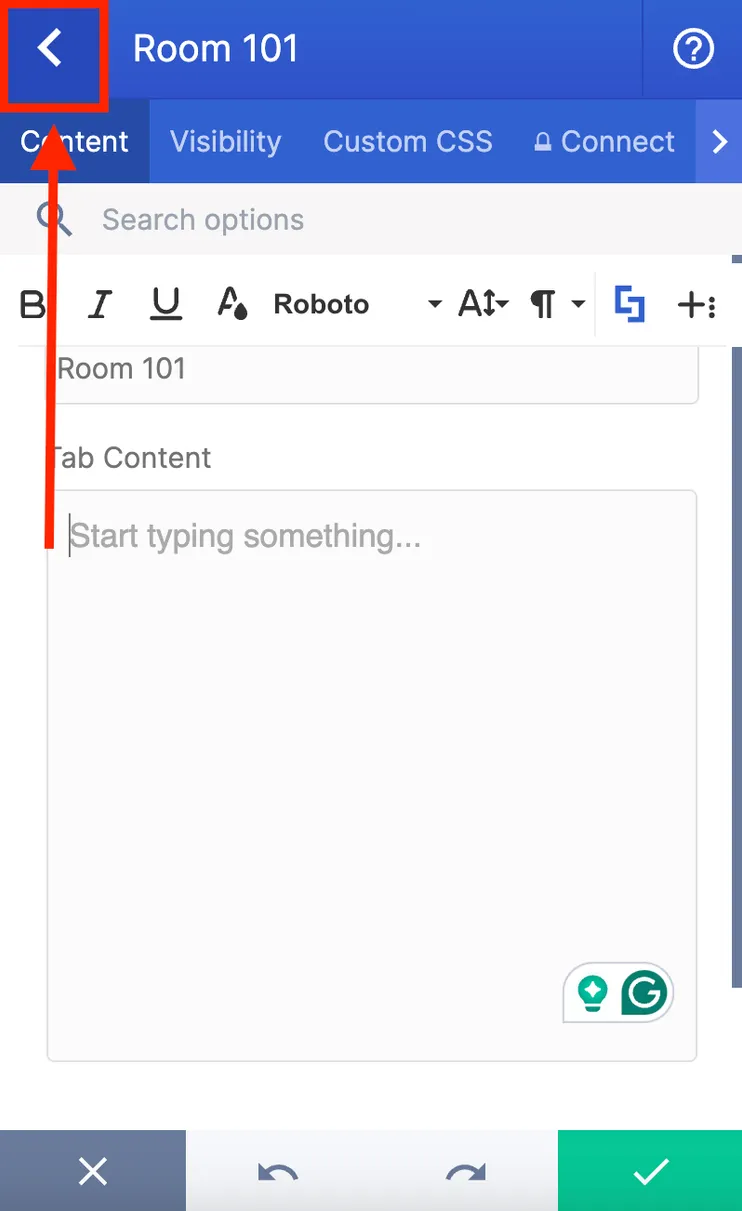
Click the back icon:
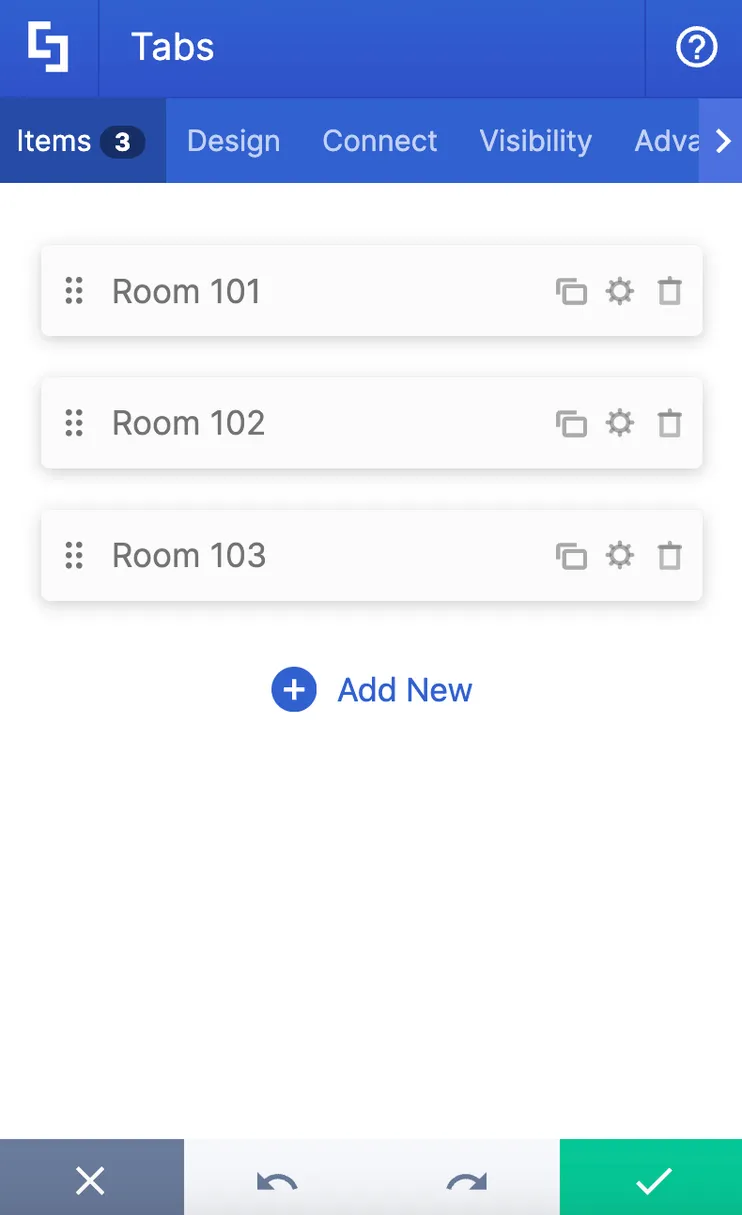
Repeat the steps above until you add all your rooms:
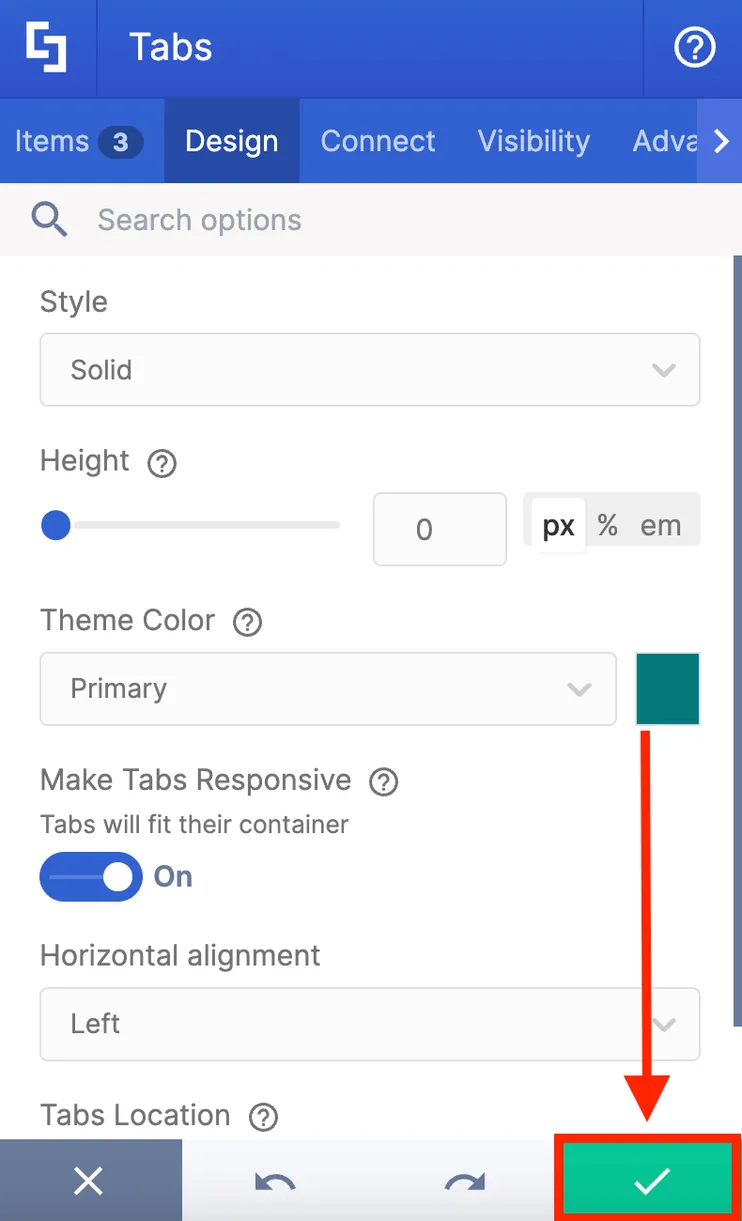
Step 4: Customize the look of the Tabs
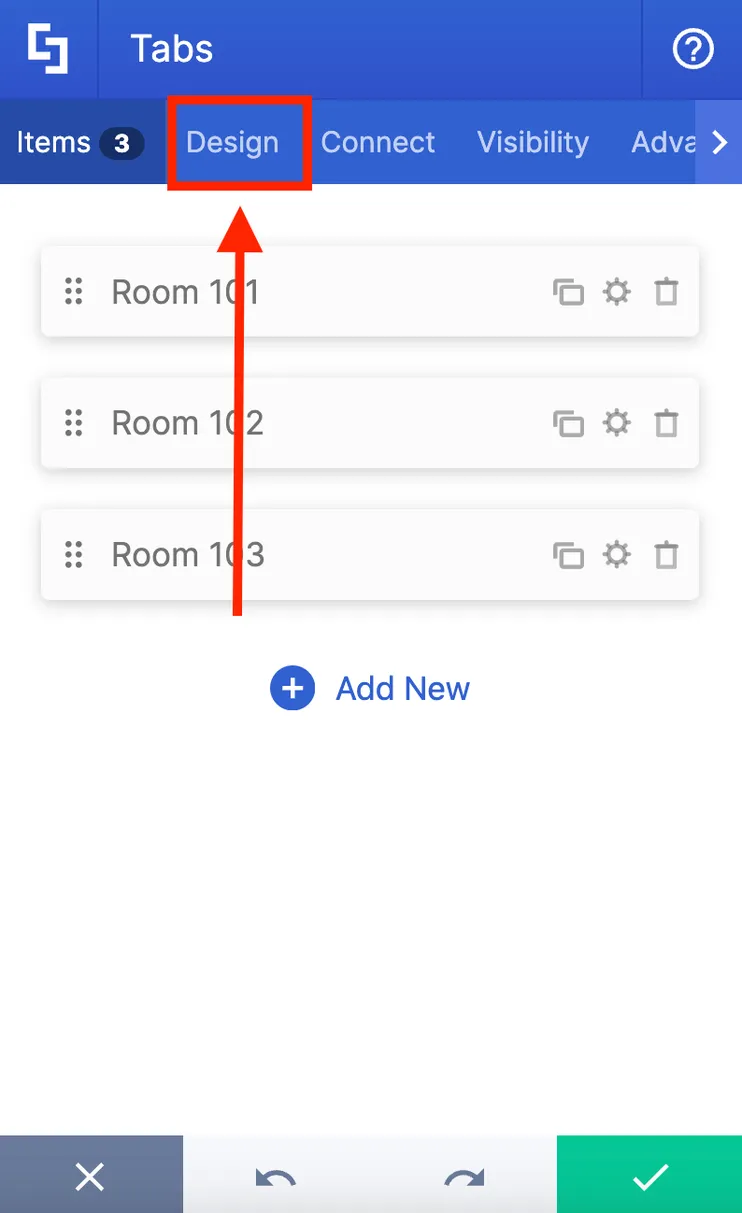
Navigate to the Design tab:
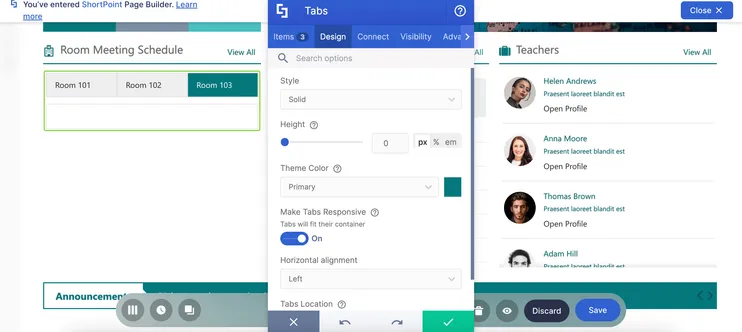
Customize the design of the Tab according to your preference:
Once satisfied, click the green check mark:
Part 4: Connect the tabs to the Room & Equipment email
Follow the steps to learn how to use the Shared Events (Outlook) connection type to connect to the Room & Equipment email:
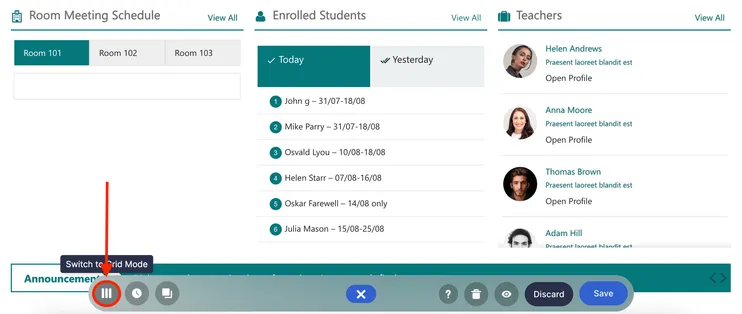
Step 1: Switch to Grid Mode
Note:
ShortPoint Connect is currently only available in Grid mode.Click the Switch to Grid Mode icon:
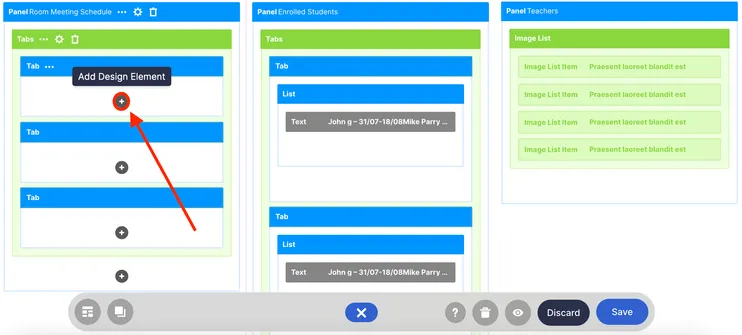
Step 2: Insert the Events Design Element
Scroll down until you see the Tabs Design Element you added earlier and click the plus icon inside the tab:
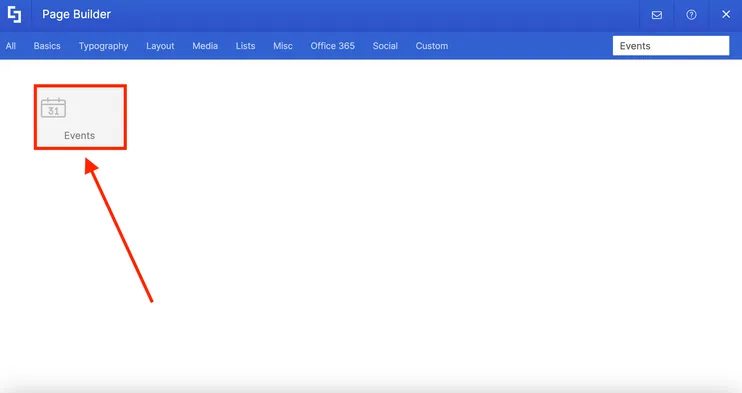
Use the search bar to look for Events and click it:
Step 3: Use the Shared Events (Outlook) connection type
Navigate to the Connect tab:
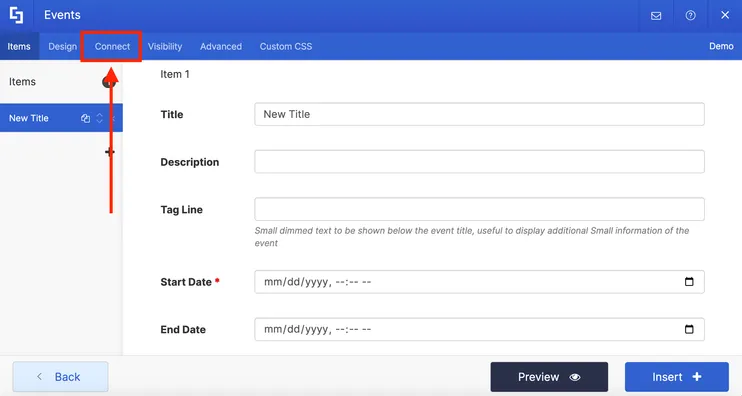
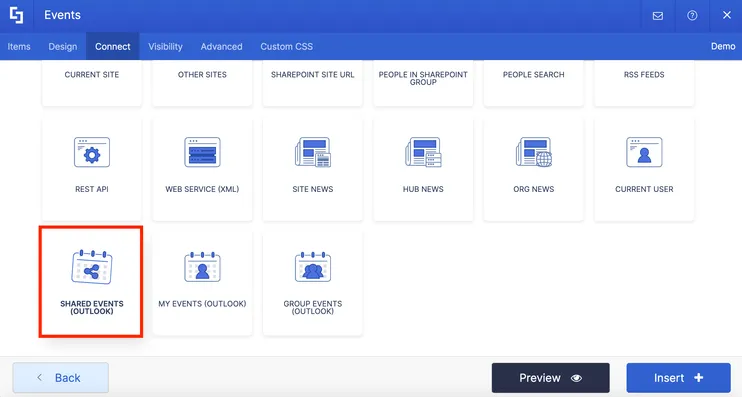
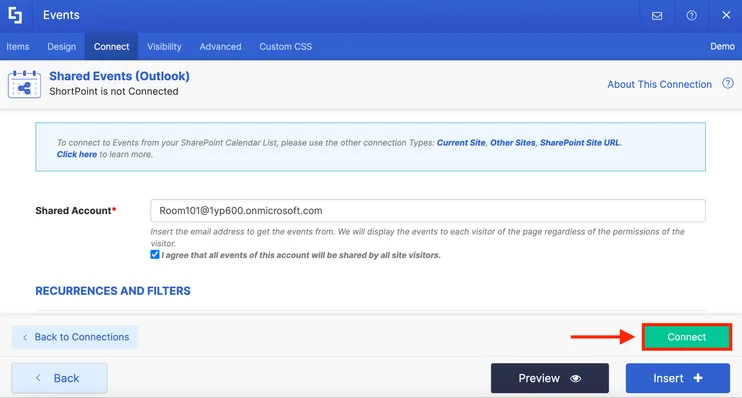
Select Shared Events (Outlook):
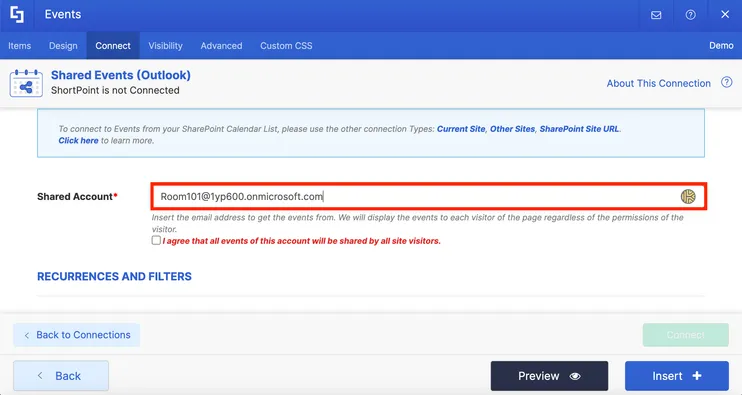
Write the Room & Equipment email of the room you want to connect to in the field provided:
Tick the check box to consent to the condition that all events of the account provided will be shared by all site visitors:
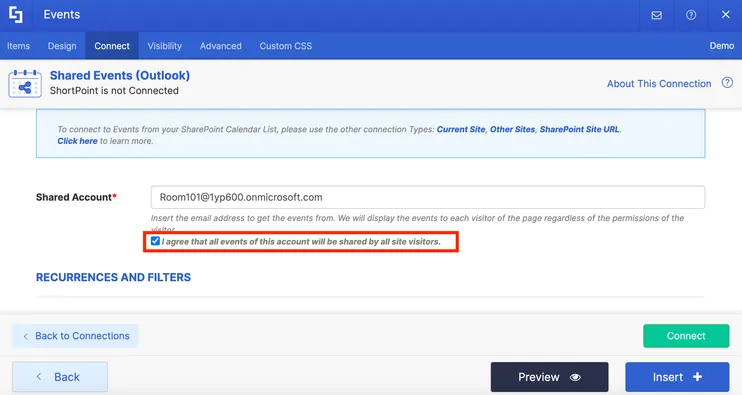
Click Connect:
Note:
For more information about the Shared Events (Outlook) connection type, check out our Connection Type: Shared Events (Outlook).Step 4: Map Items to Display
Navigate to the Items tab:
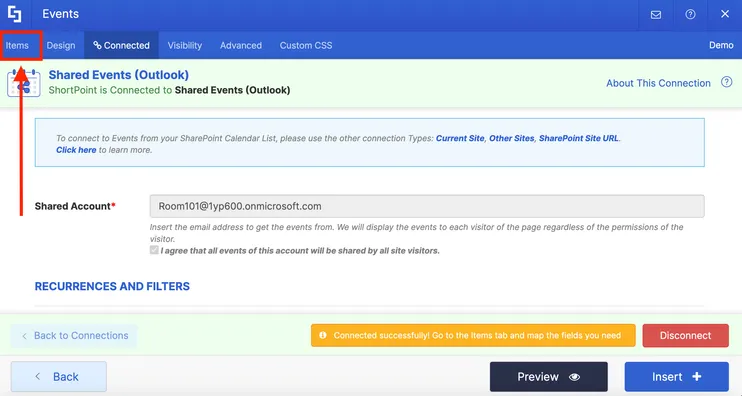
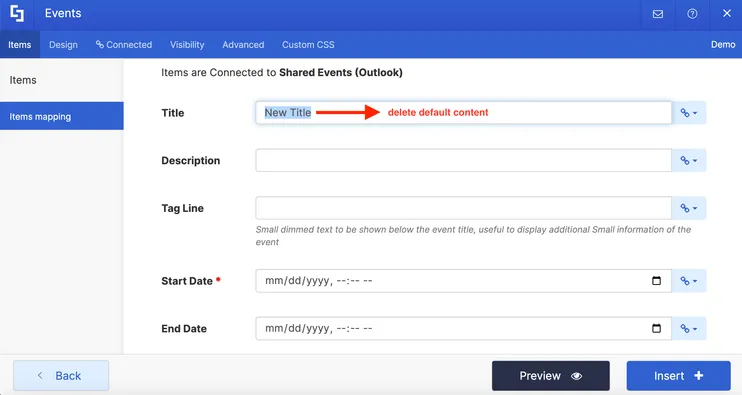
Delete all default content:
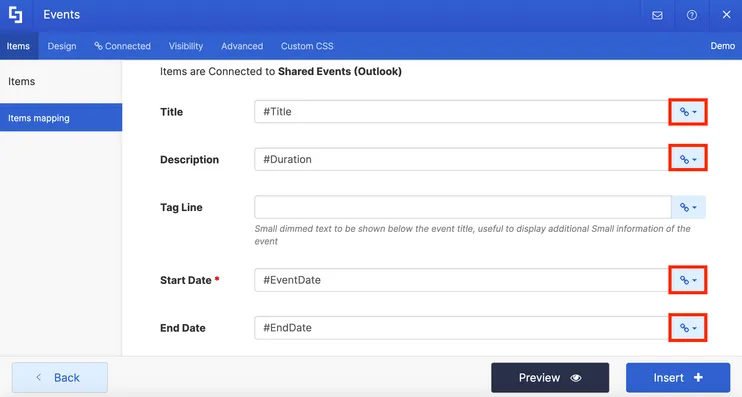
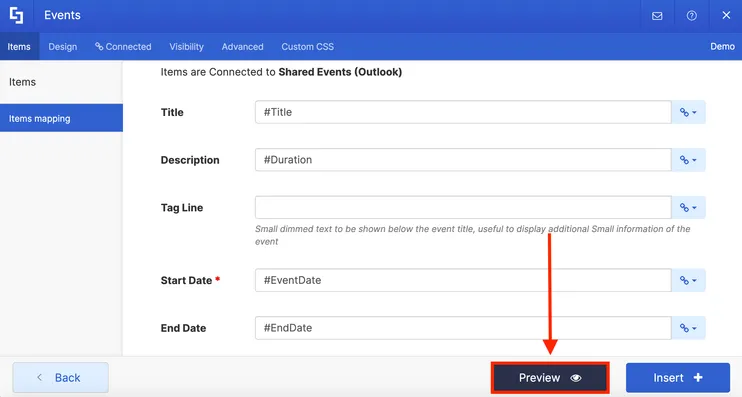
Use the link icon under each field to select the properties you want to display. For this guide, we will display the Title, Duration, Event Date, and End Date:
Note:
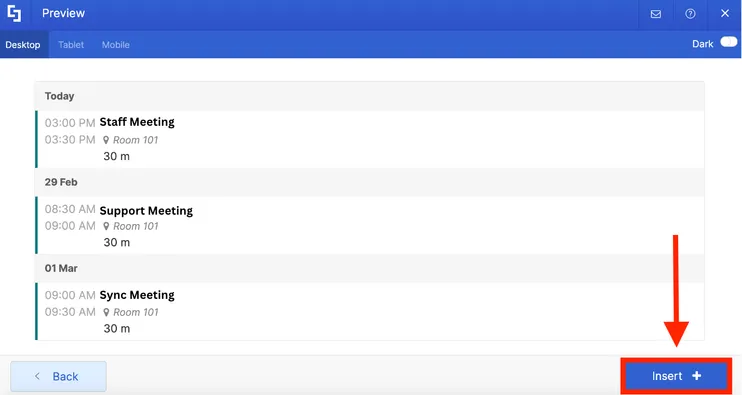
For more information about items mapping, check out our ShortPoint Connect: Basic Tutorial.Click Preview to see how the Events will look on your page:
Once satisfied, click Insert:
Step 5: Repeat steps 2 to 4 for the other tabs
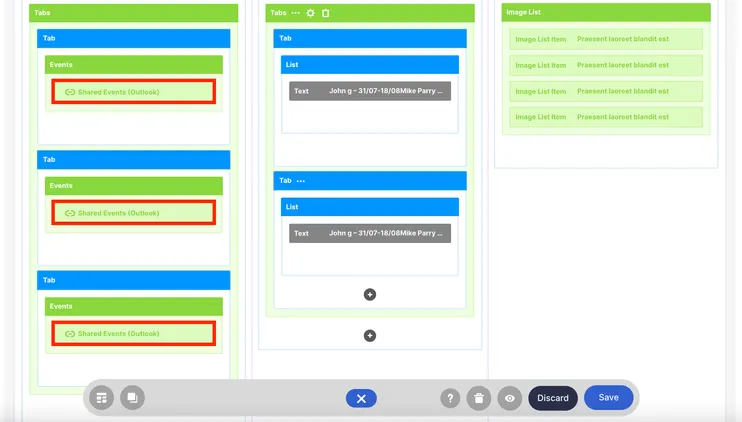
Repeat steps 2 to 4 for the other tabs. After doing so, you will see Shared Events (Outlook) inside all your tabs:
Step 6: Save
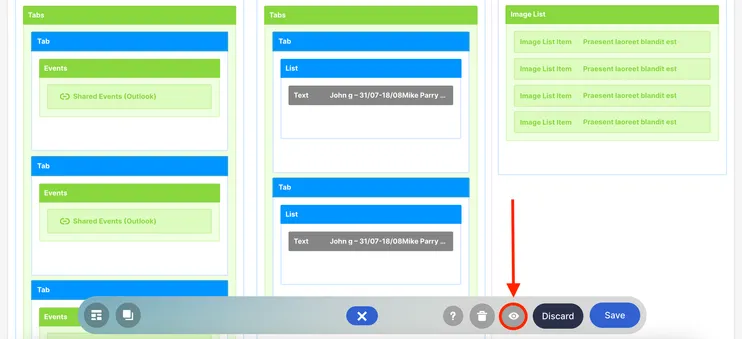
Click the eye icon to see your page in real-time:
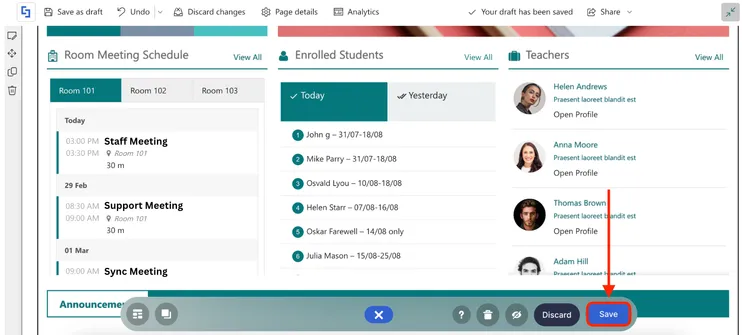
Once satisfied, click Save:
Congratulations! You can now go ahead and create a go-to page for all your room and equipment resources.