

ShortPoint Connect Basics
Connecting to a SharePoint Library
In this lesson, you will learn how to connect to a SharePoint library using a File List Design Element and identify and map the file information you want displayed on your page.

Looking at the SharePoint library
Most teams work on a set of documents and files stored within a SharePoint library. It is often the source of information and data that teams collaborate on and share to produce results. For this project, we’re using a generic document library containing several files that a team maintains.
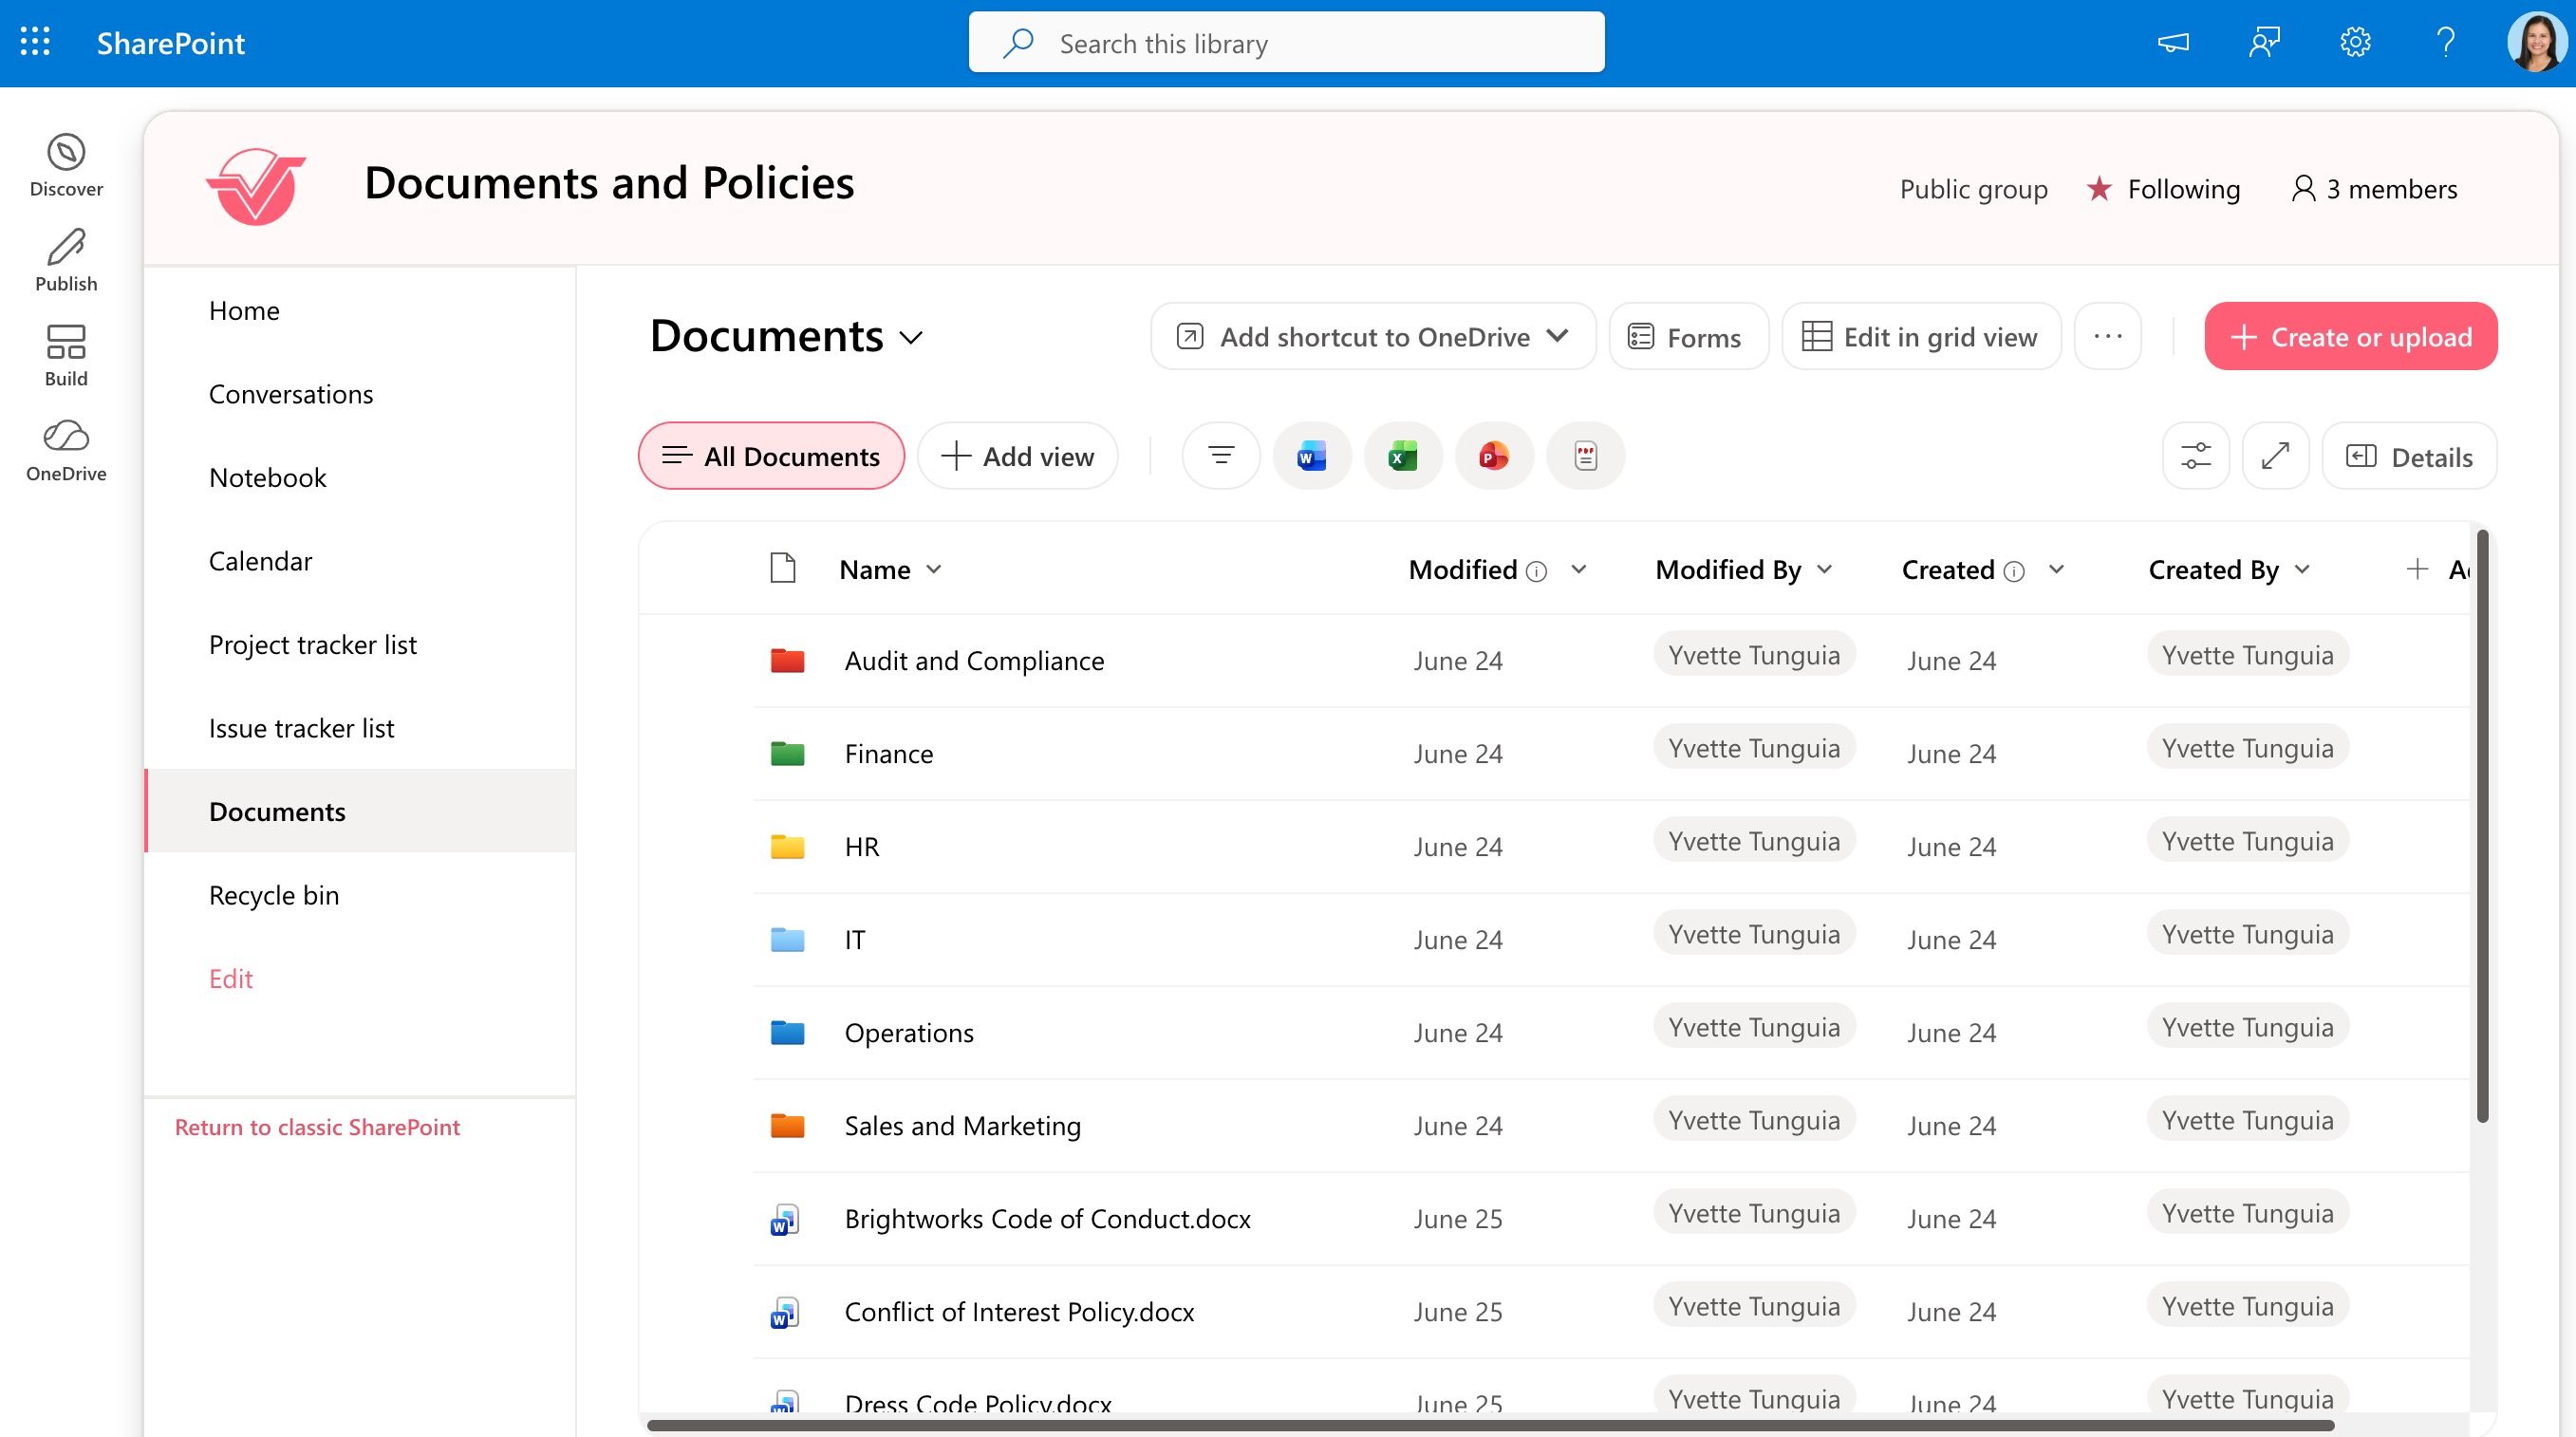
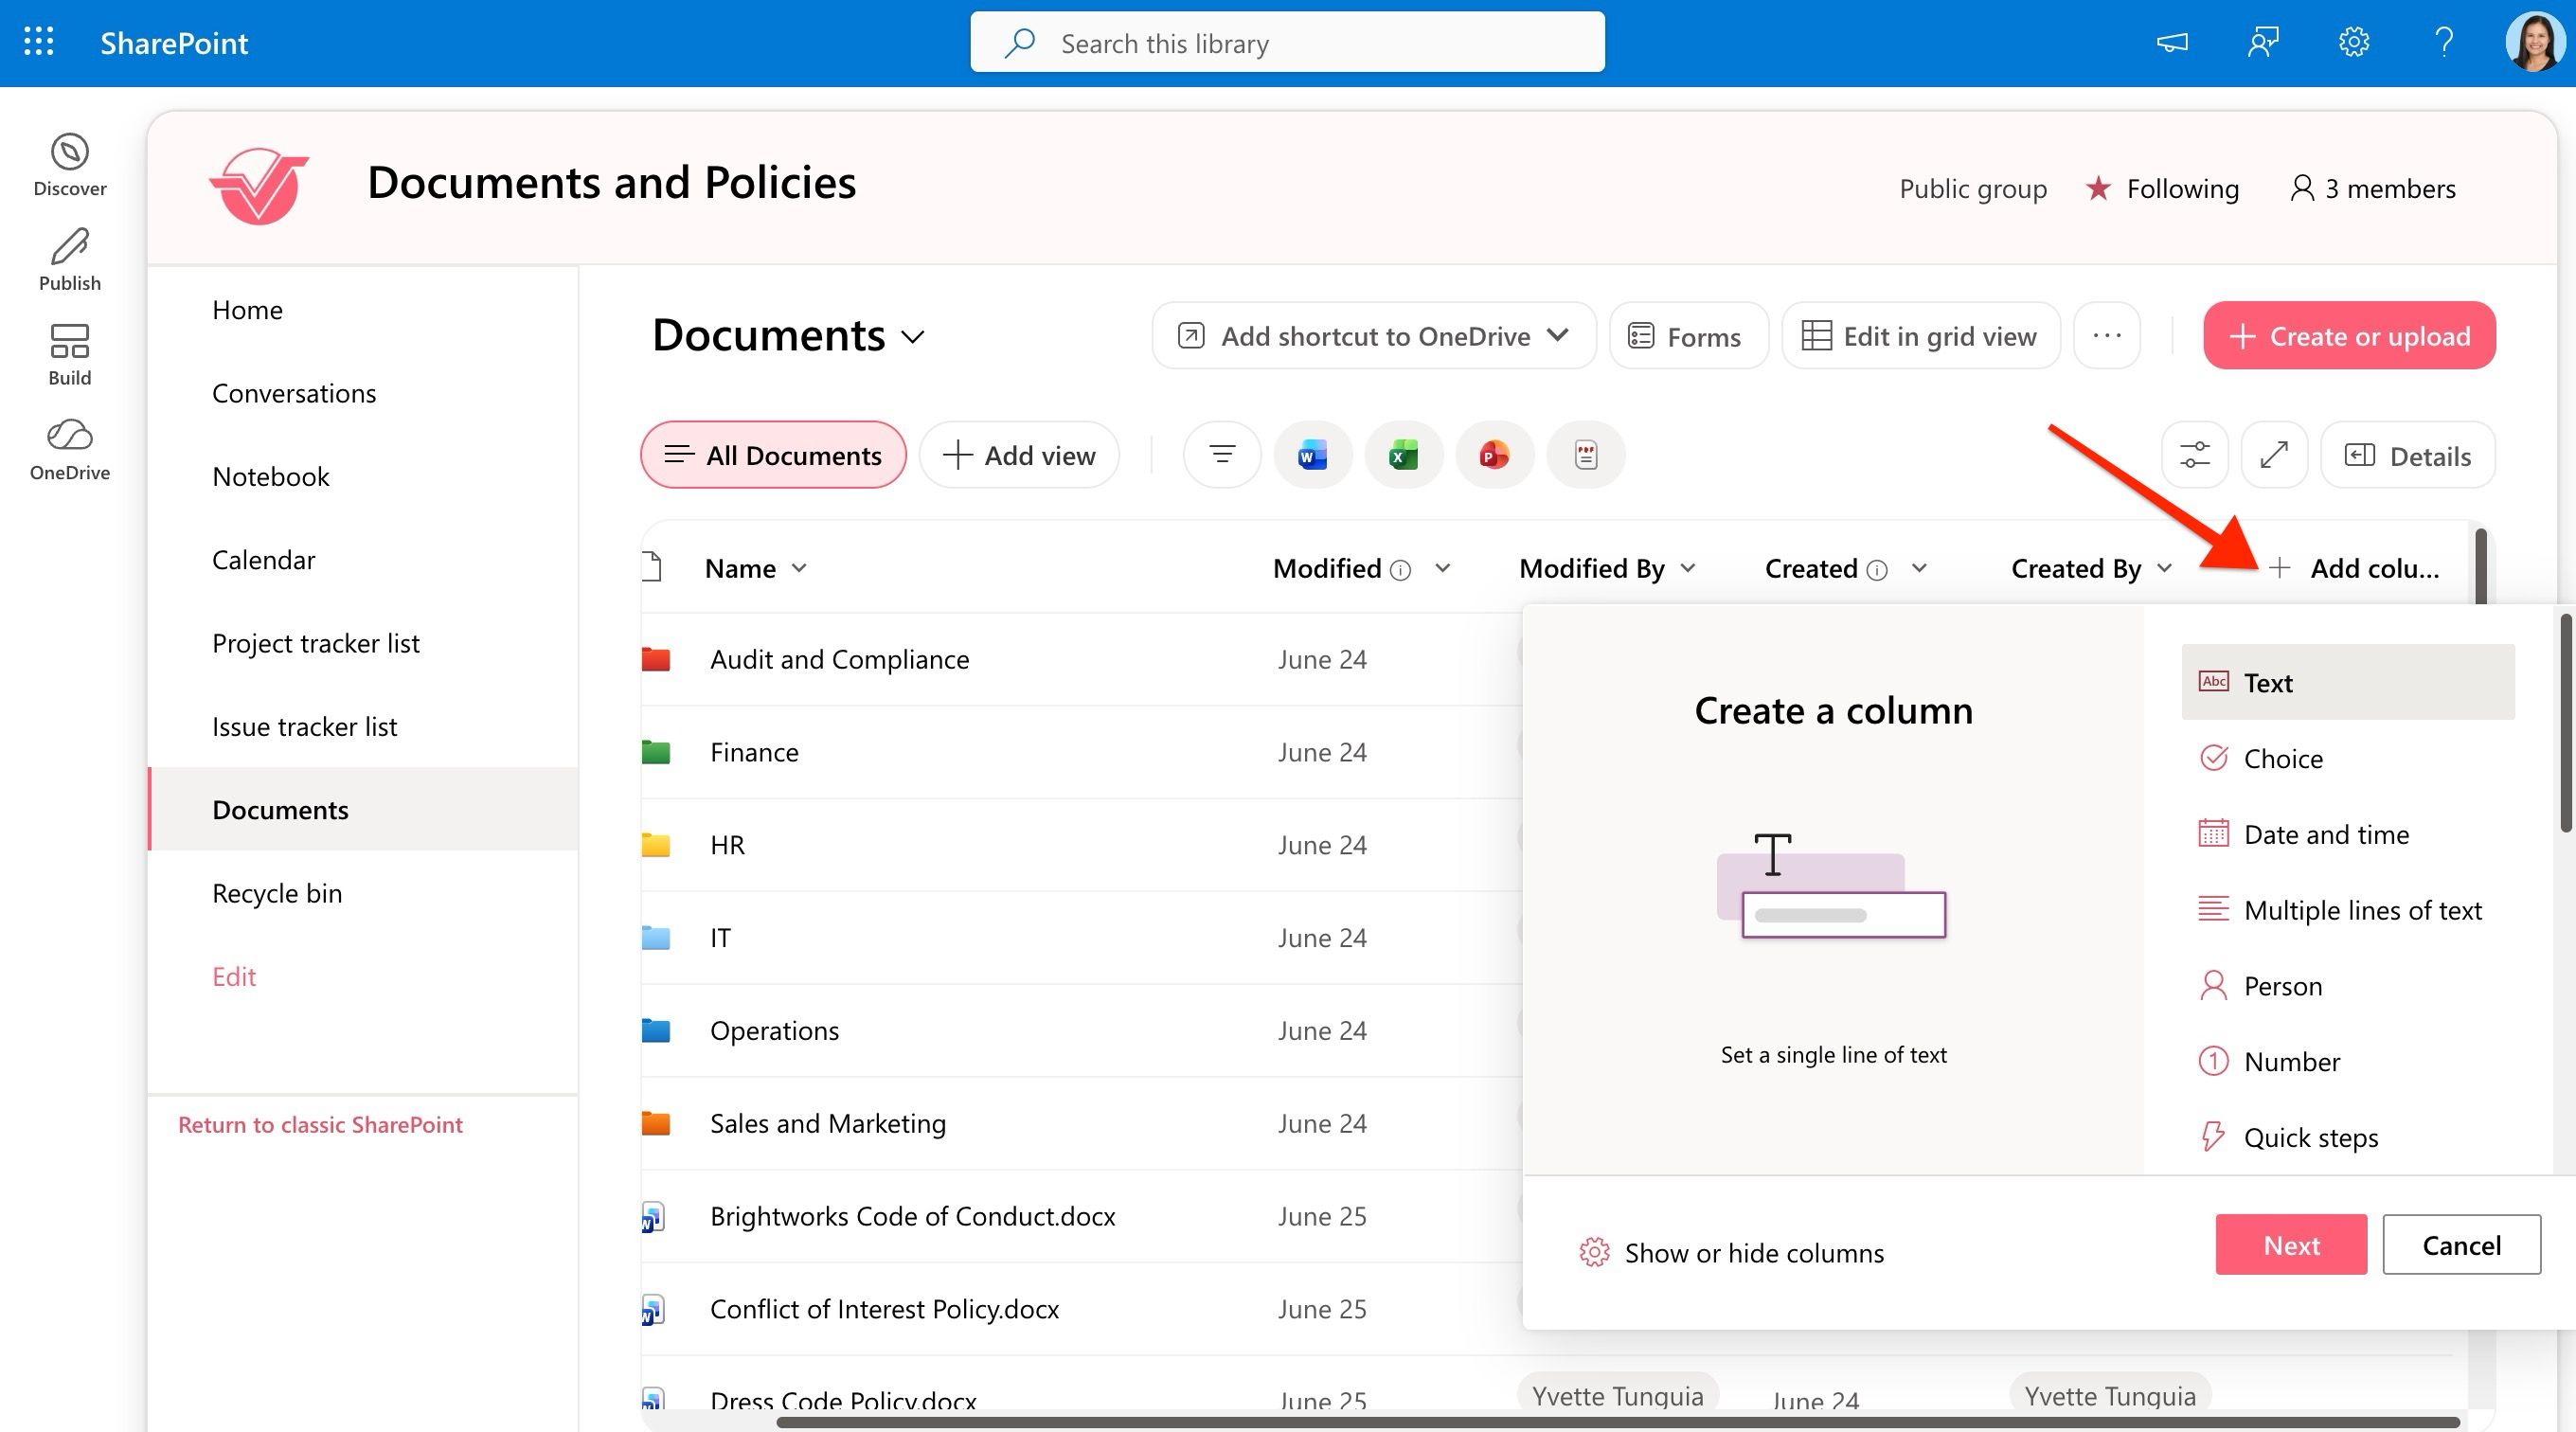
The SharePoint library has default column labels. If you need to display more information about the files, you have the option to show or add more columns. This particular library is located on a separate site from the page we’ll be building on.
Inserting the Design Element
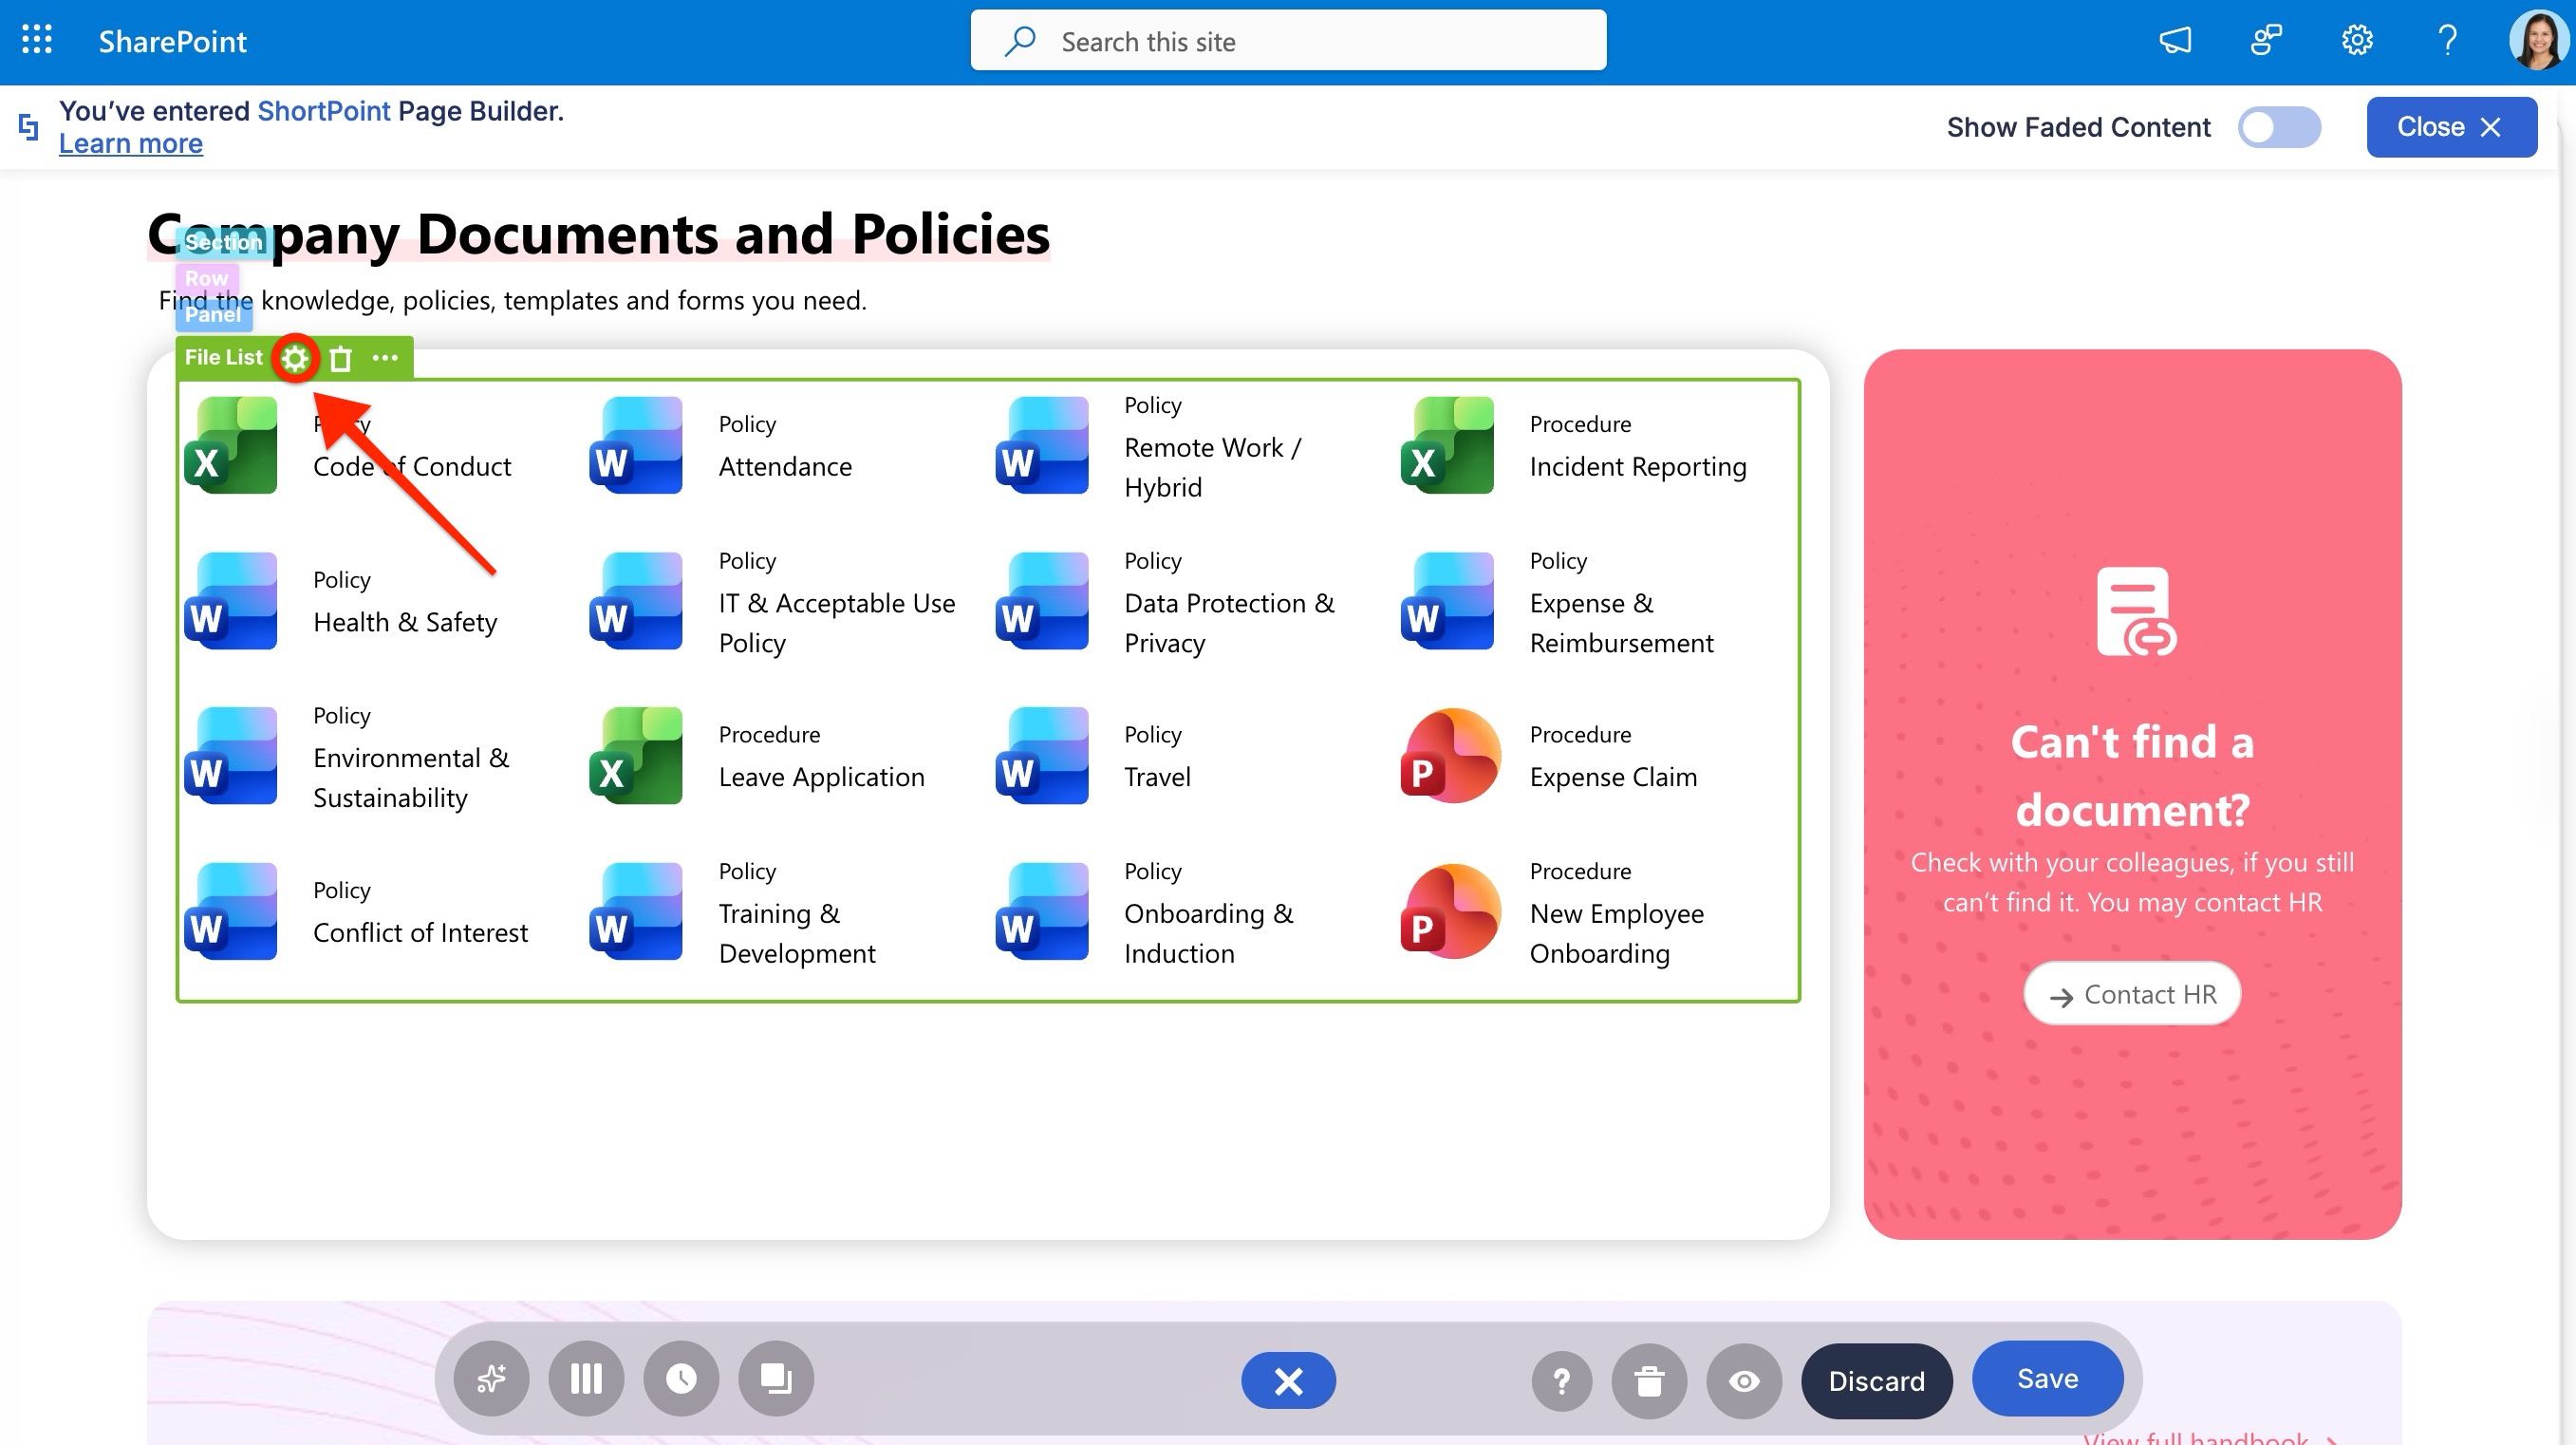
This is the File List Design Element we’ll use. It currently has placeholder content, and we want it to display our team’s document library dynamically. Start by editing the page and opening the File List’s settings window.
Choosing a connection type
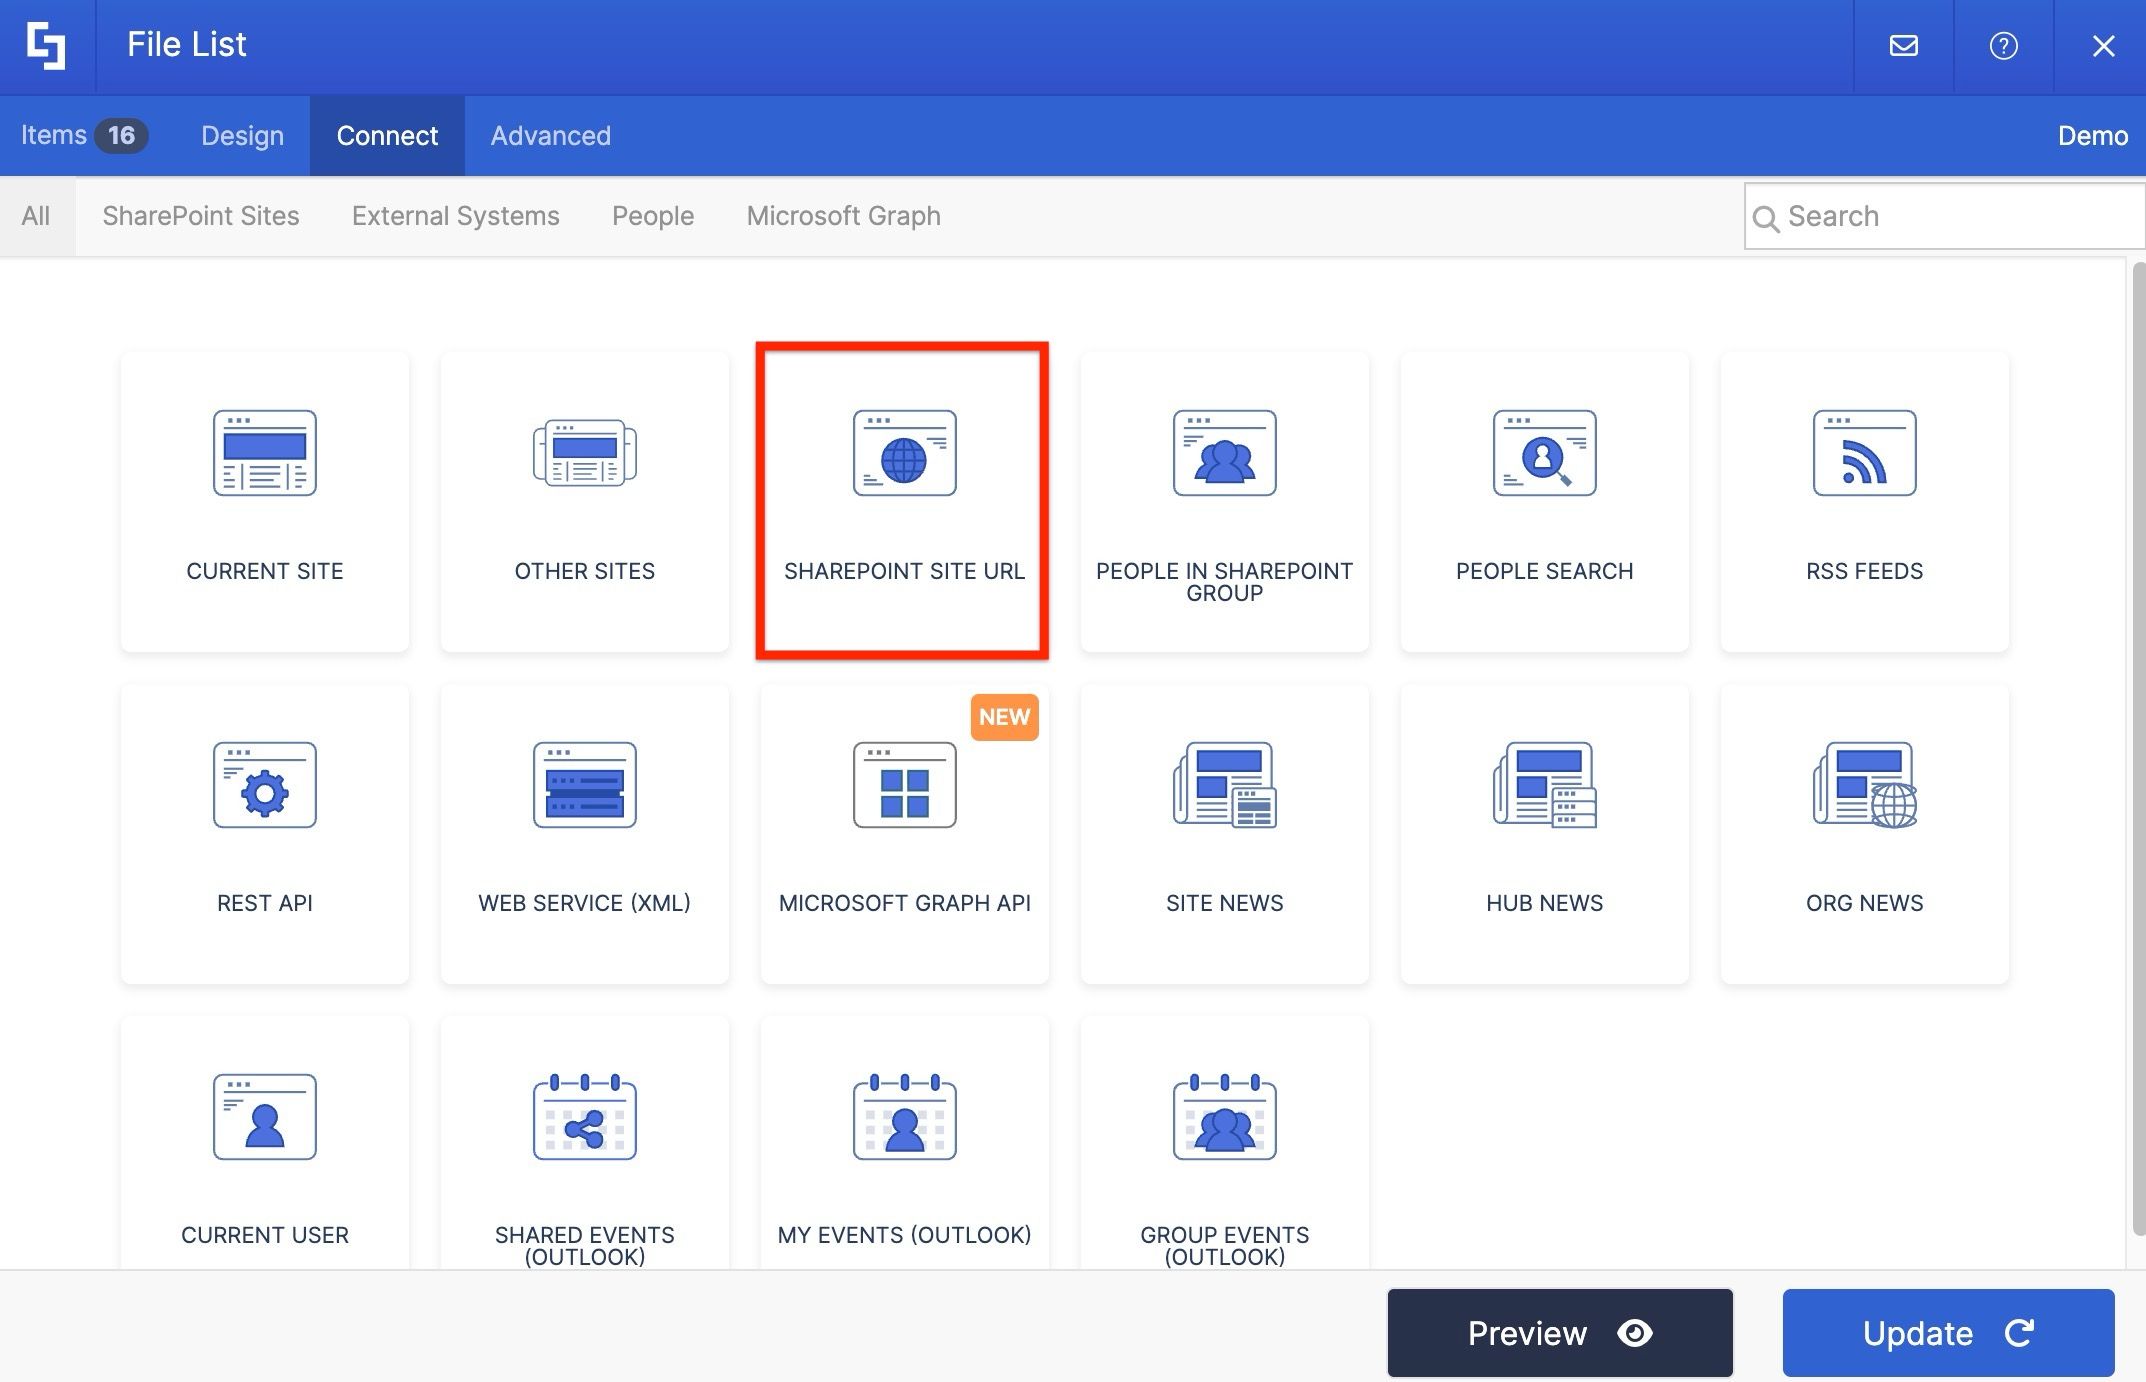
To access the Connect options, go to the Connect tab. The Current Site and Other Sites connection types are convenient because they are able to list all sites you have access to. However, if the site you need to connect to isn’t retrieved, you can use the SharePoint Site URL connection instead.
Setting up the connection
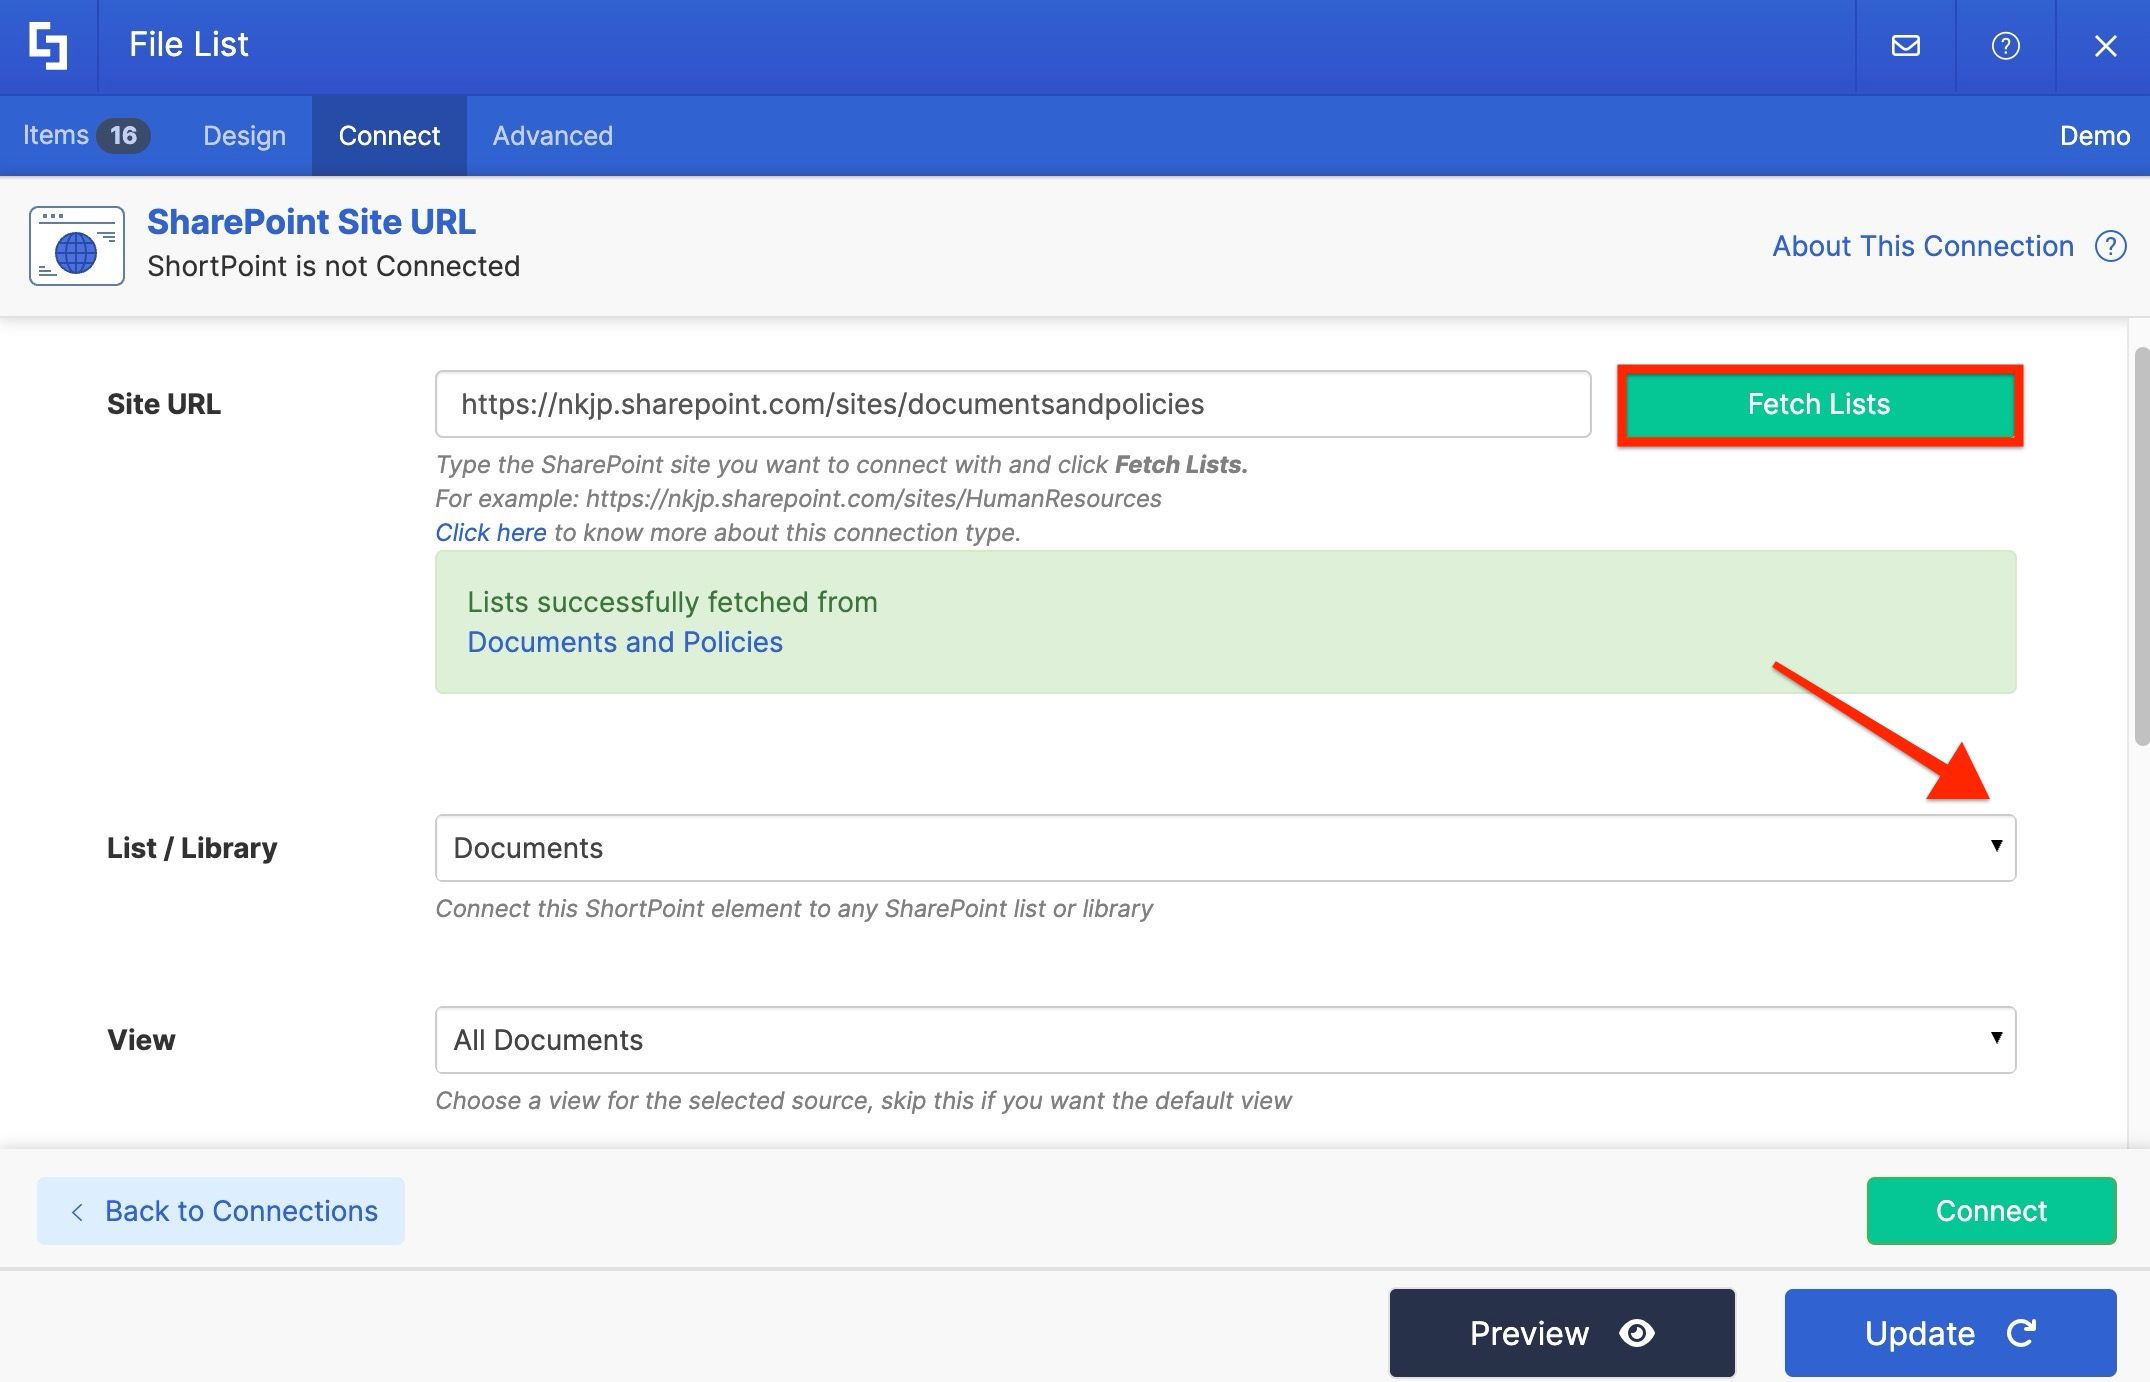
For the SharePoint Site URL connection, add the target site’s URL and hit Fetch Lists. Once all the lists or libraries in that site are successfully retrieved, select from the List/Library dropdown. Choose the specific view if you want to use one, set a limit on the number of items you want to show, and hit Connect.
Mapping file information
Now that the connection is successful, we can map the file or folder information we want to show on our page. In the Items tab, remove all the default content, then click the link icon to see the properties you can choose from. These correspond to the columns of information in the document library.
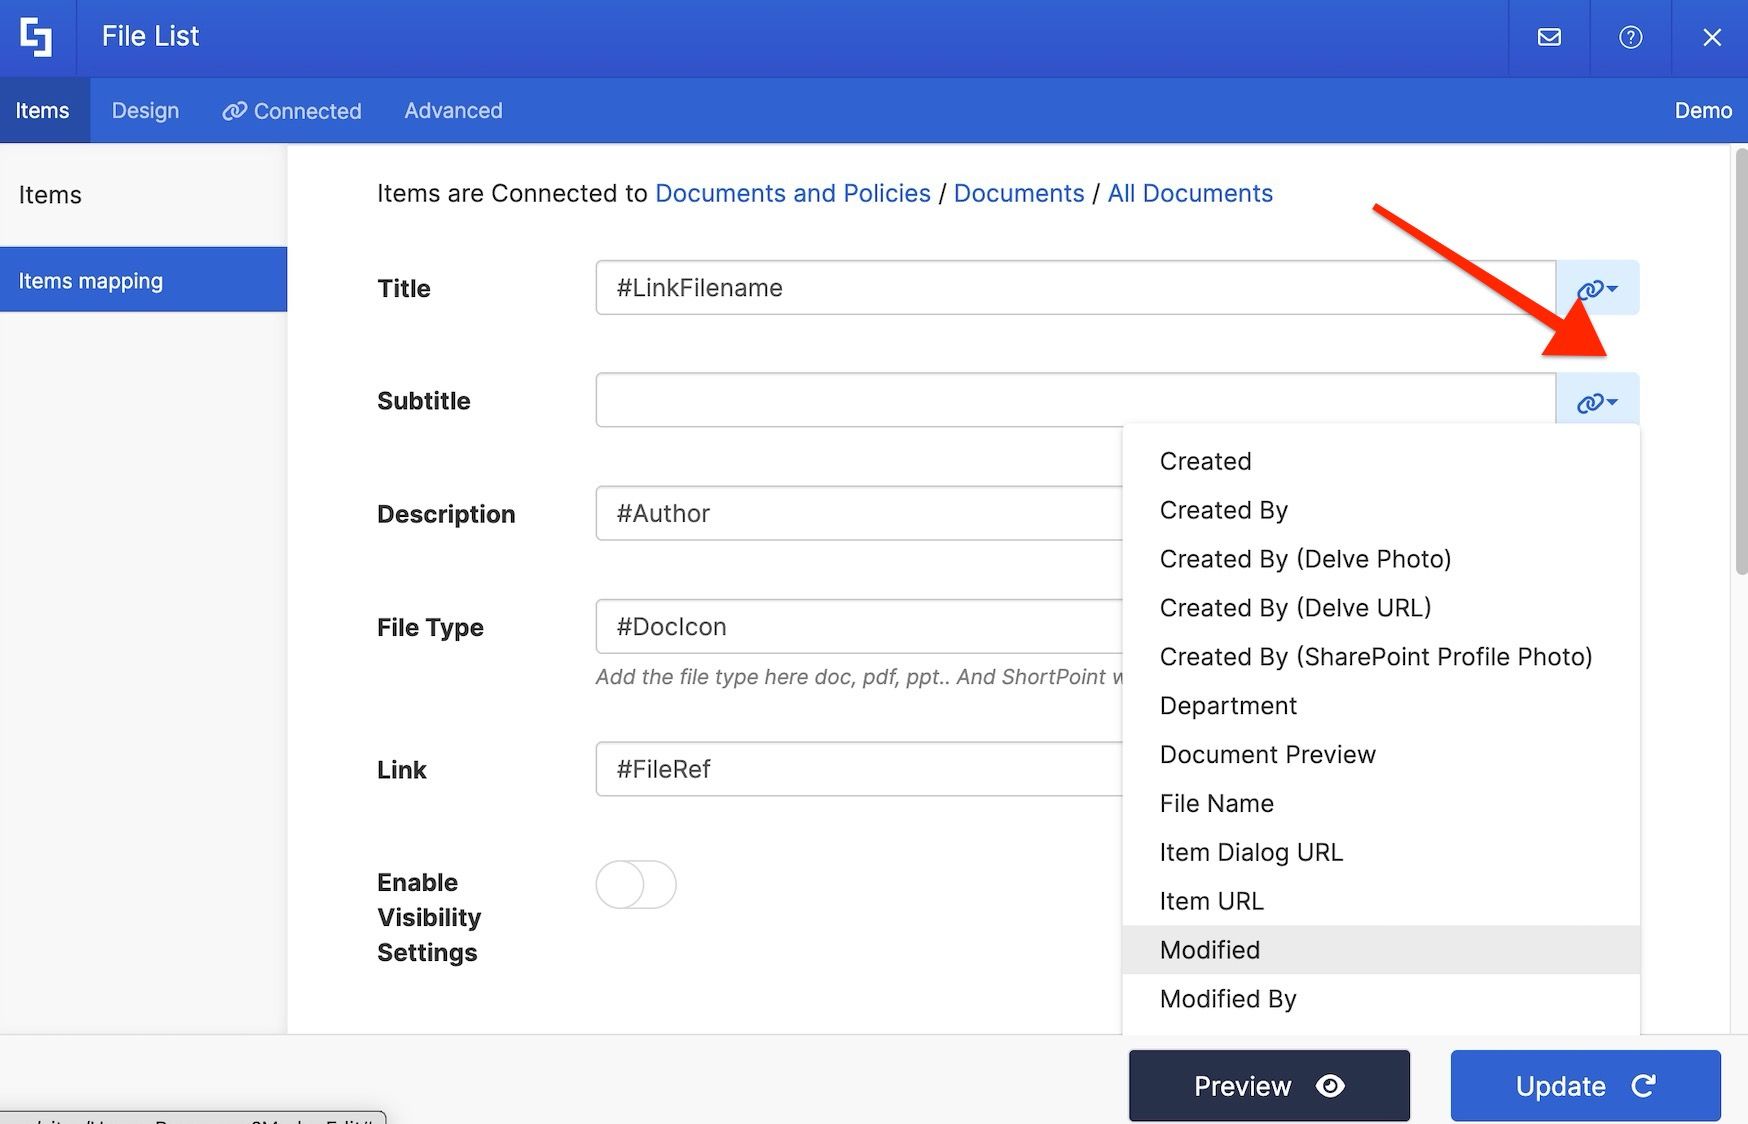
For this example, we’ll add the file name in the Title field. Since it’s important for users to know the last date a file was modified, we’ll add the Modified property in the Subtitle field, and show who made the edit by adding Modified By in the Description field.
The File List Design Element also gives you the option to show the file type as an icon. We’ll choose that in the File Type field. We’ll also add the URL Path so users are redirected to the file when they click it, and set it to open in a new window instead of the default same-window behavior.
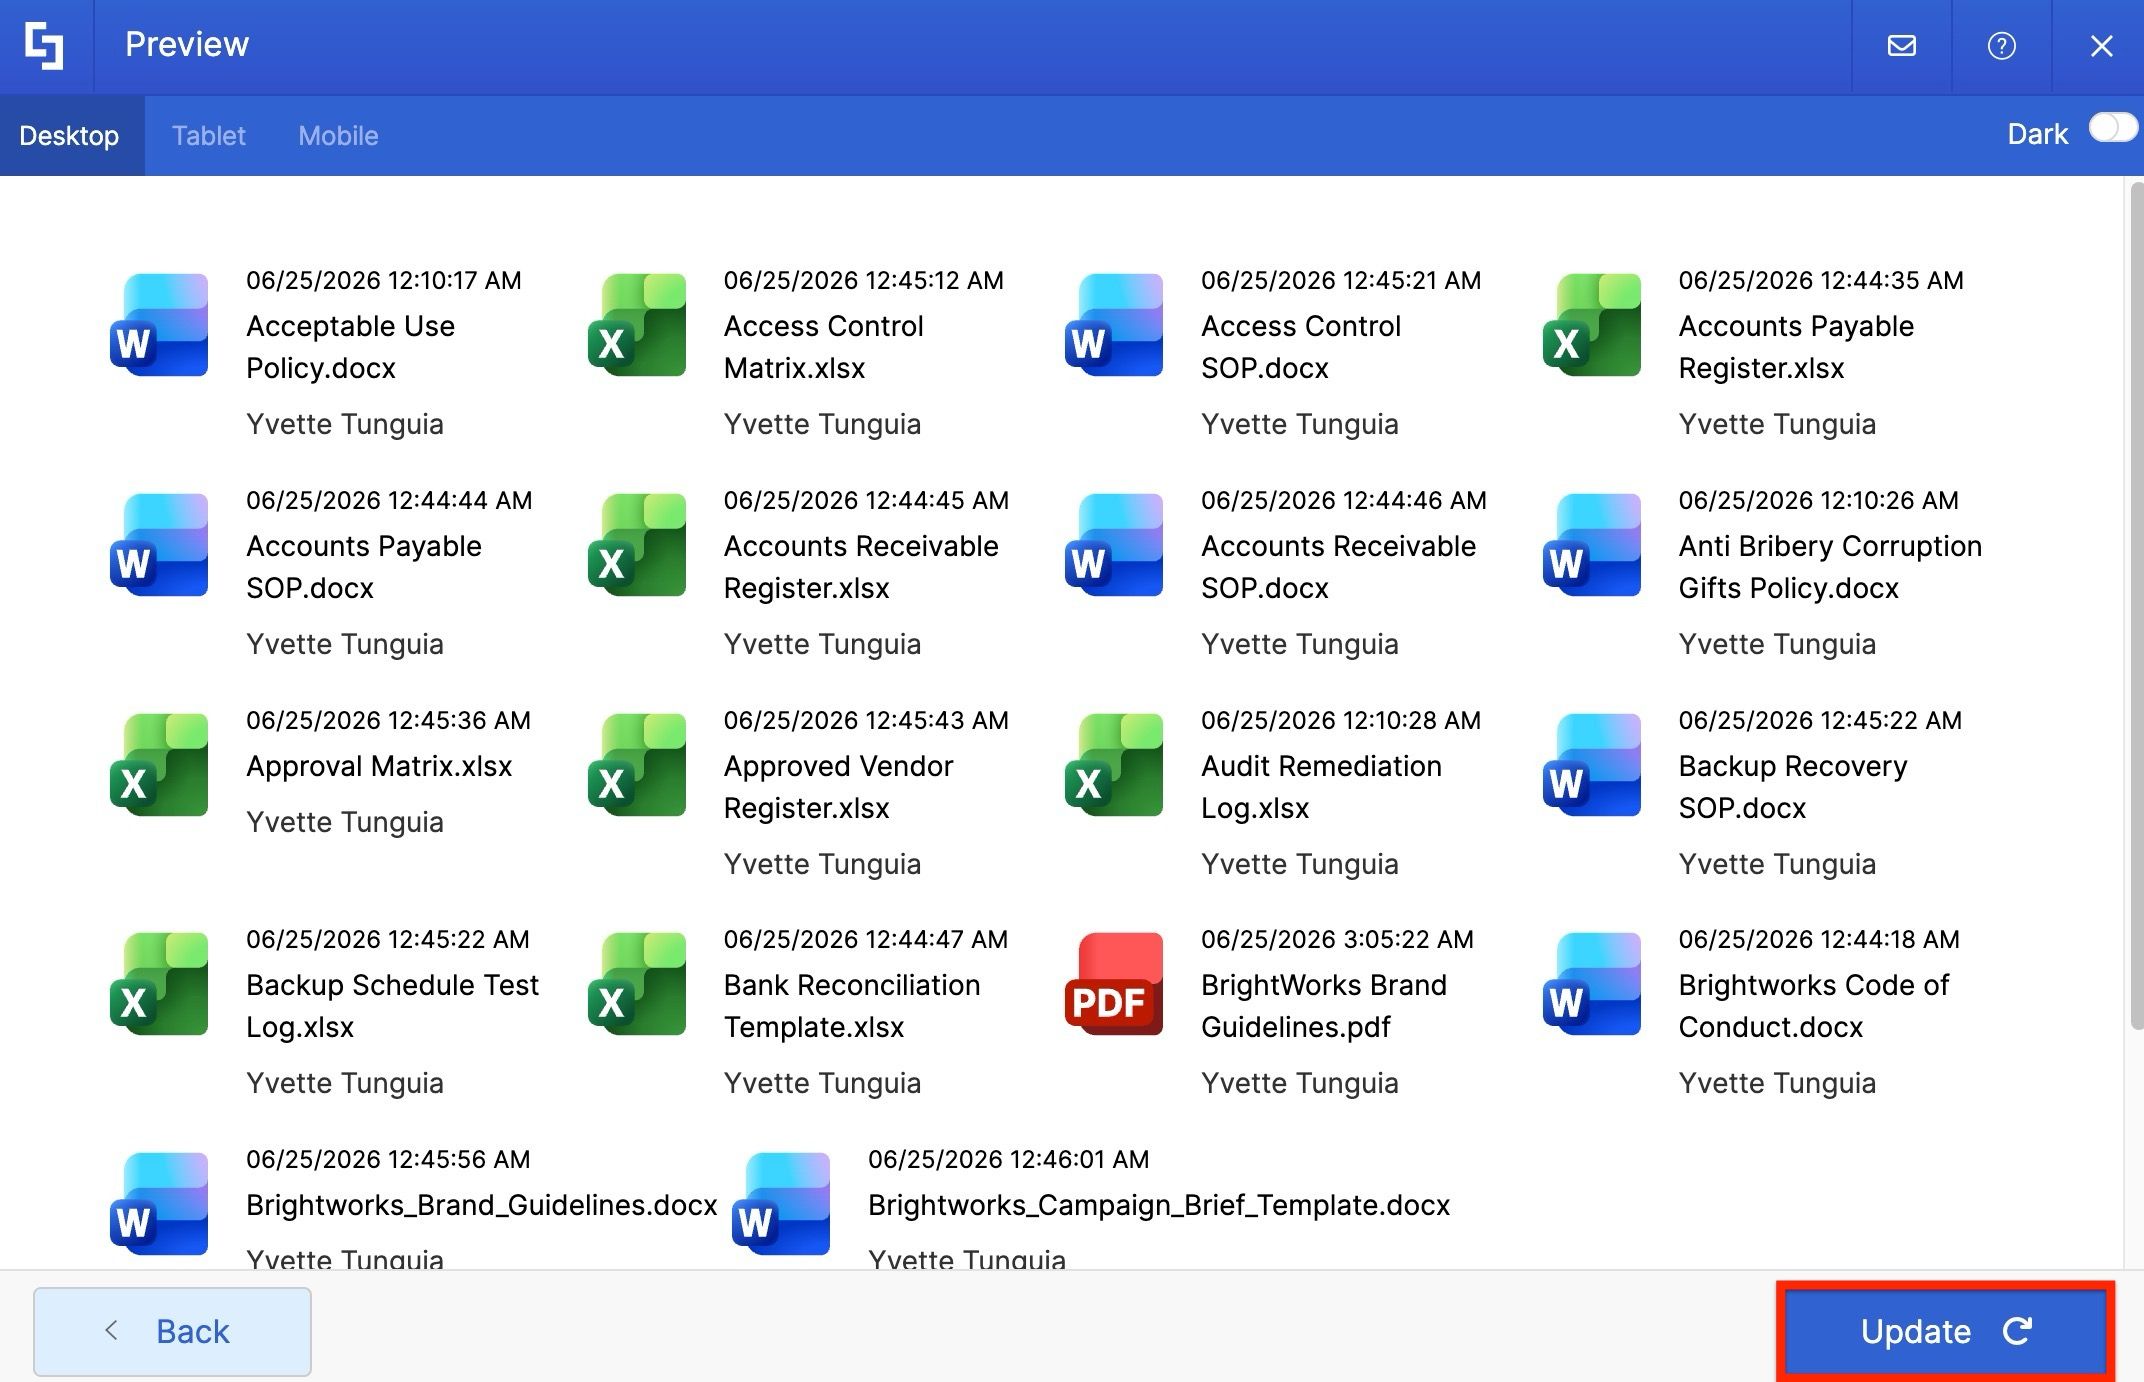
Click Preview to check that everything displays the way you want, then press Update to keep the connection and your edits.
Making the library easy to navigate
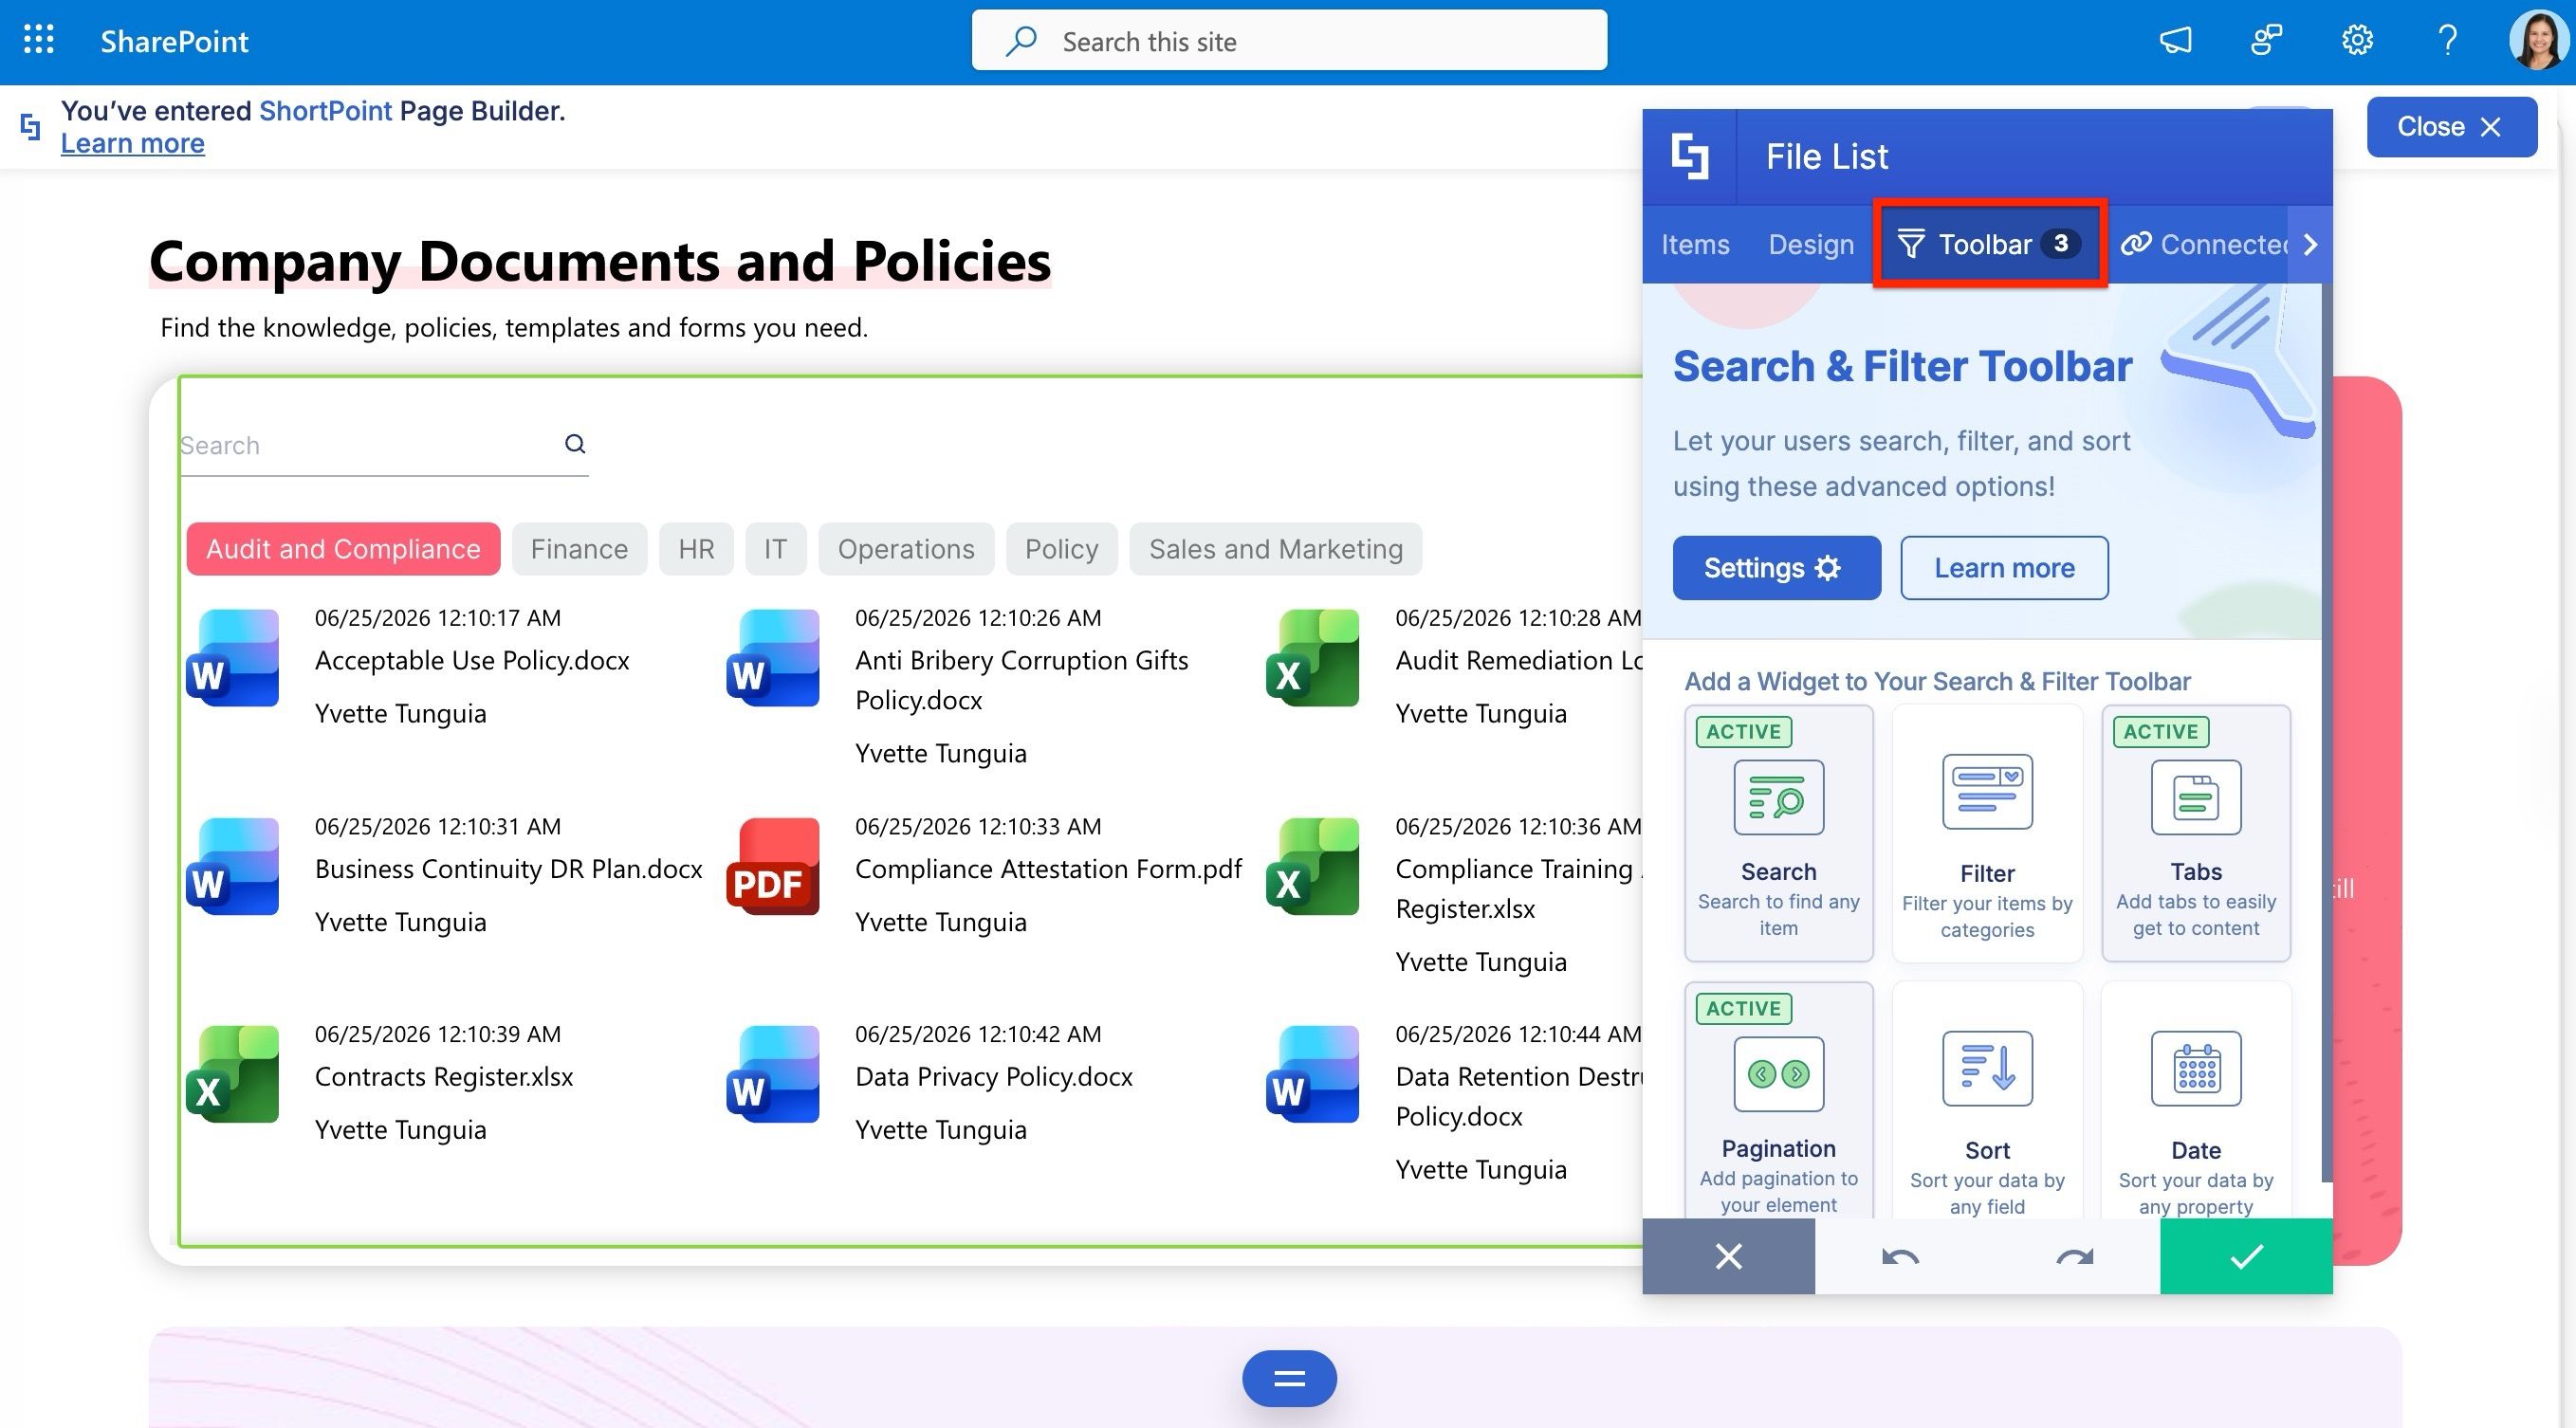
Since document libraries can grow quite large, we want to make it easy for users to find what they need. Using the Search and Filter Toolbar feature, we can add a search bar so users can quickly look up files by name, tabs to organize files by category or type, and pagination so they can browse through the results in manageable chunks rather than scrolling through a long list.
Clicking the Preview icon on the Action Toolbar will show you what the updates to the File List will look like on your page, and you can hit Save to commit all your changes.
Seeing the connection in action
When a new file is added or when there are changes to any of the files, the File List will automatically update — no manual editing needed. This way, teams who update documents regularly can easily keep track of any changes and quickly open the files right on your SharePoint page.
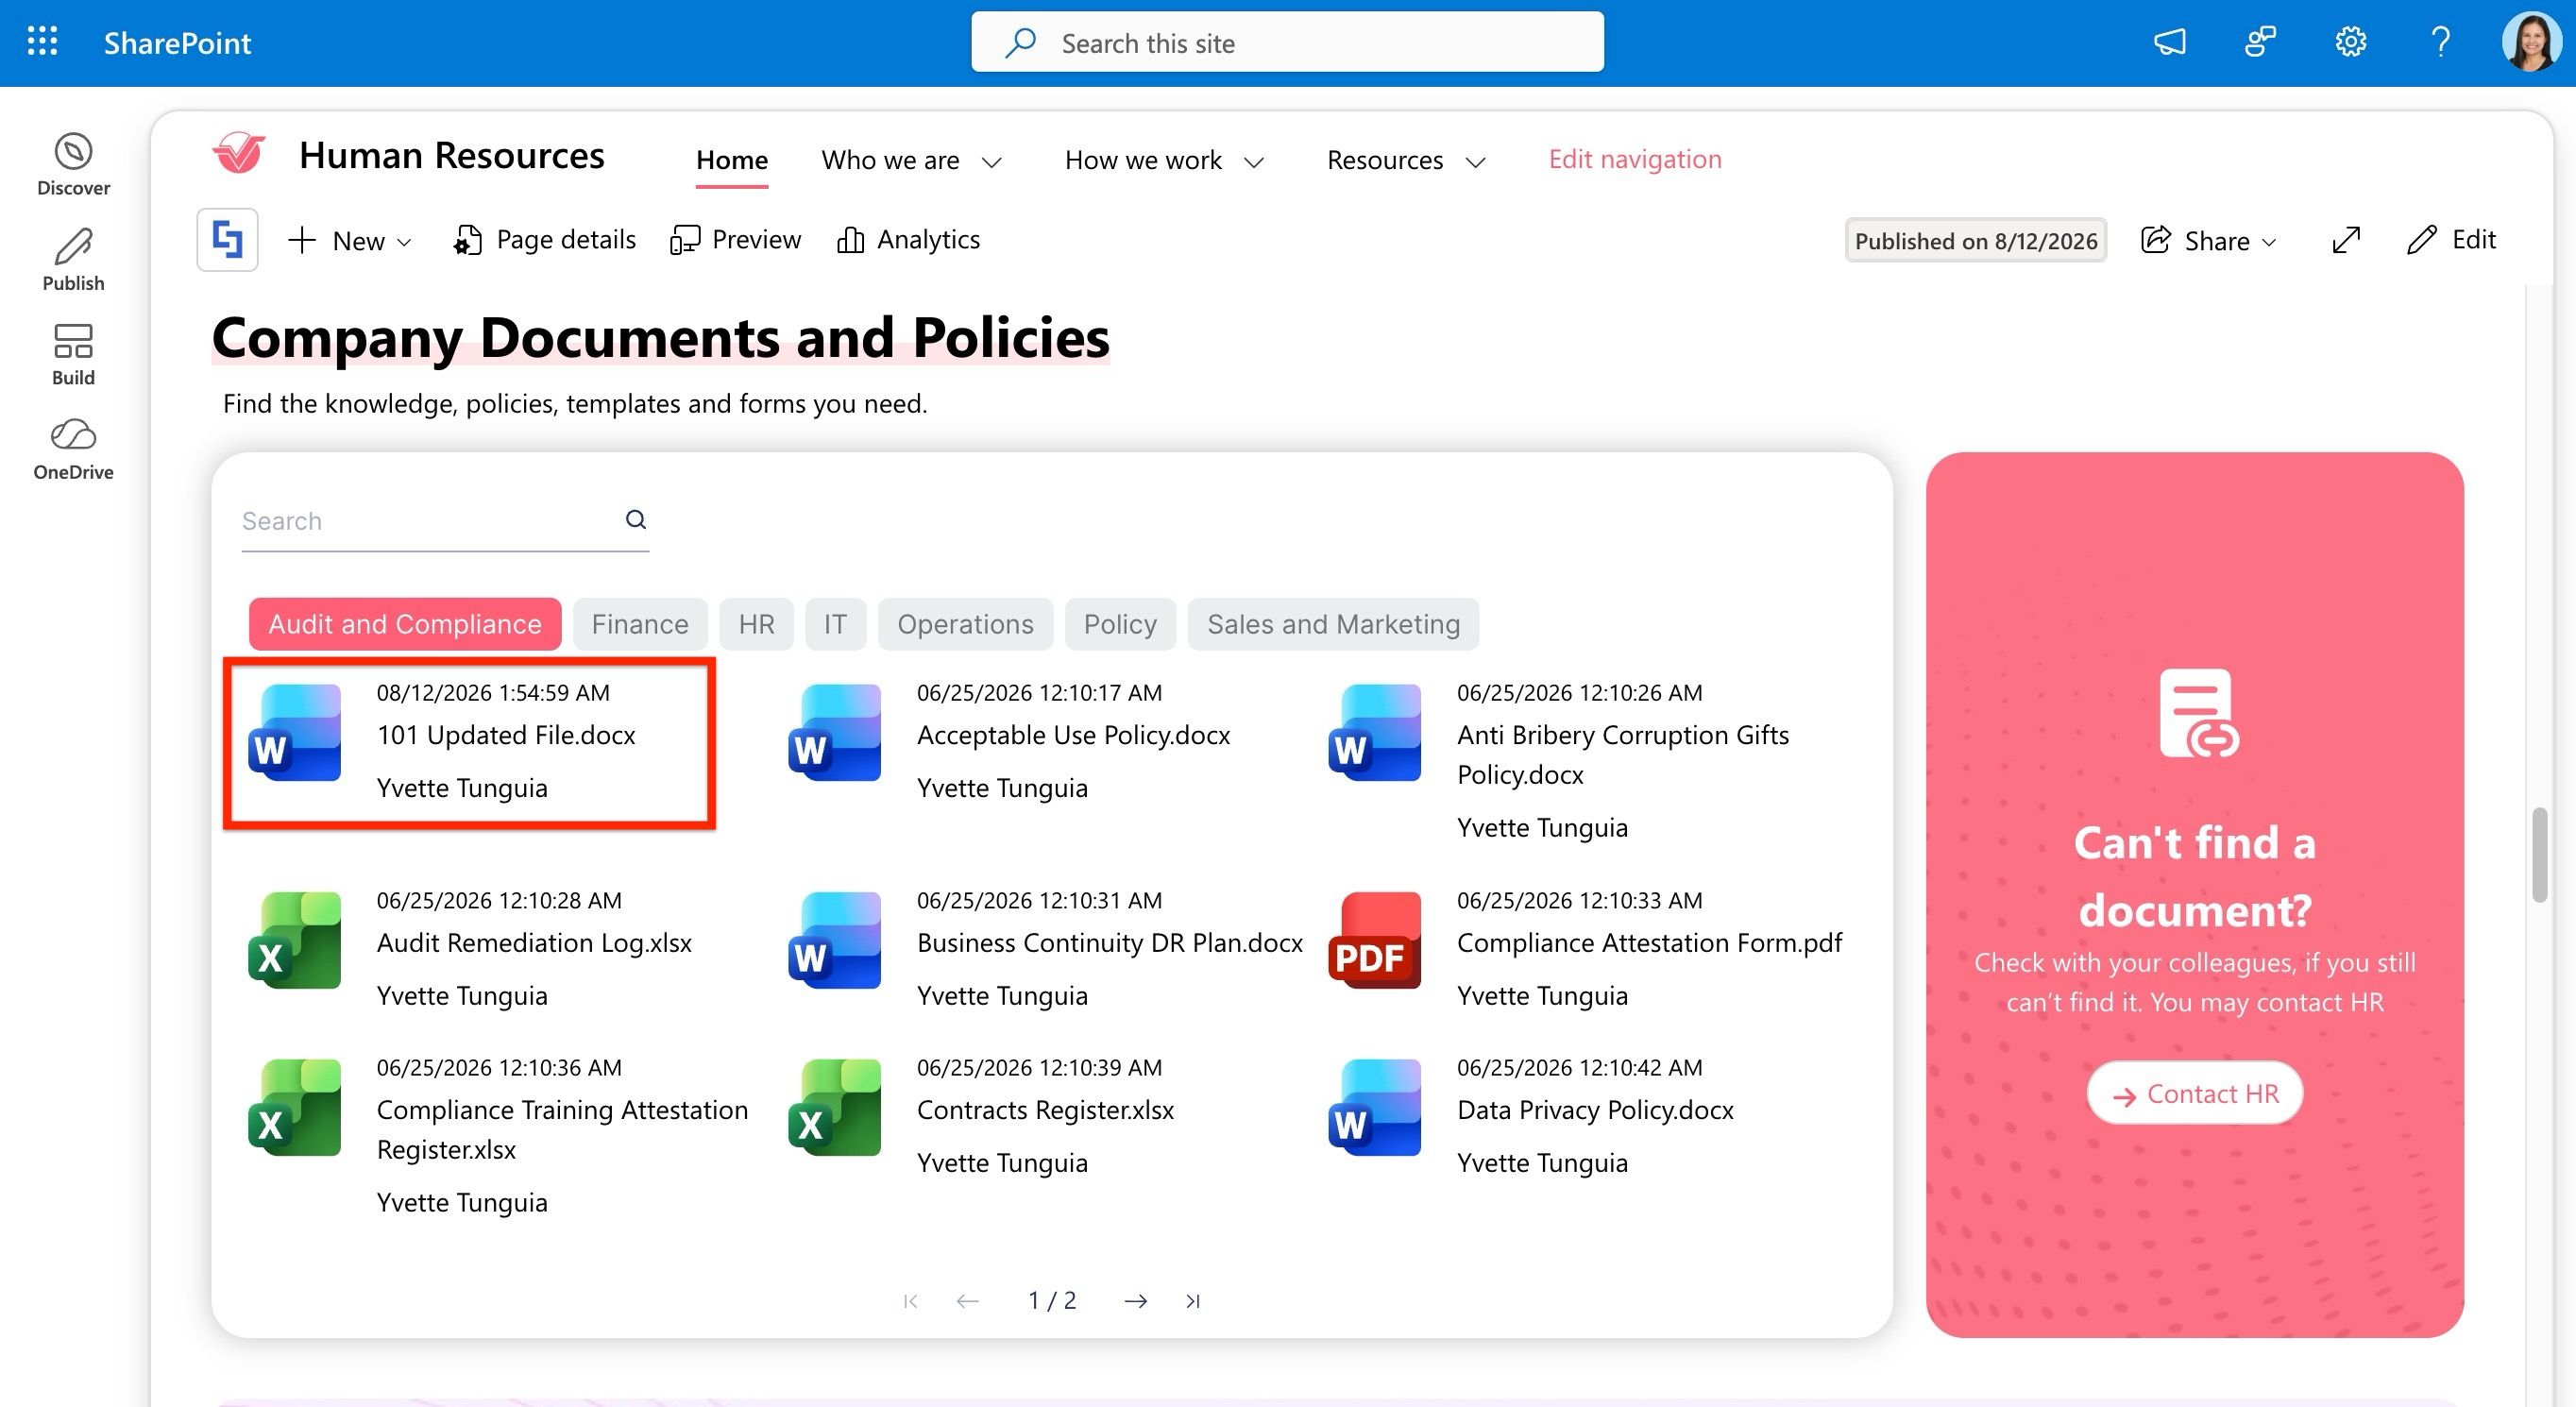
You’ve successfully connected a File List Design Element to a SharePoint library, giving your users an organized, always up-to-date, and easy-to-navigate way to access important files.