
ShortPoint Connect Basics
Connecting to a SharePoint List
In this lesson, you will learn how to connect a ShortPoint Design Element to a SharePoint list, map the list contents to display on your page, and see how the connection automatically keeps your content up to date.

Looking at the SharePoint list
For this project, we’re using a SharePoint list that tracks equipment assigned to each room across the office. It also includes a set of views that filter the list by room. Our goal is to display this data directly on a SharePoint page so users can access it without ever needing to open the list itself.
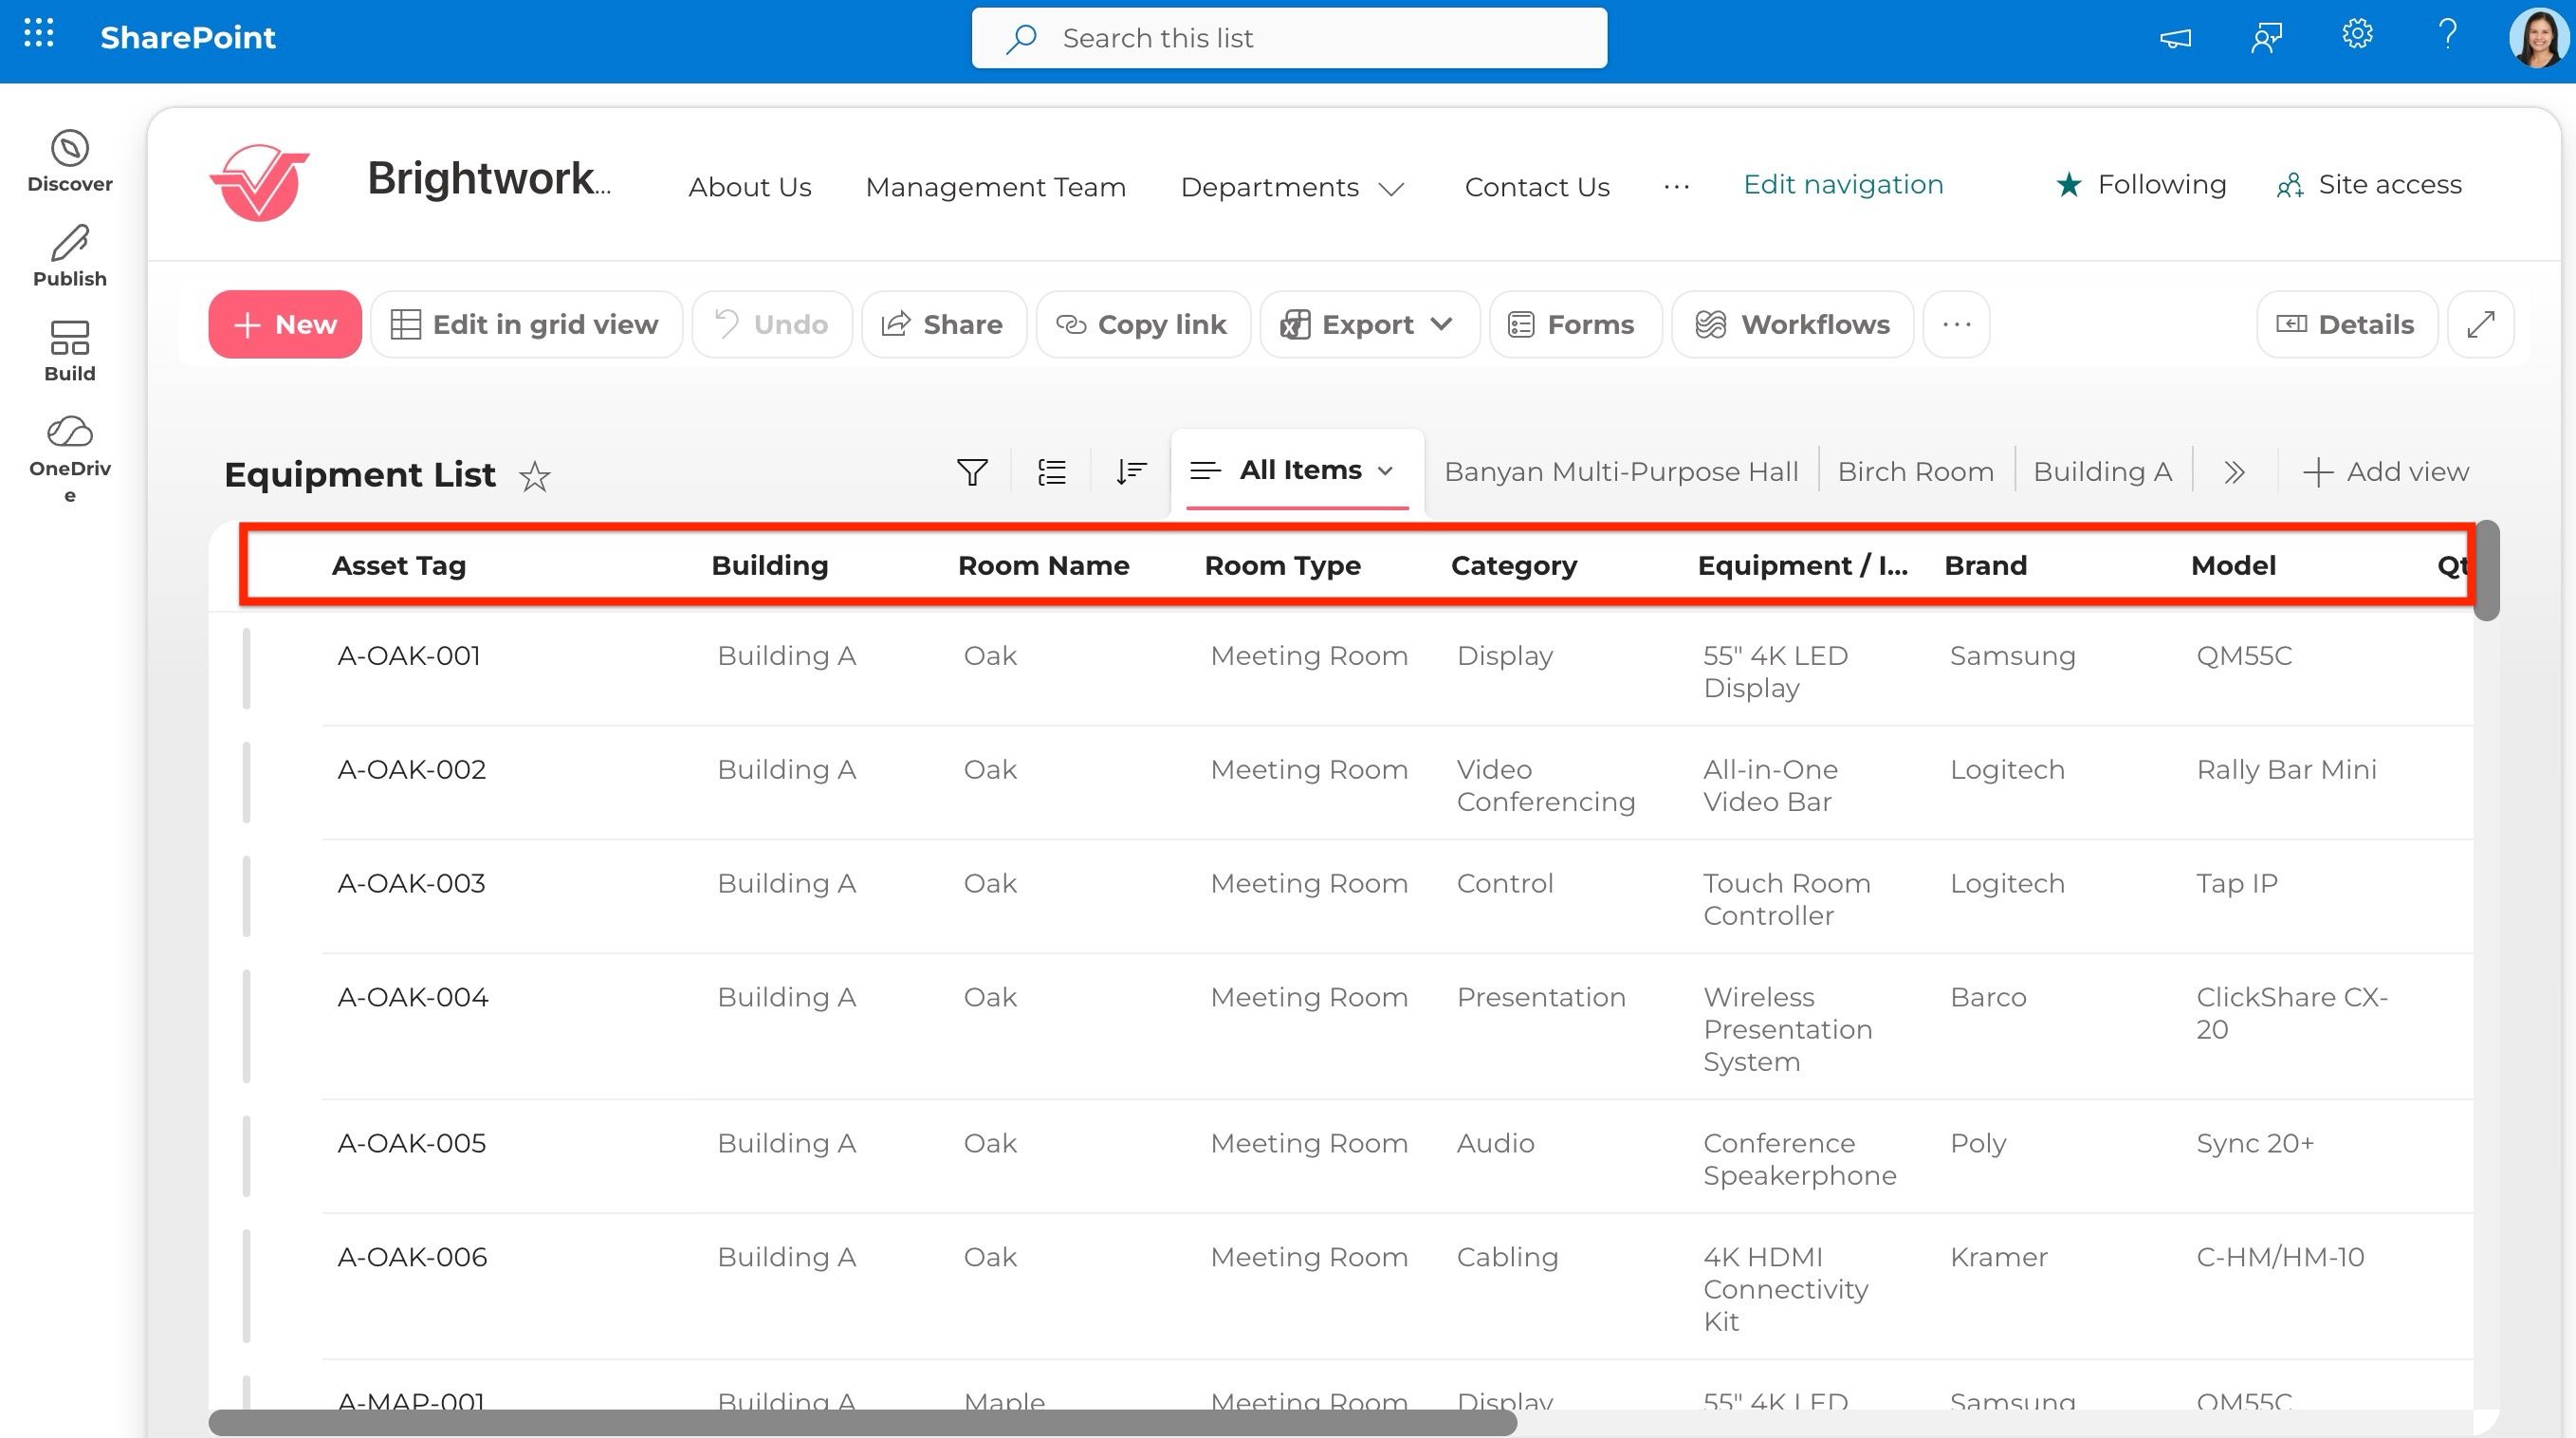
You can follow along using any SharePoint list you have available, or create a new one with similar content.
Inserting a Design Element
Here’s the page where we’ll be embedding the equipment list. After opening edit mode, we’ll insert a Simple List, the Design Element we’ll use to display the list we just looked at.
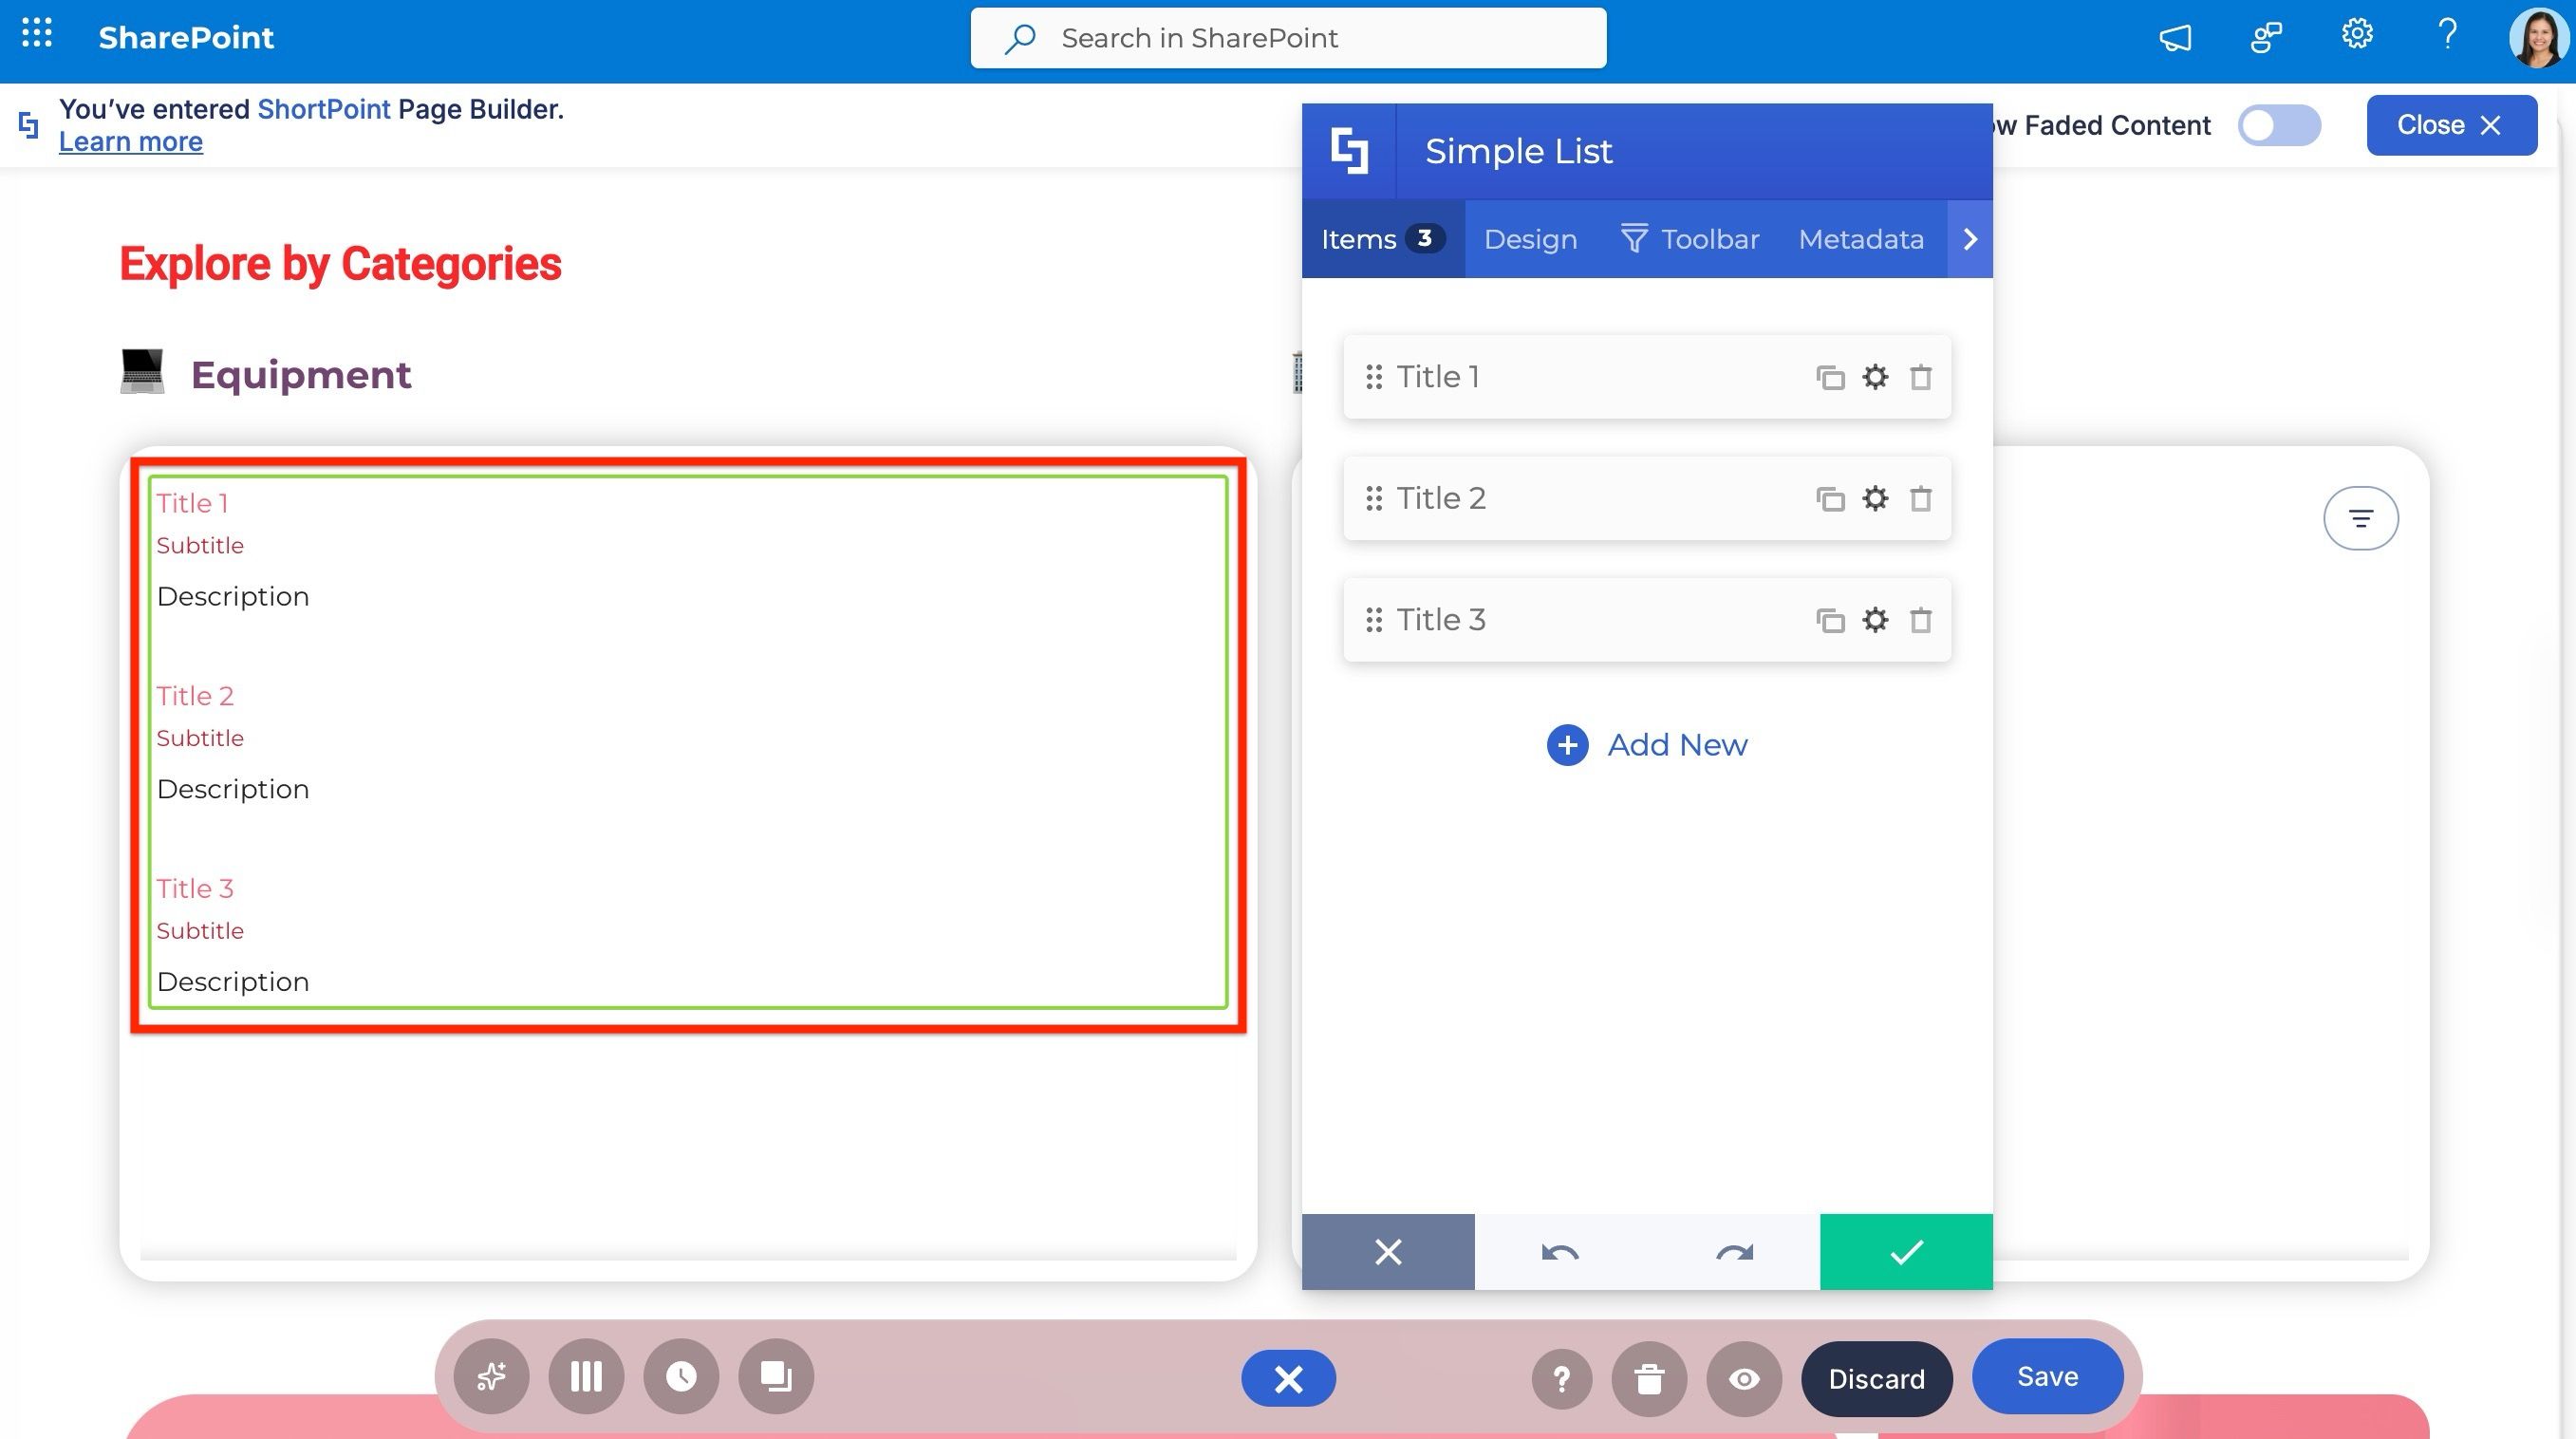
The Connect feature is available on almost all of ShortPoint’s 80+ Design Elements, so feel free to choose a different one if it better suits your layout or content needs. The connection steps work the same way regardless.
Choosing a connection type
Once the element is on the page, switch to the Connect tab to begin configuring the connection.
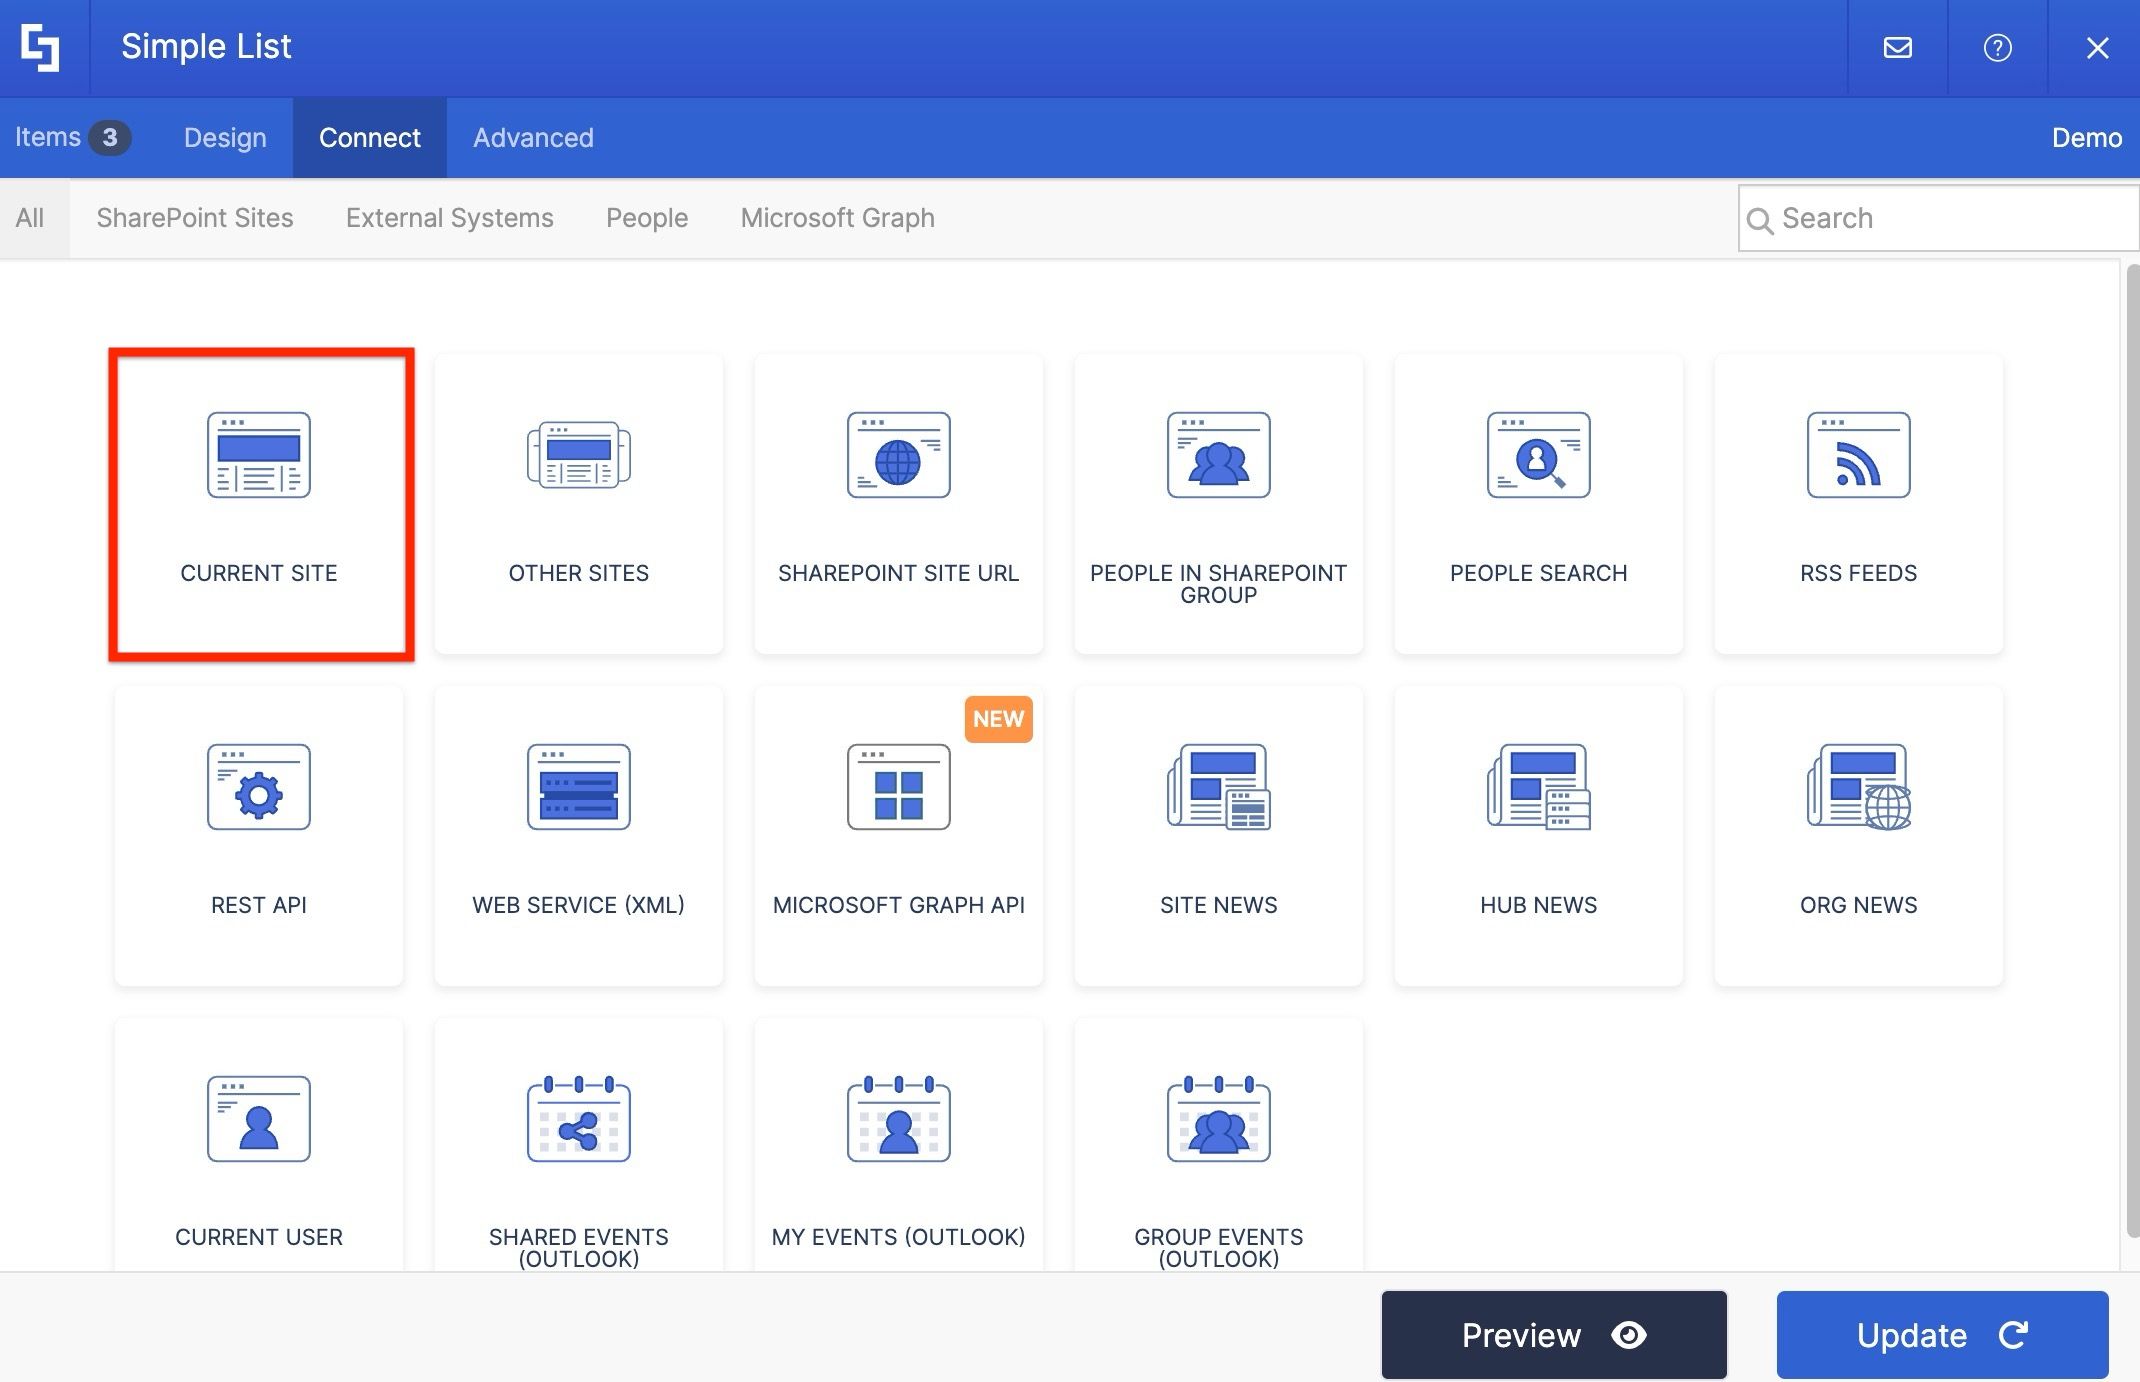
Since our list lives on the same site as this page, we’ll select Current Site. It is the most straightforward option for our scenario. If your list is hosted elsewhere, don’t worry. We cover other commonly used connection types in upcoming lessons, and you can also visit our Knowledge Base for a deeper dive into each one.
Setting up the connection
Depending on the connection type, you’ll find fields requiring specific information to establish the connection. For Current Site, we’ll select the list name from the dropdown.
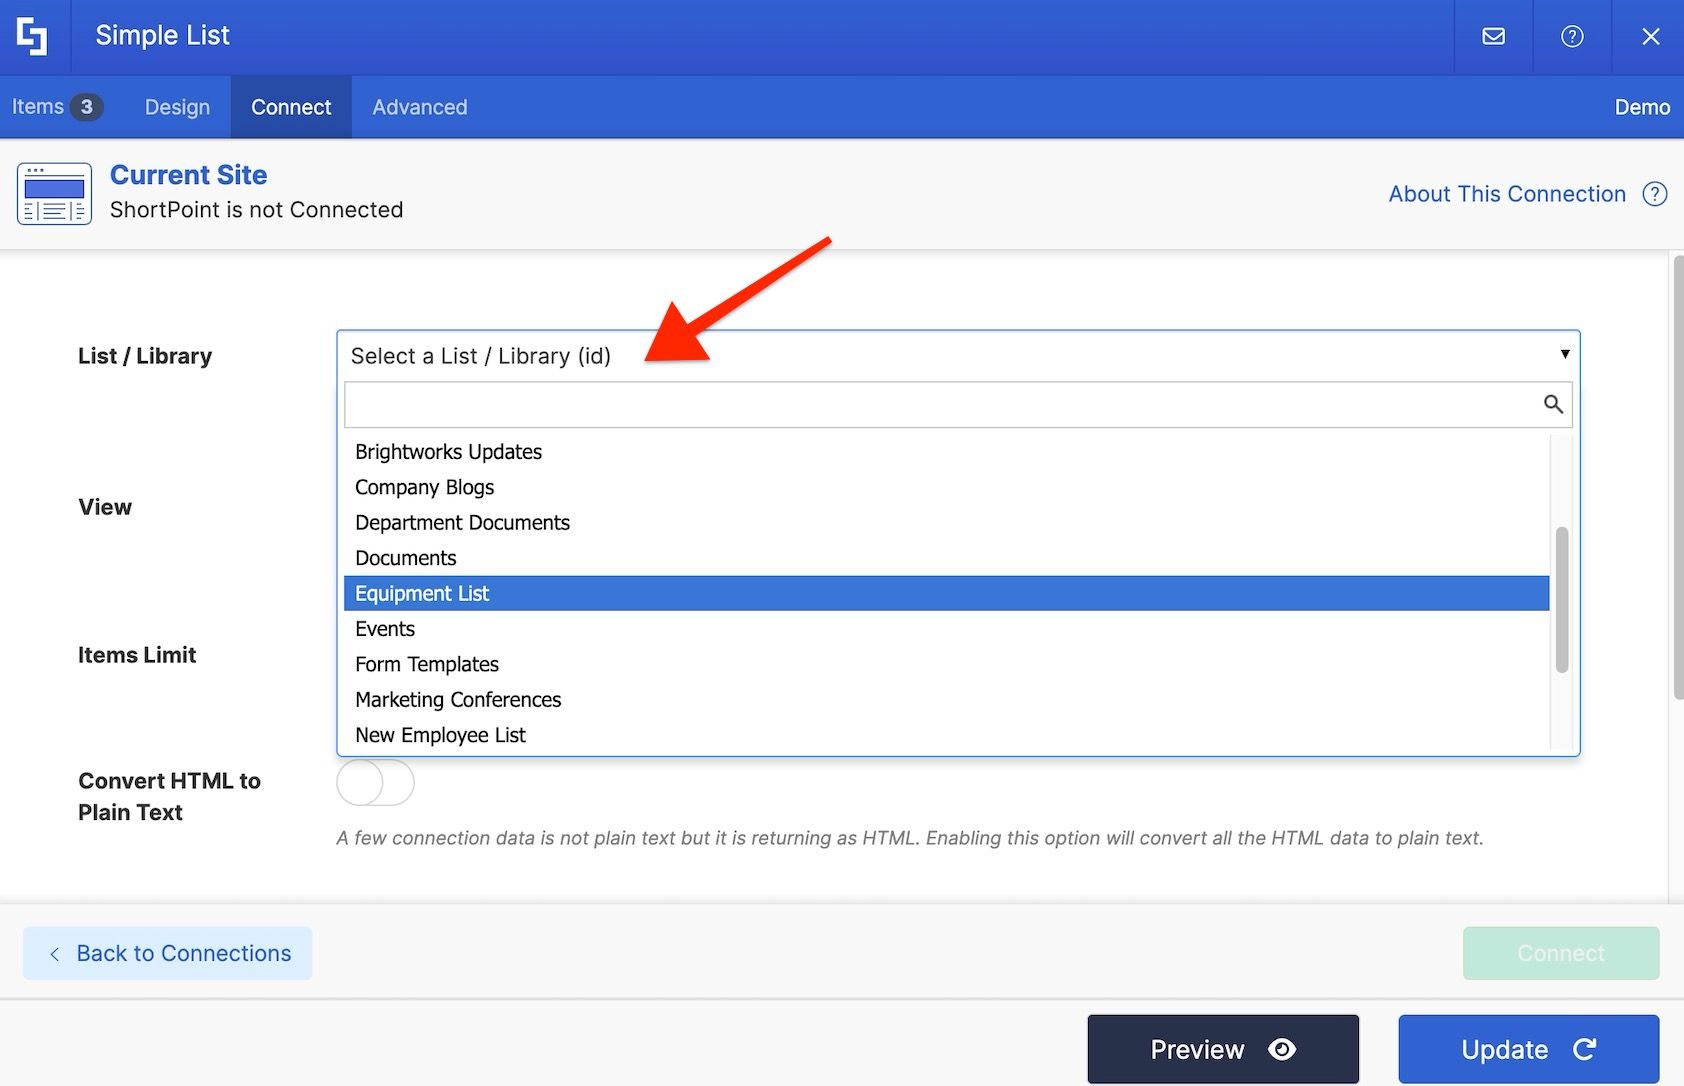
If you want to use a specific list view, you can select it under the View field. Otherwise, leave it at “All Items.” You can also set a limit on the number of items displayed on your page.
Once you’re ready, press Connect to establish the connection. You’ll know it was successful when the notification banner confirms it.
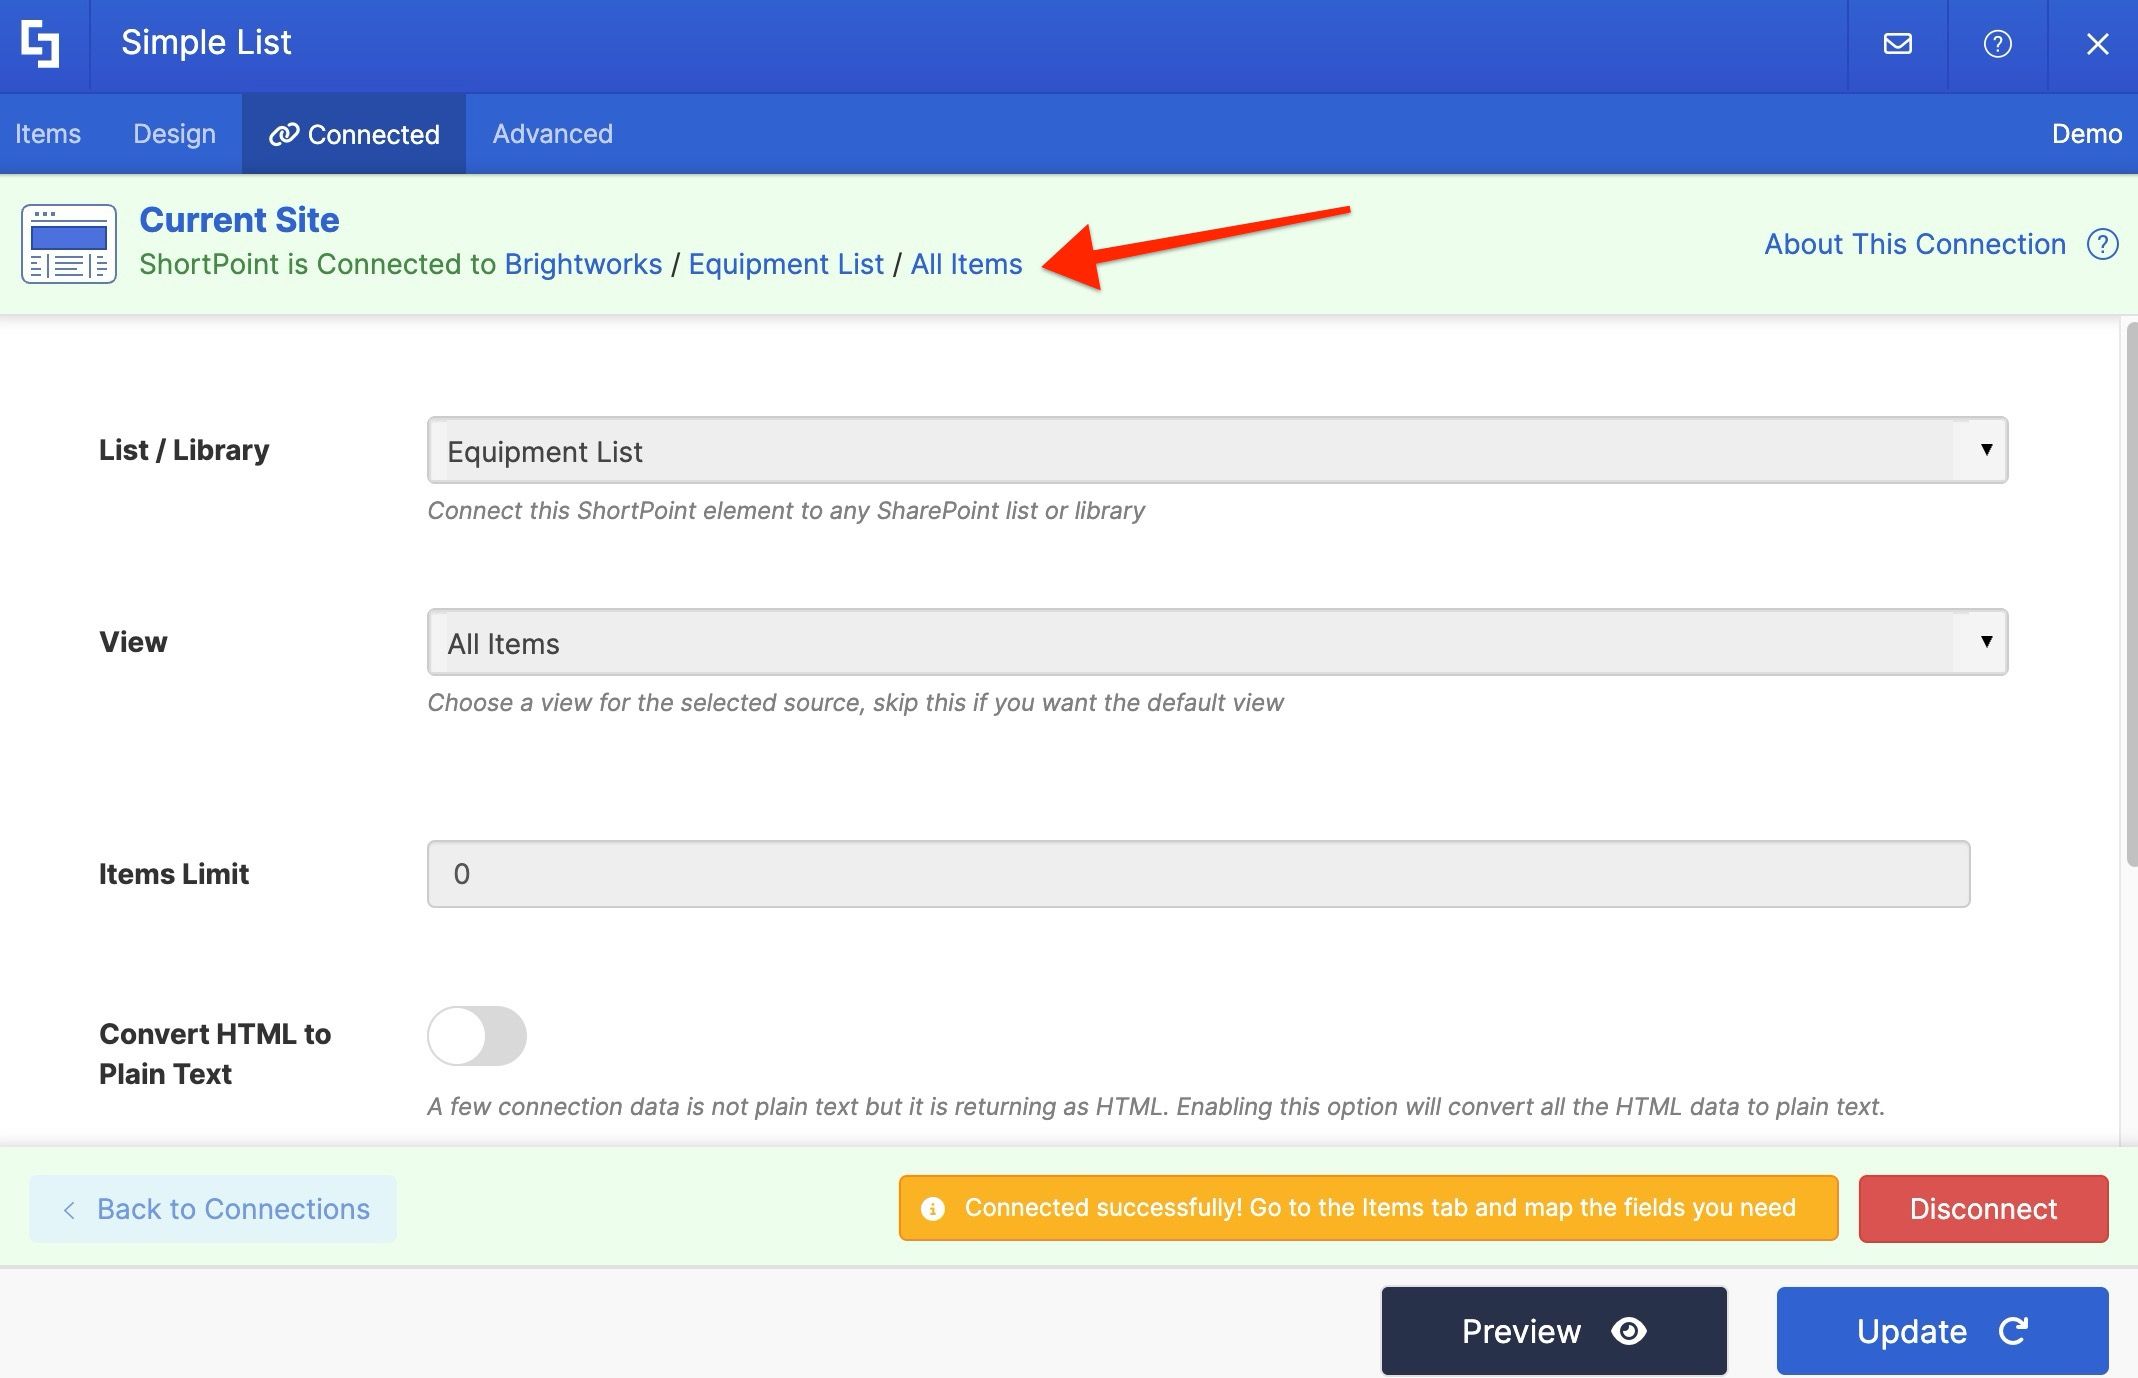
If you need to update the connection or change settings later, hit Disconnect, update the fields, and reconnect.
Mapping list content
Now all that’s left is to map which items from your SharePoint list you want to show on your page. For this, go to the Items tab.
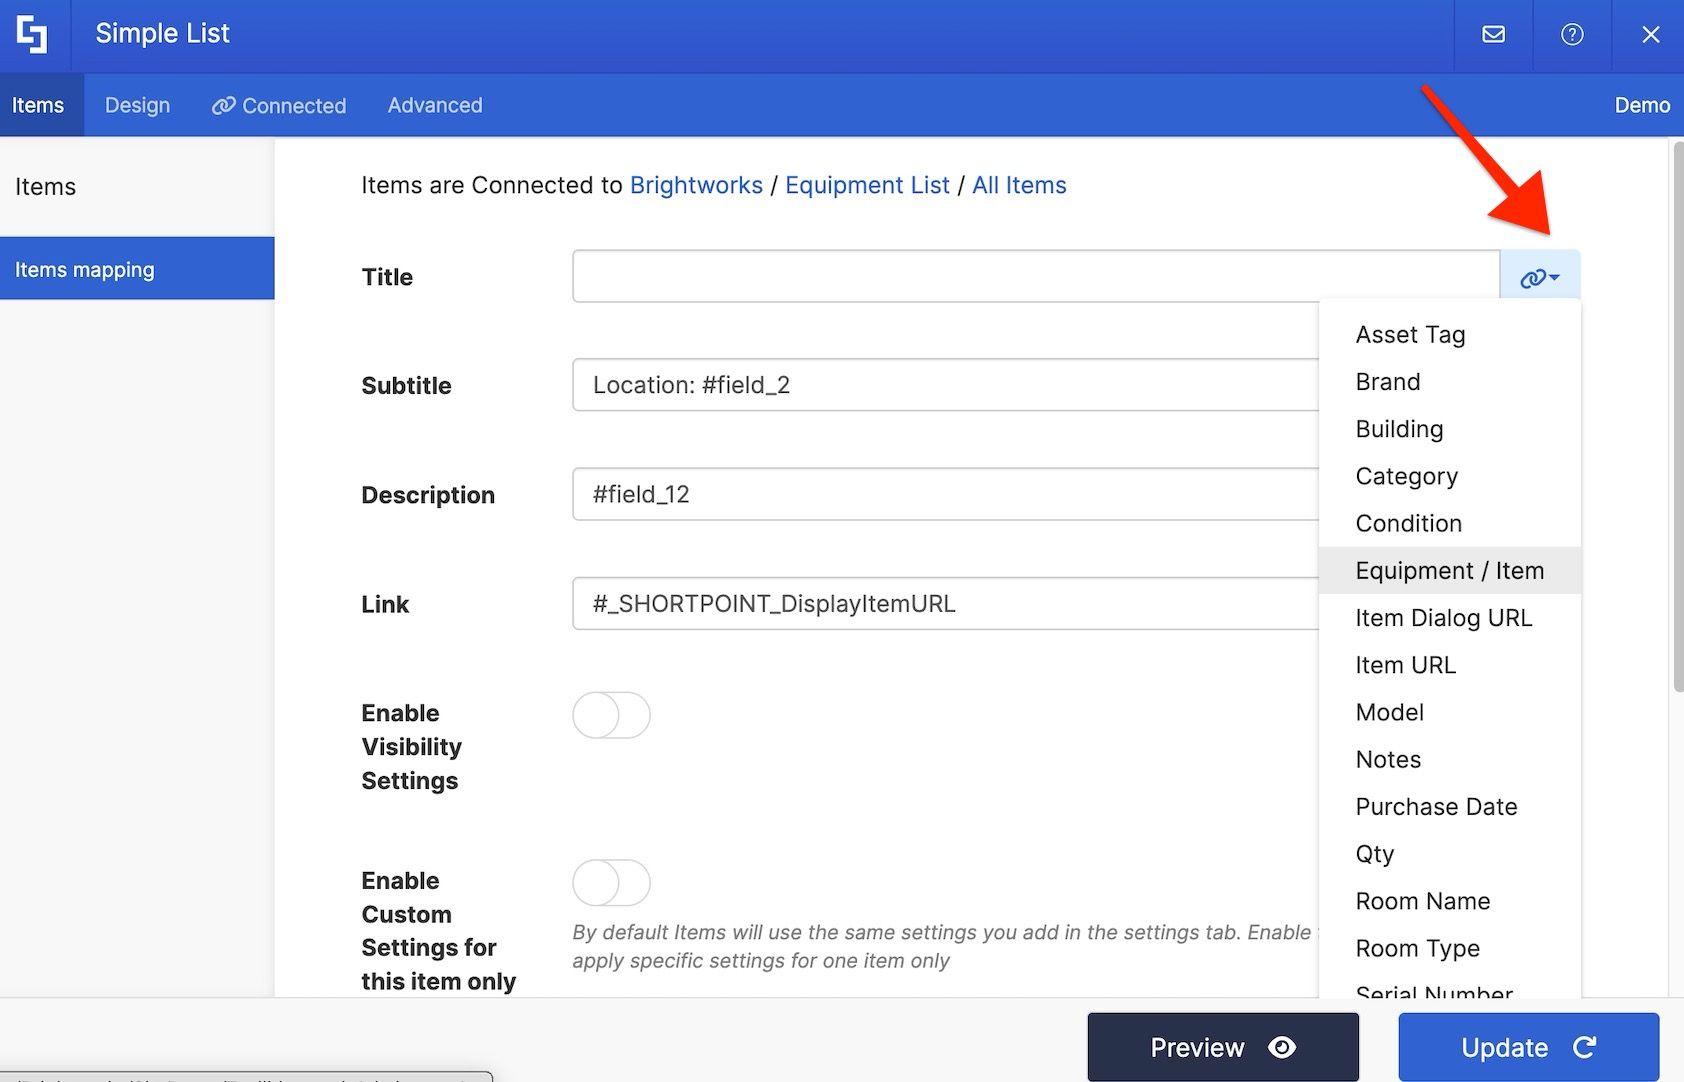
You need to identify which property in the list will appear in each Design Element field. These properties are typically the column headers in your list. Selecting a property tells ShortPoint to display content from that column in that field.
Keep in mind that the data retrieved must match the type of content required in the field. For example, make sure a link field is matched with a property containing a URL. Otherwise, you’ll see an error, or the field will appear blank.
For more information, check out our support article on How Items Mapping Works.
You can verify your selections by pressing Preview, and adjust as needed until you get the result you want.
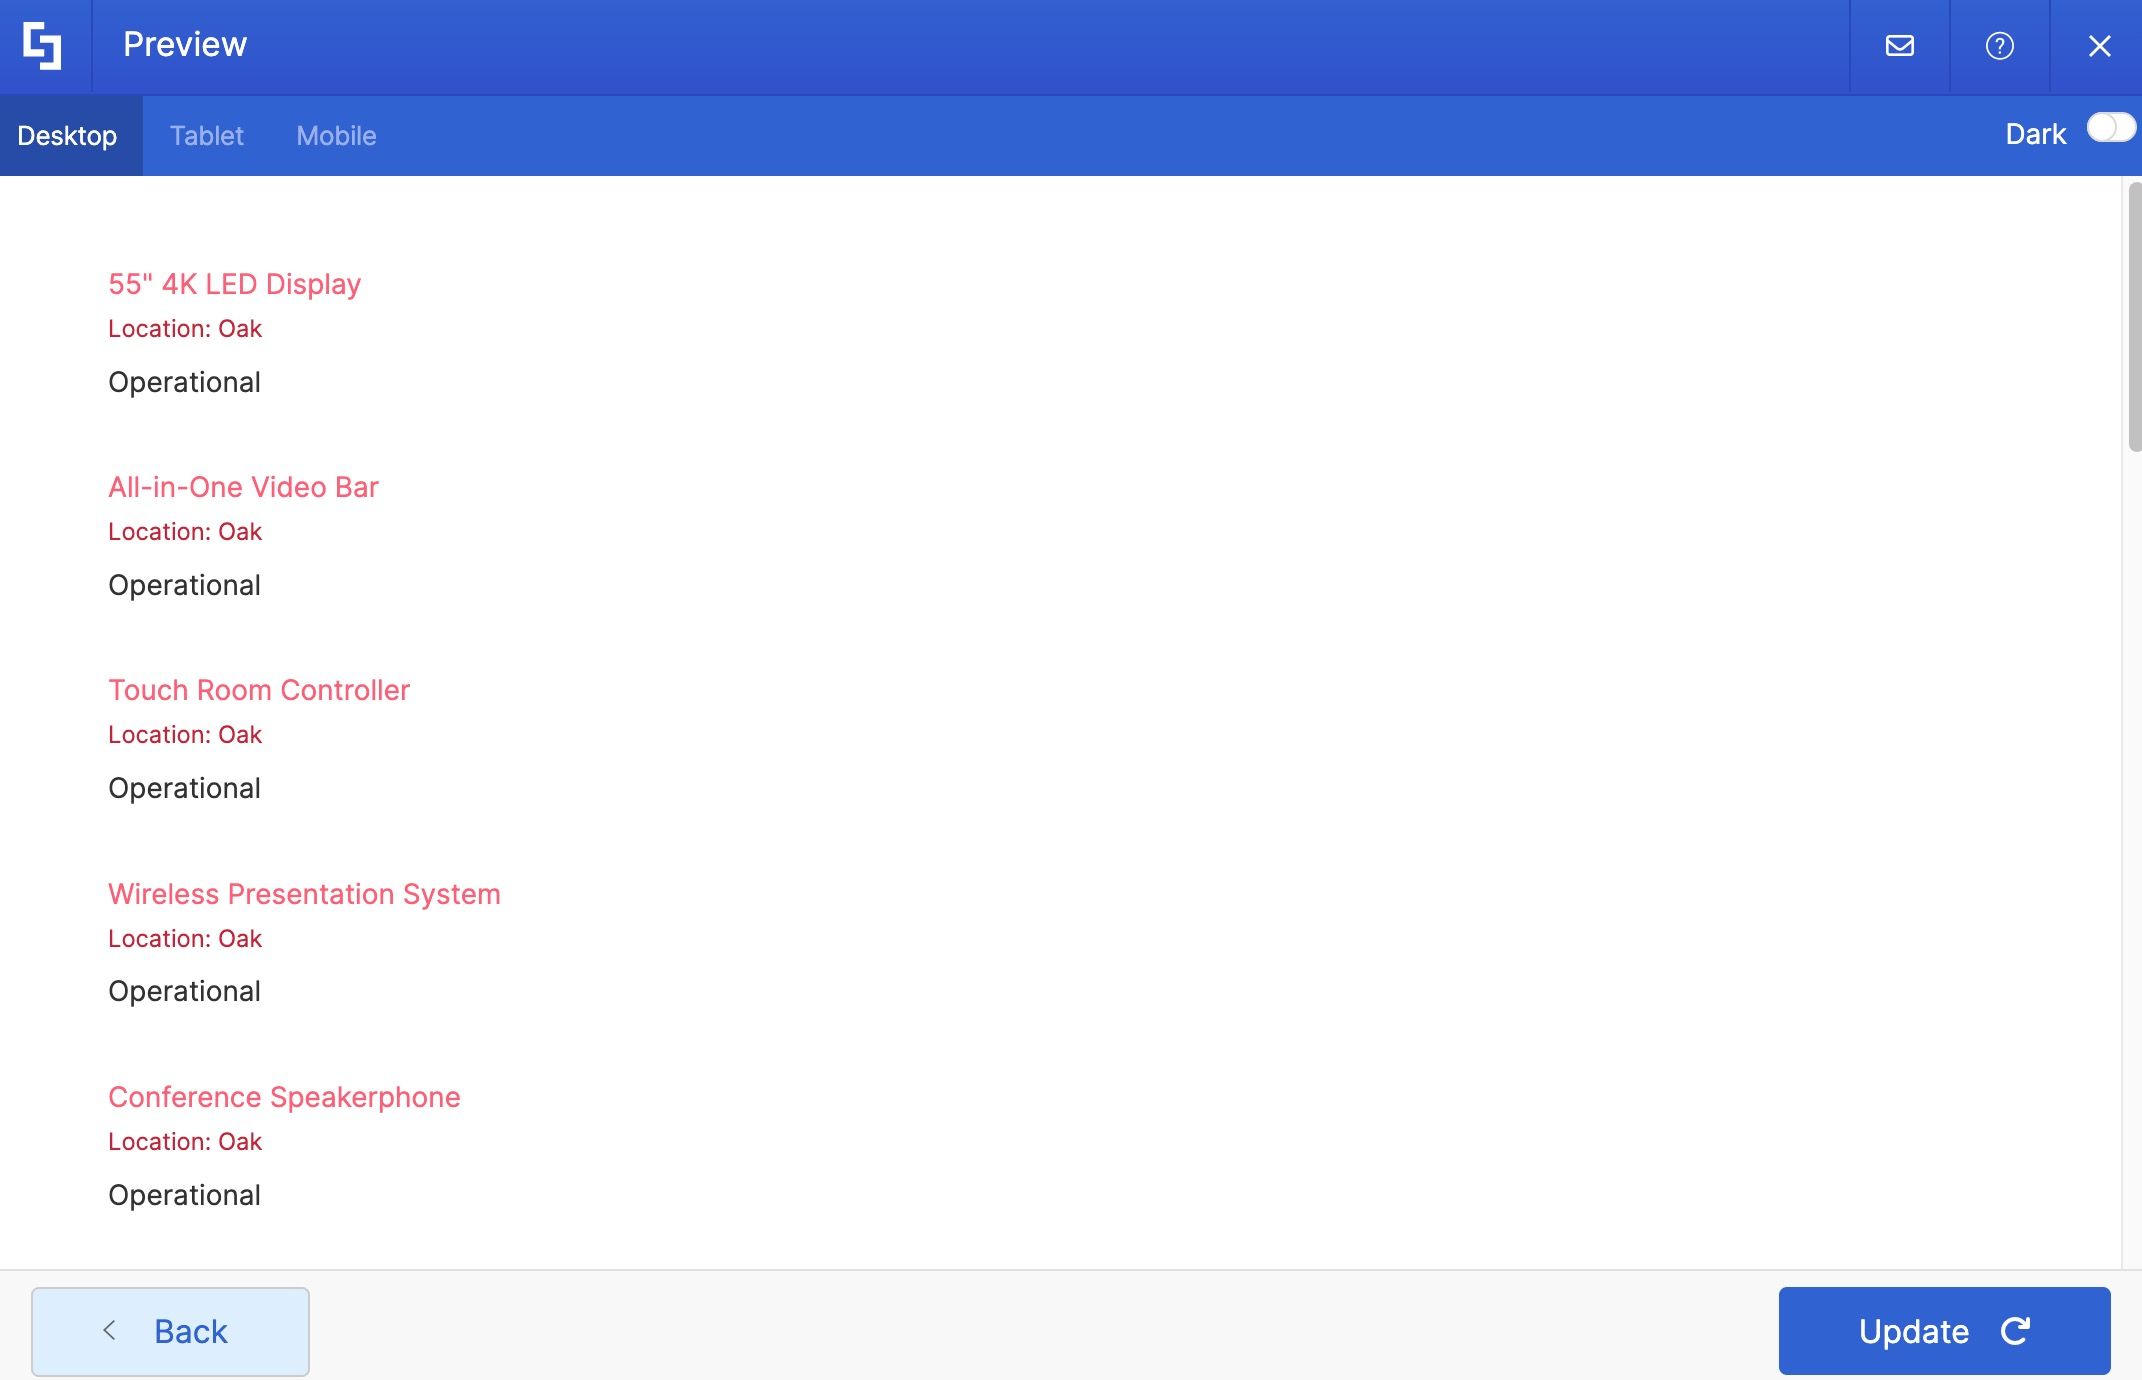
Hit Update when you’re done to apply your changes.
Optimizing for navigation
Since most connections pull in a sizeable amount of data, we recommend adding filters, tabs, or a search widget to your Design Element using the Search and Filter Toolbar feature. This makes it easier for your users to navigate and find exactly what they need.
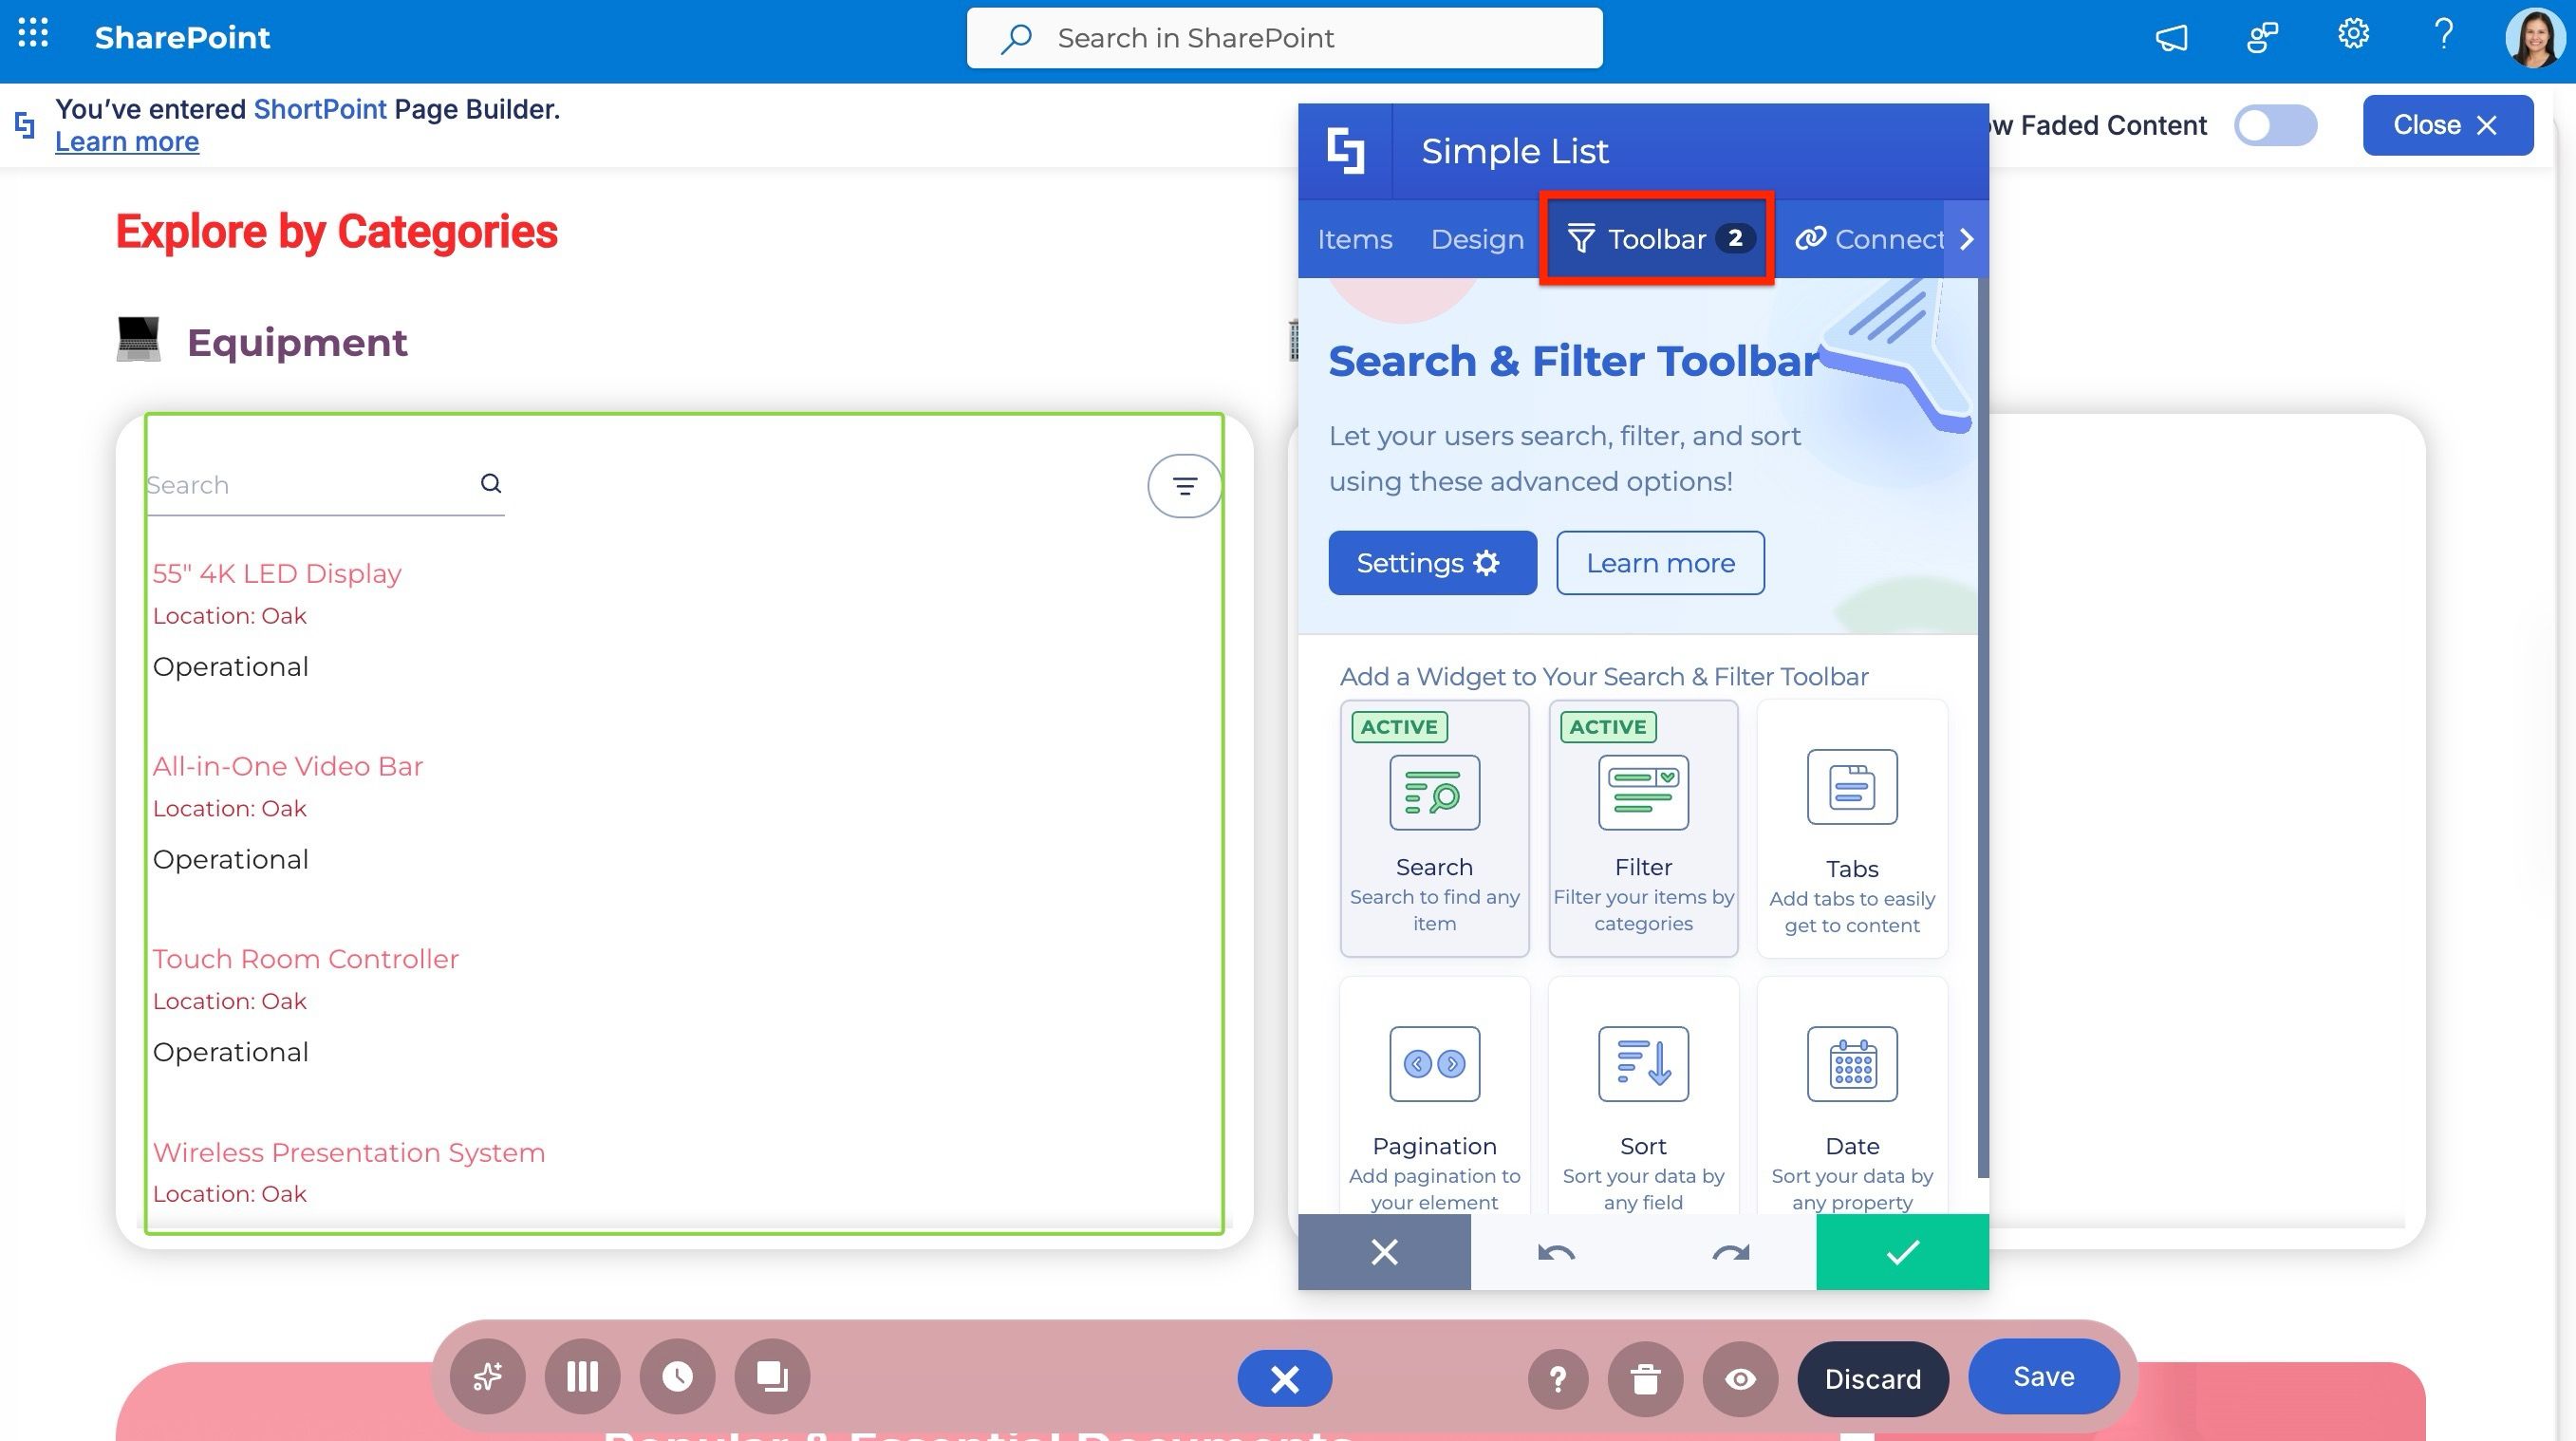
To see how the Simple List will look on your page, click Preview on the Action Toolbar. Don’t forget to press Save to keep your changes and ensure the connection continues to run.
Seeing the connection in action
Once a Design Element is connected, it automatically retrieves updated data from the SharePoint list. For example, after adding a new entry to the list, reloading the page shows the new entry displayed automatically — no manual editing required.
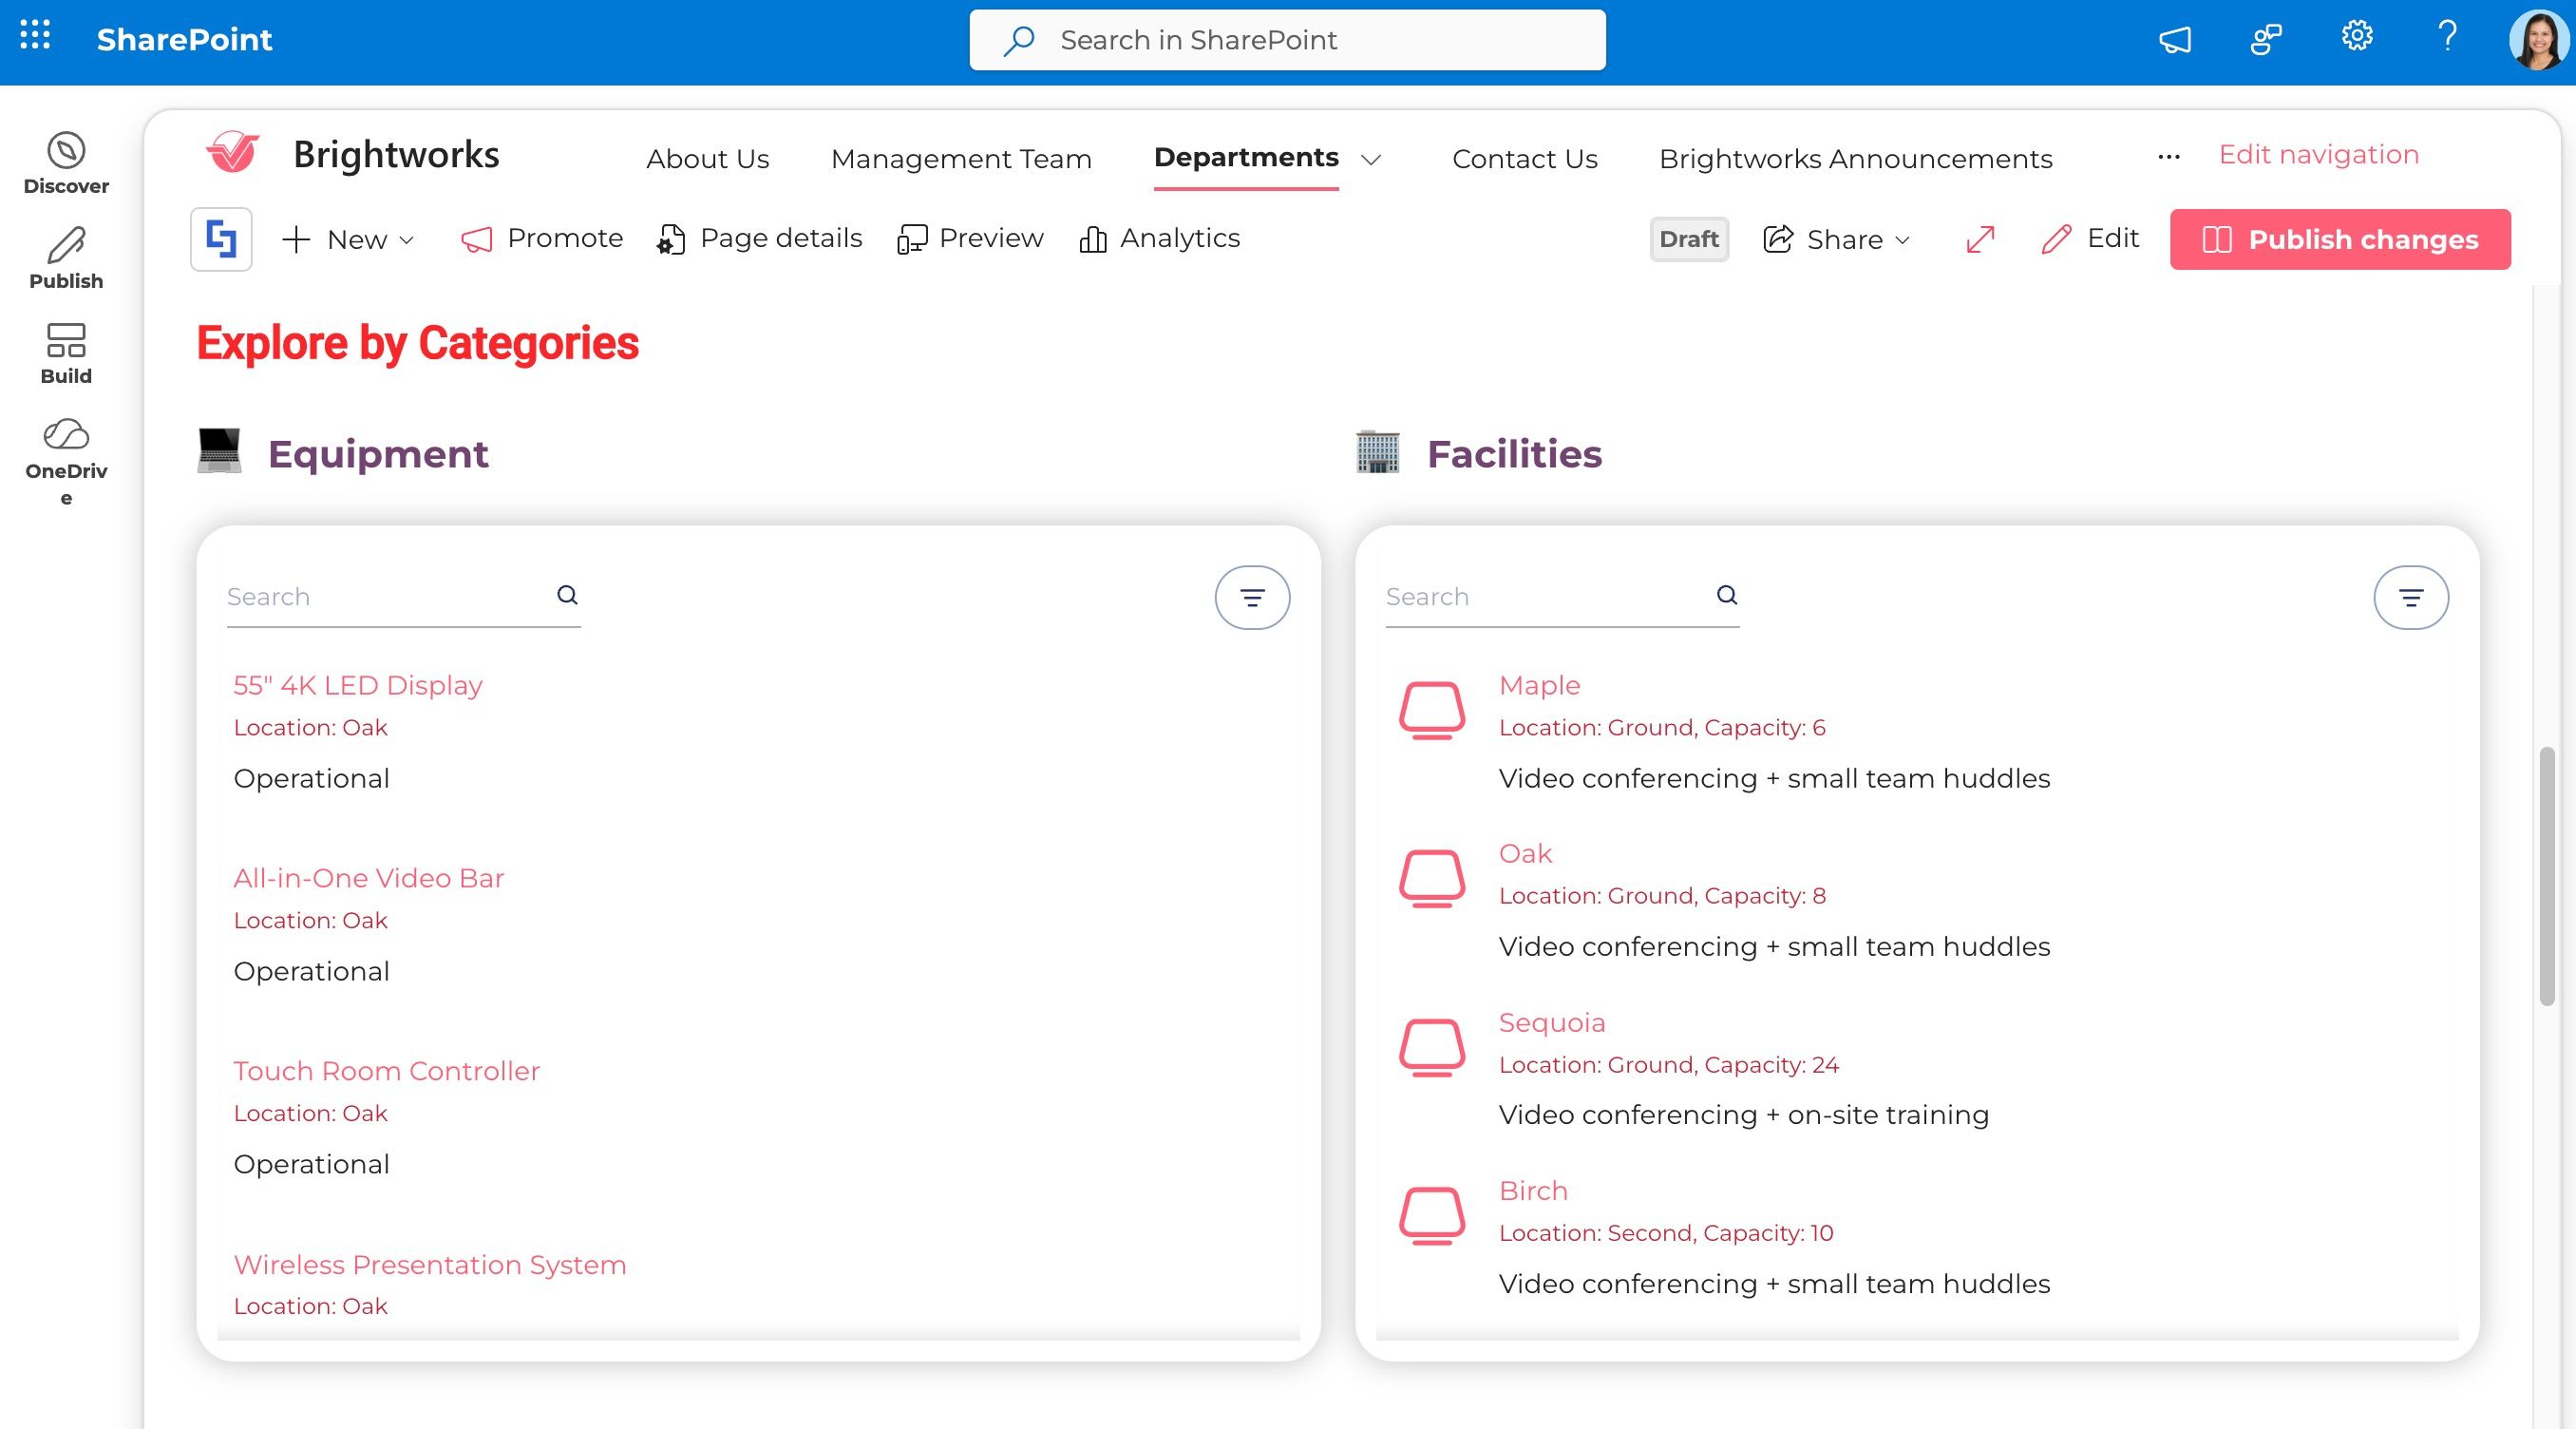
That’s it! You’ve successfully connected a Design Element to a SharePoint list, and your data is now embedded directly on the page and accessible to anyone who needs it.